In staffing, it is inevitable that applicants and existing employees may need to read a multi-page employee handbook, dress code policy booklet, etc., and verify they have not only read this handbook but answer a few questions regarding the material they've read.
With the HRCenter Document Upload tool, you may set this up by creating an interactive link quickly and easily by following a few simple steps.
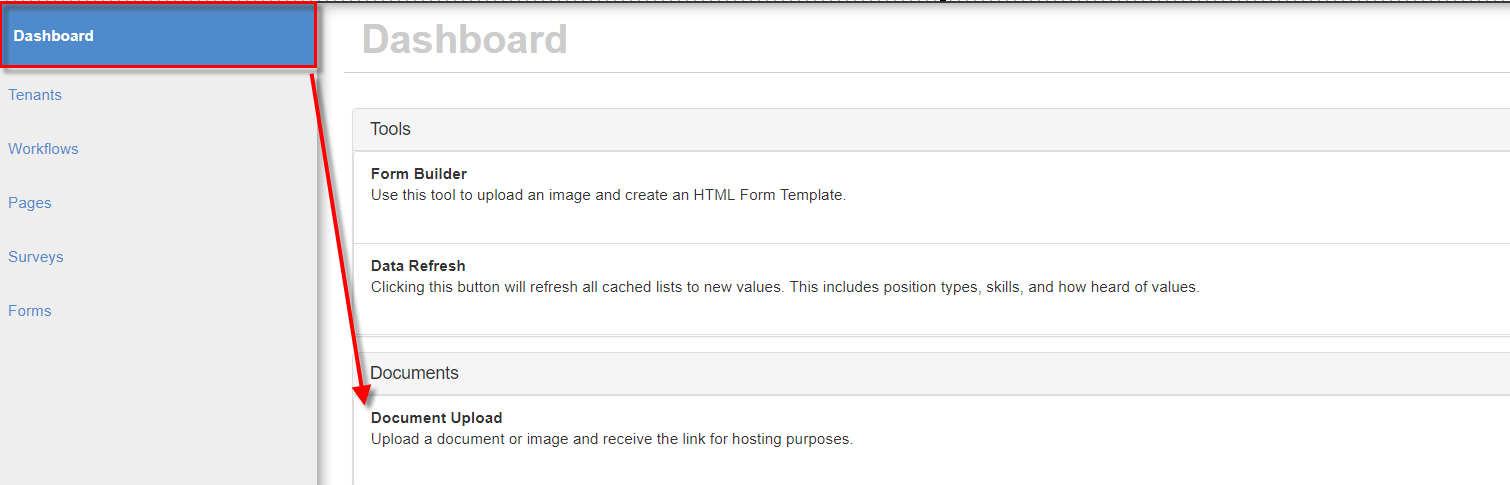
Uploading Documentation
Once signed in to HRCenter administration, navigate to the dashboard. From the dashboard, select 'Document Upload':
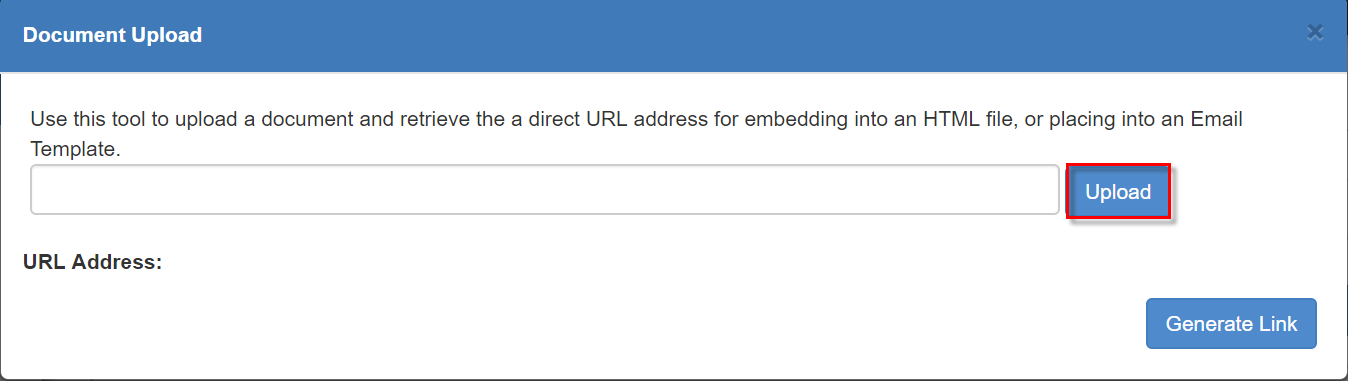
Within the Document Upload window, click the 'Upload' button to add your company documentation (a 30 page handbook for example):
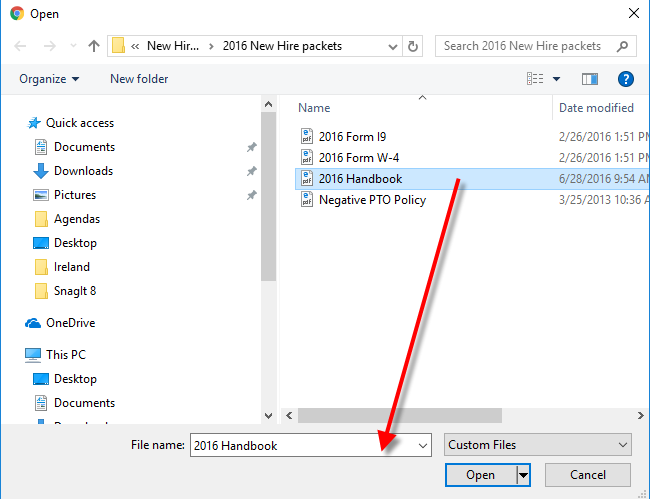
This will open your file explorer within your computer. Navigate to your folder where your documentation is stored and select the file. If you are not seeing your desired folder housed within your computer, please work with someone in your IT department:
*Note* The only supported file type is PDF for the document upload.
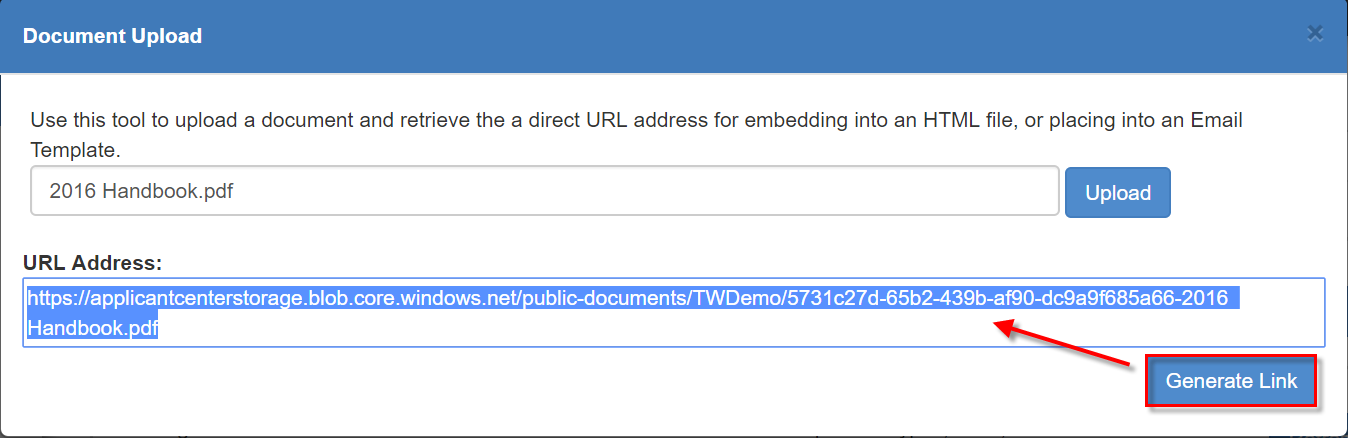
Generate the Link
Select the 'Generate Link' option to create an accessible link for applicants to interact with. Once the link is generated, simply copy this link by highlighting the text and either right-clicking to copy or holding 'ctl+c':
Once the link is copied, you will need to create a survey and apply the link within the survey for your applicants to gain access to said documentation.
Create a Survey
To create a new survey, navigate to the surveys section and select the '+' icon:
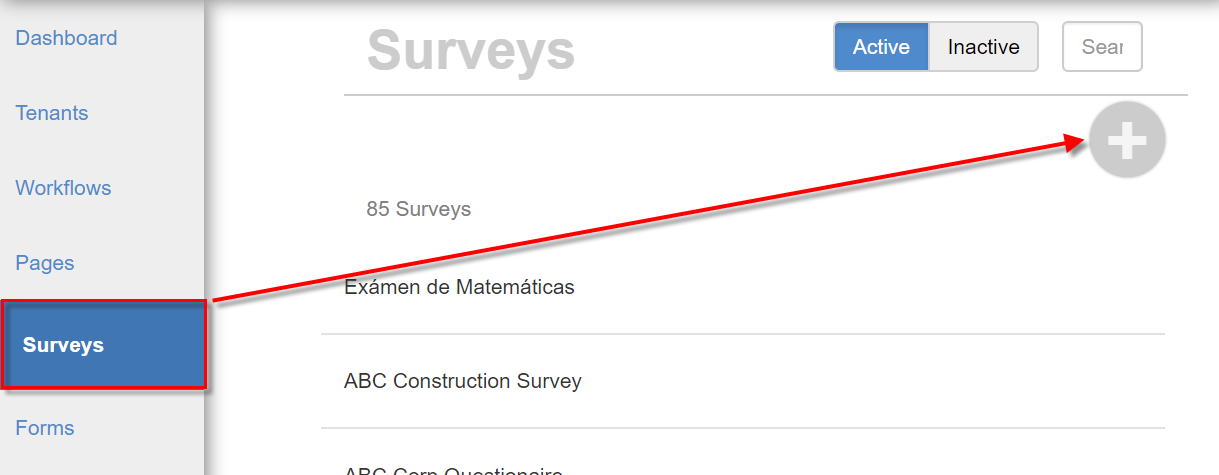
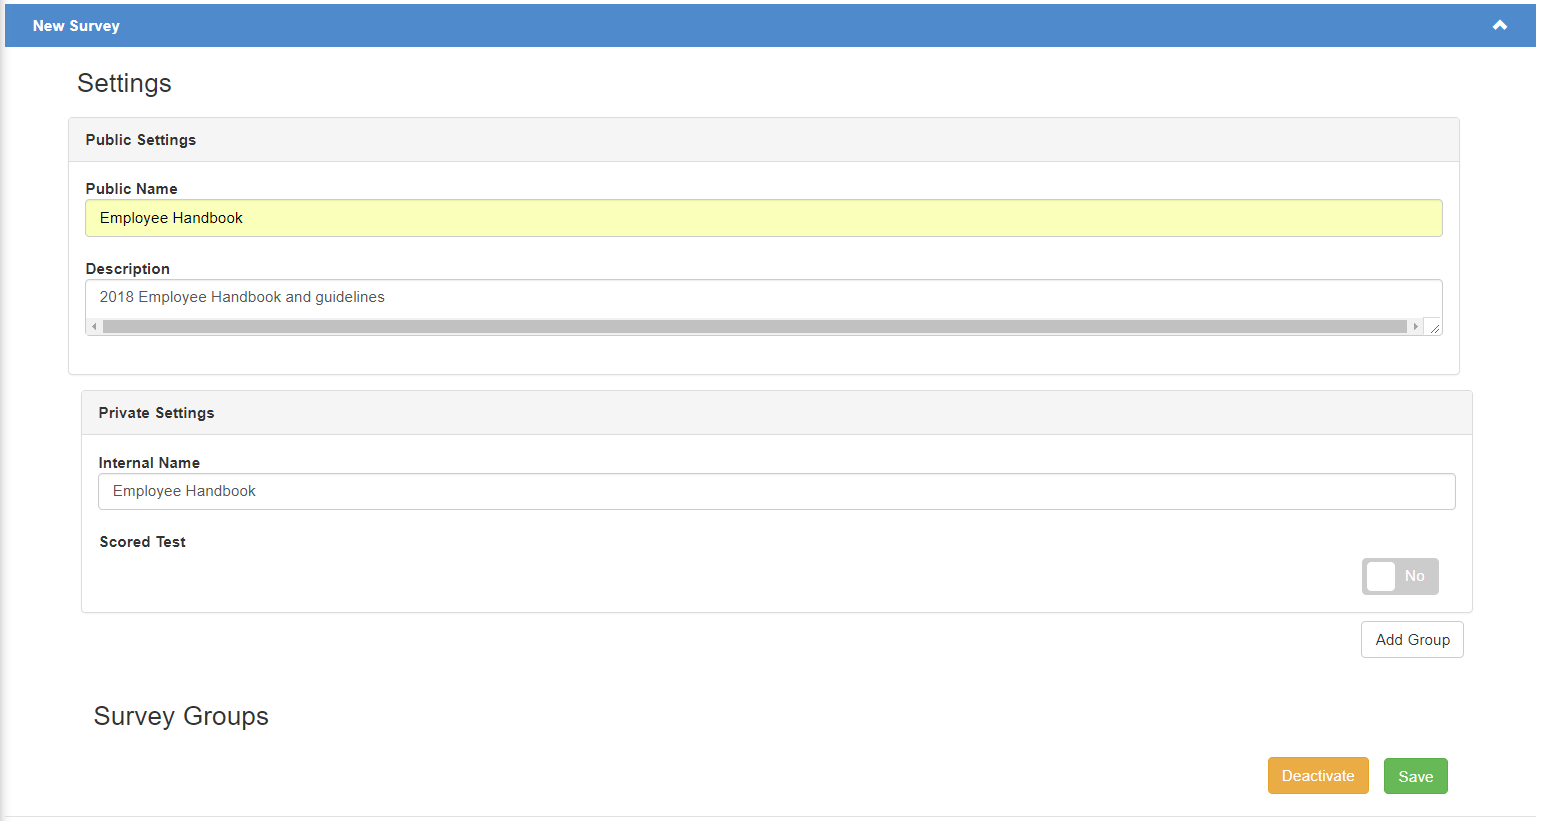
Once you have selected the '+' icon a "New Survey" will immediately be listed among any existing surveys. Scroll until you locate the "New Survey". Proceed to enter in the following information and select 'Save' once finished:
Public Settings:
- Public Name- The name of the survey as you would like the applicant to see it.
- Description- Enter a description of what the documentation is for.
Private Settings:
- Internal Name- How you would like to refer to the survey internally.
- Scored Test- When selected, allows users to design questions that have defined correct answers.
- If a test is scored, any applicant that completes the survey will have the percentage score listed and saved to the employee record.
*Note* If you no longer want a survey available to your temporary employees, select the 'Deactivate' option.
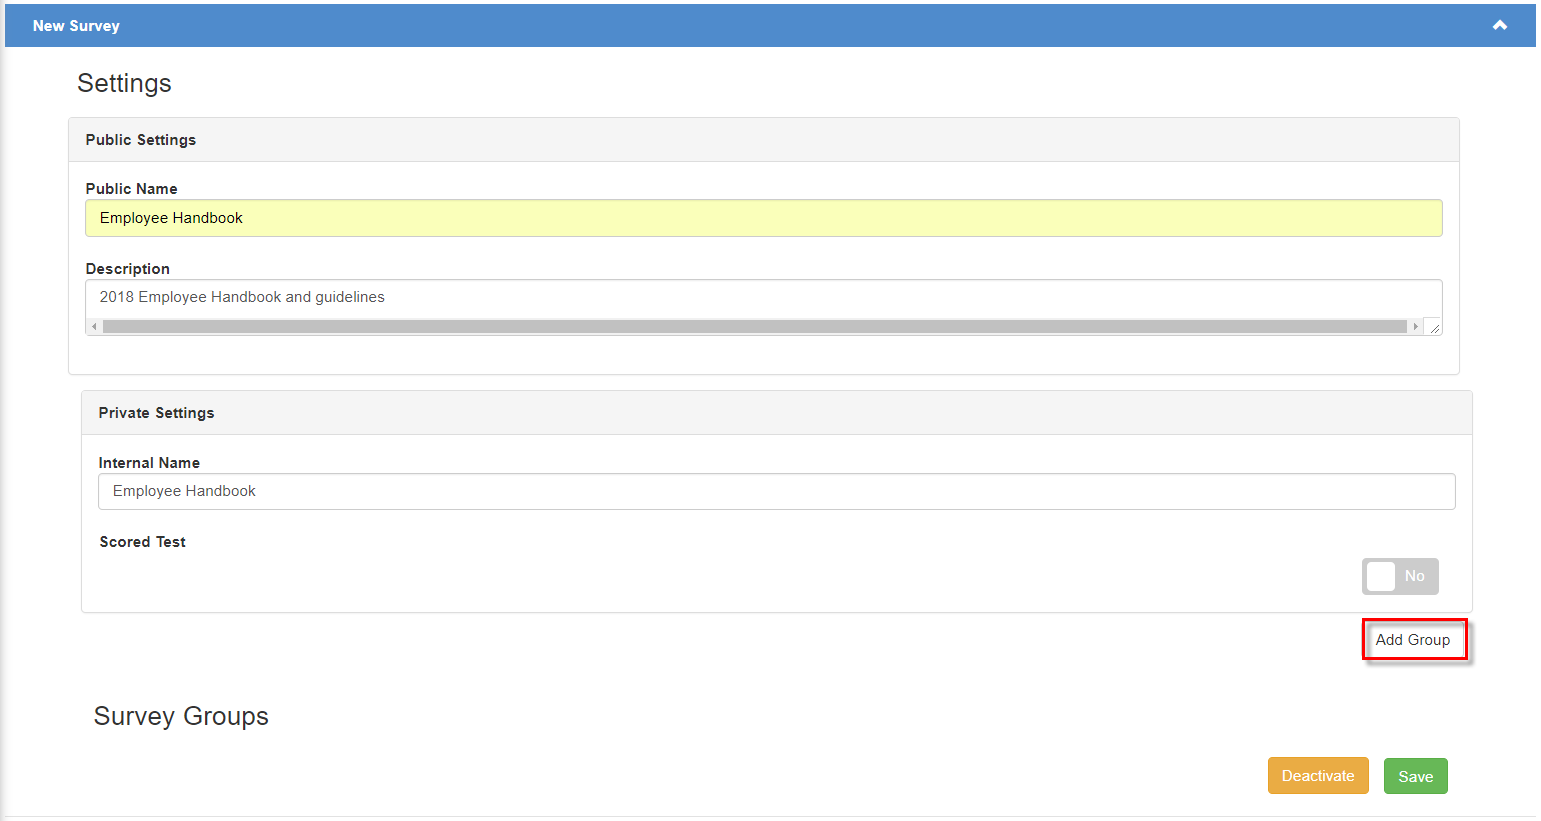
After initial setup of the survey is completed, select 'Add Group' to begin. A group is defined as a section of the survey. Each group houses specific instructions and questions specific to its group. Within this group is where the employee handbook link is going to be entered.
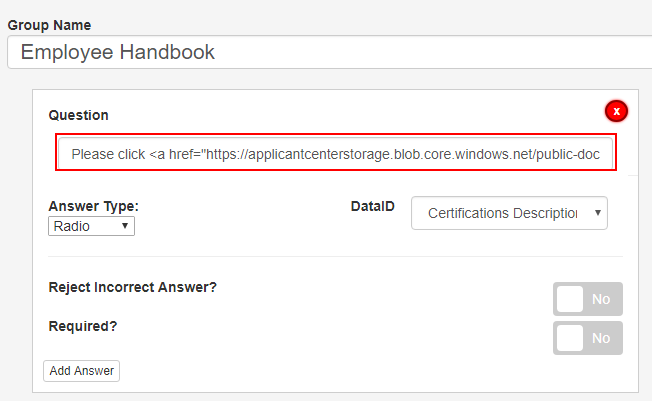
Enter the group name. Take the recently copied link and enter it in to HTML formatting within the Question field.
*Note* If you are not sure how to format HTML, please follow the instructions within this article.

*Note* For more information on how to continue building a survey with questions and more please follow the instructions within the following article.
Once the survey has been completed, click on 'Save'.
Create a Page
With the survey saved, the final step is creating a page based on the newly created survey. This allows the page to be added to applicant workflows, or to be assigned individually.
*Note* Steps on how to create a page are located within the following article.