What is the Vendor Portal?
The vendor portal in WebCenter is part of the TempWorks Vendor Module which allows your 3rd party staffing companies or "Subcontractors" to access important information including accepting order requests and submitting candidates.
There are lots of ways to customize your Vendor Portal in WebCenter. In this article, we will review some of the additional configs that are available related to the Vendor Portal.
If you are looking for information on how to create roles and give contacts access to the vendor portal, check out WebCenter Admin - Giving Vendors Access to the Web Portal for more information.
*Note* This article is designated for WebCenter Admins. If you are looking for instructions to send your Vendor Contacts, check out Vendor Portal Quickstart and all articles that start with "Vendor."
This article covers:
- What are Configs?
- Order Related Configurations
- Employee Related Configurations
- Candidate Related Configurations
What are Configs?
Configs or configurations can help you manage smaller features and permissions that each vendor has. If you have never worked with configs before, check out WebCenter Admin - Intro to Configurations.
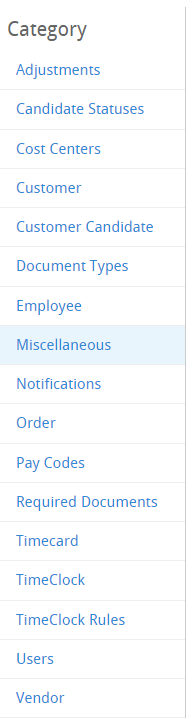
Configs are located on the Configs tab in WebCenter Admin:

They are grouped into "Categories" found on the left:
Each Config will have Rules that allow you to turn this option on or off for a particular set of people. Rules can be set up by Role or Vendor name for example.
Order Related Configurations
The following configuration options relate to details found on order requests. To learn more about order requests, check out:
- What the Vendors See: Vendor: How to Review Orders
- How to Distribute Orders: Vendors - Distributing Orders to Subcontractors
The configs in this section include:
- Vendor Order Details Show Default JobDescription
- Vendor Orders Details Show Contacts
- Label for Employee Pay Rate
- Label for Vendor Pay Rate
Vendor Order Details Show Default JobDescription
This configuration, located under the Vendors category, allows you to control which job description the vendor sees. 
Setting this Config to True:
If you set this config to True by creating a rule, the Vendor will only see the regular job description - never the public job description field from the Order record.
 Regular Job Description on the Order Details Page
 Public Job Description under the Web Options Tab on the Order Details Page
Example Rule:
Public Job Description under the Web Options Tab on the Order Details Page
Example Rule:
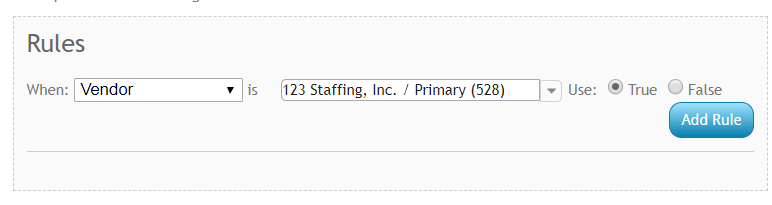
For Vendor 123 Staffing, I want them to only see the regular job description.
Setting this Config to False:
By Default, this rule is set to false which means it will show the public job description when available instead of the regular job description. This can be nice if you are using the public job description since the public option is typically more detailed.
*Note* This config, when set to false, works with "Public Job Description Fallback" config which determines whether the regular job description is ever shown. This config is located under the Miscellaneous Category: 
By default it is set to true which means if there is nothing entered in the public job description, it will show the regular job description. If you create a rule to set this to false for a vendor, the vendor will see nothing in the Job Description field if there is nothing populated in the public job description.
Vendor Orders Details Show Contacts
This configuration, located under the Vendor category, will allow you to decide whether you want Vendors to see contact information for the contacts on the order. 
Setting this Config to True:
By default, this configuration is set to true which means all vendors will see customer contact names and phone numbers for any contact listed under the contact roles section of the order: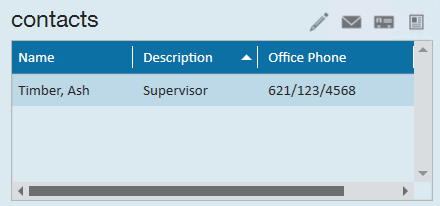 Contact Roles on the Order Details Page
This may be helpful if the Vendor's employees are calling in sick, etc. but should be discussed in your agreement with the Vendor.
Setting this Config to False:
If you don't want to give your vendors access to customer contact information, you can create rules to set this config to false.
Example Rule:
If I want to make sure none of my Vendors see this information, I would create a rule for when Origin Type = Vendor: 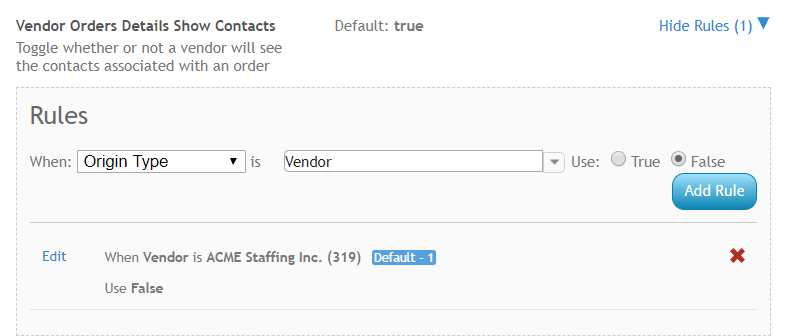
Otherwise you can also set this rule up for each Vendor.
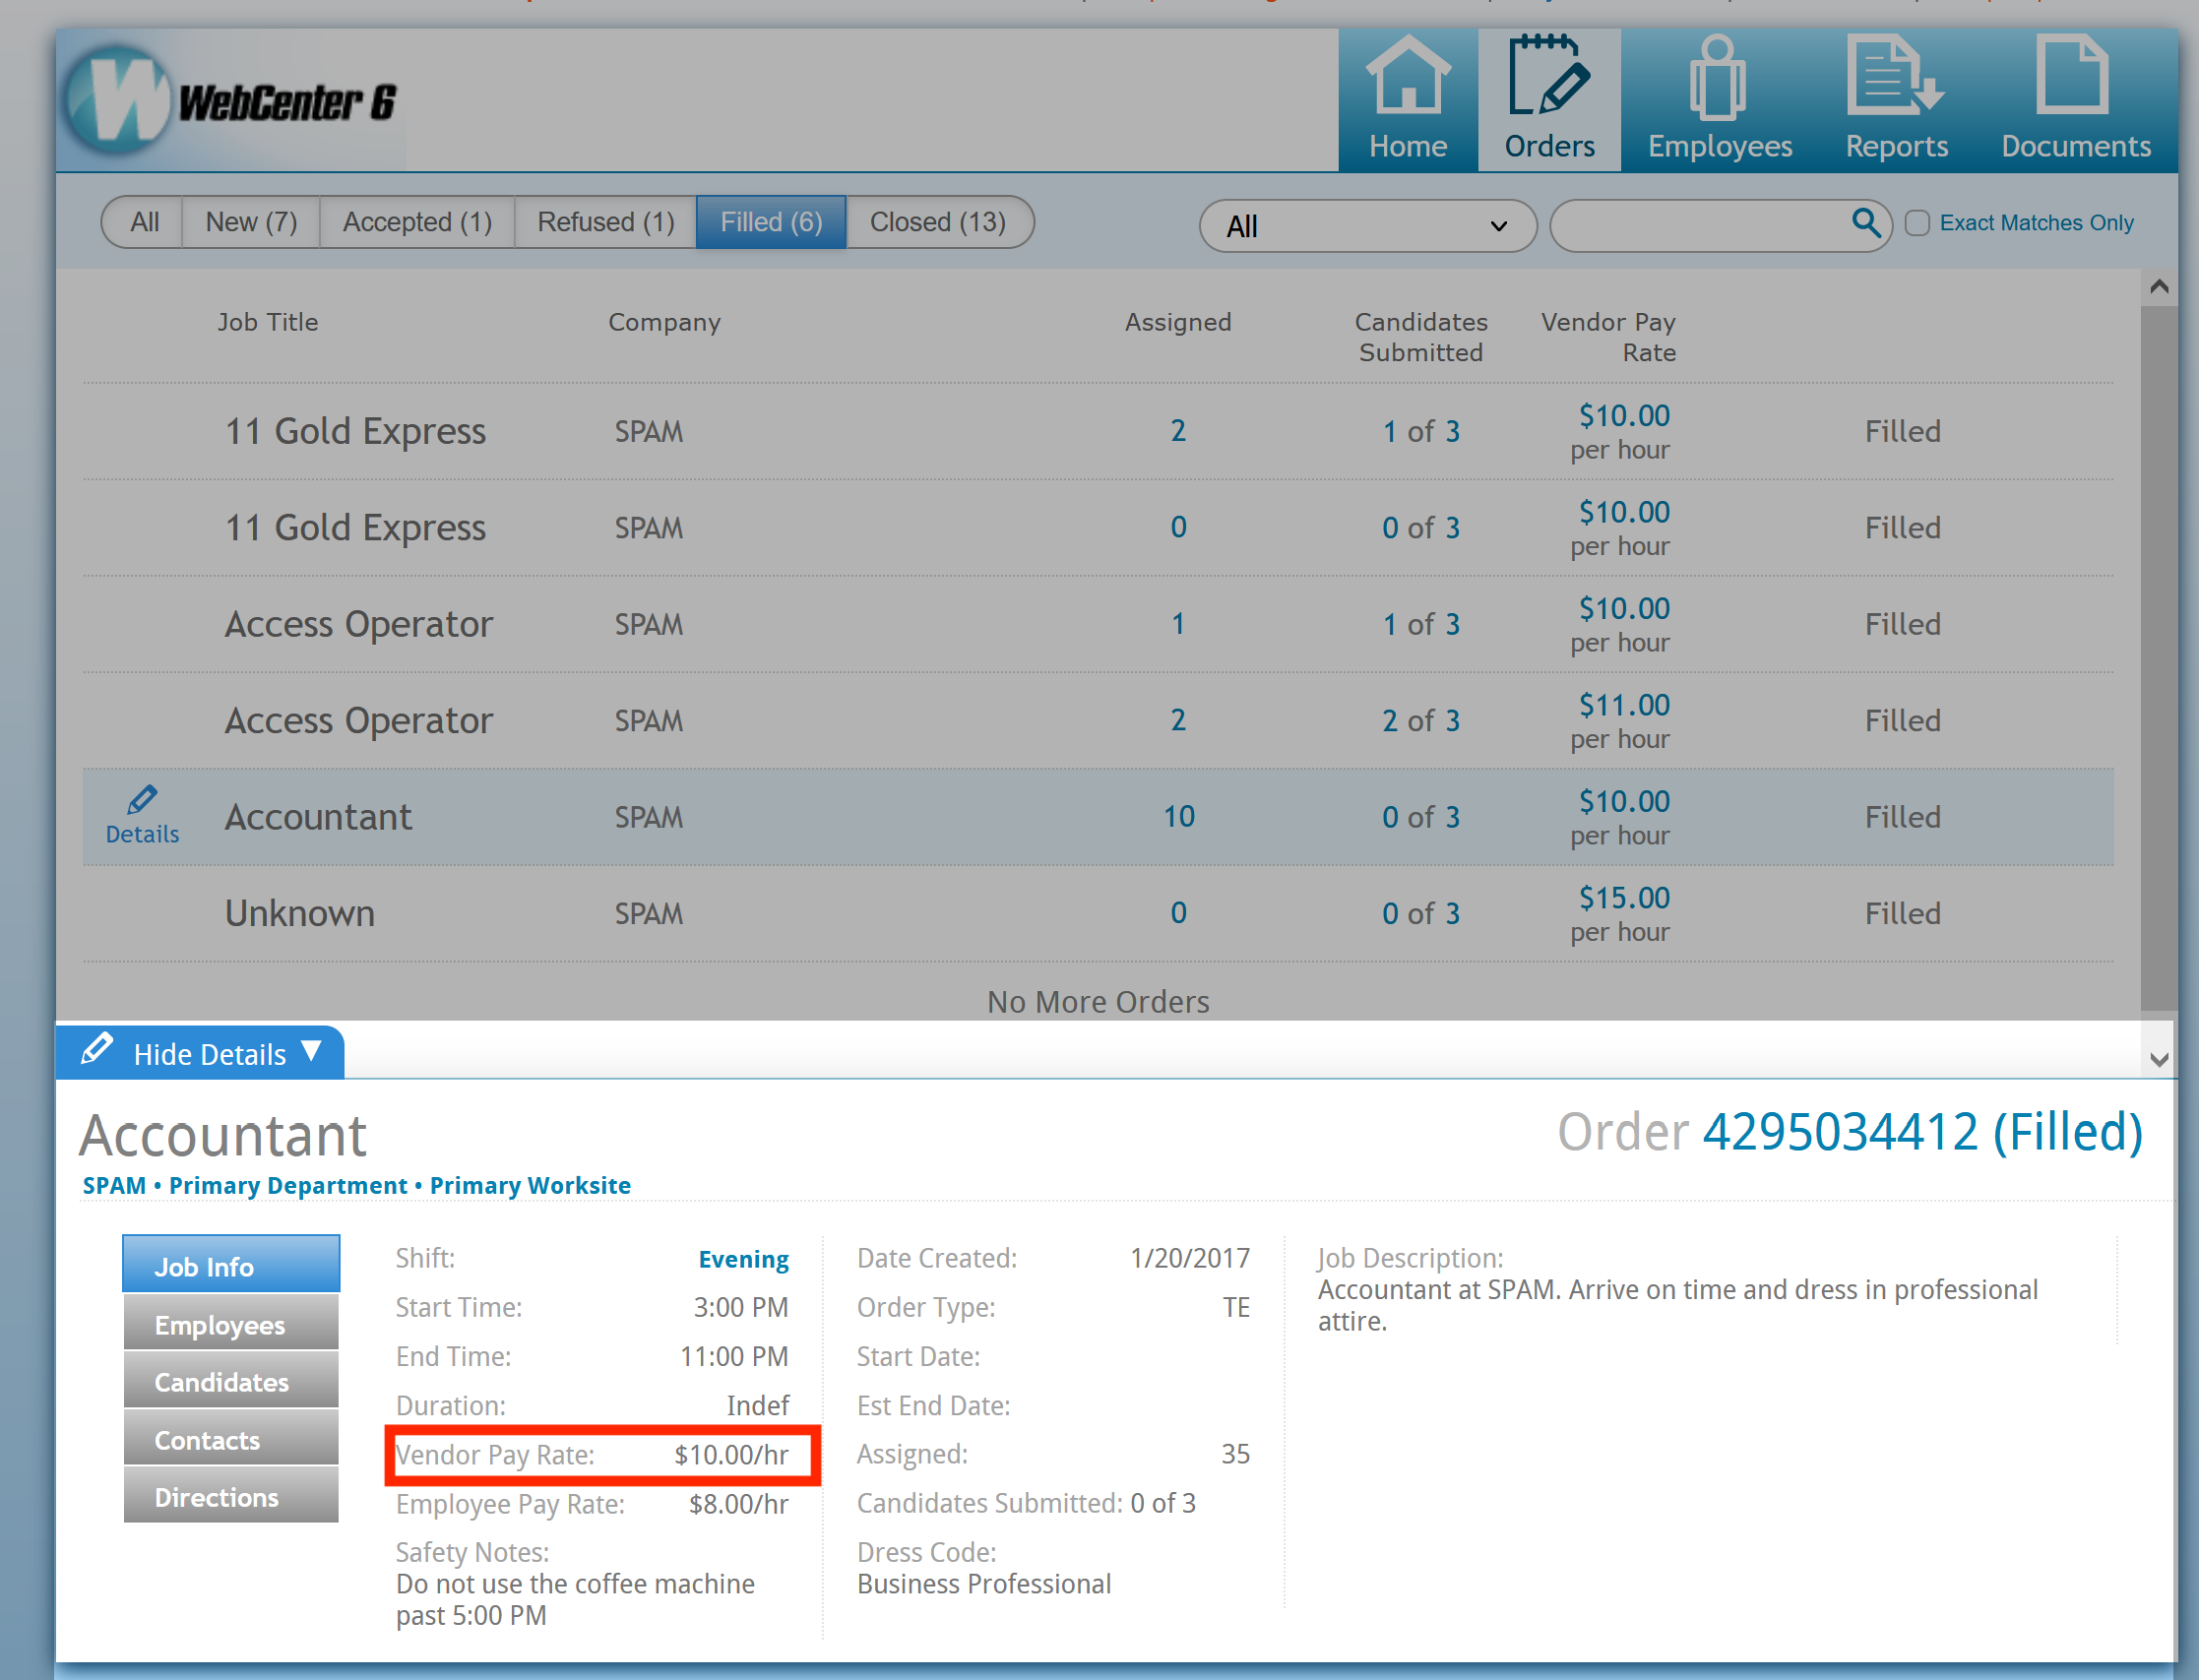
Label for Employee Pay Rate
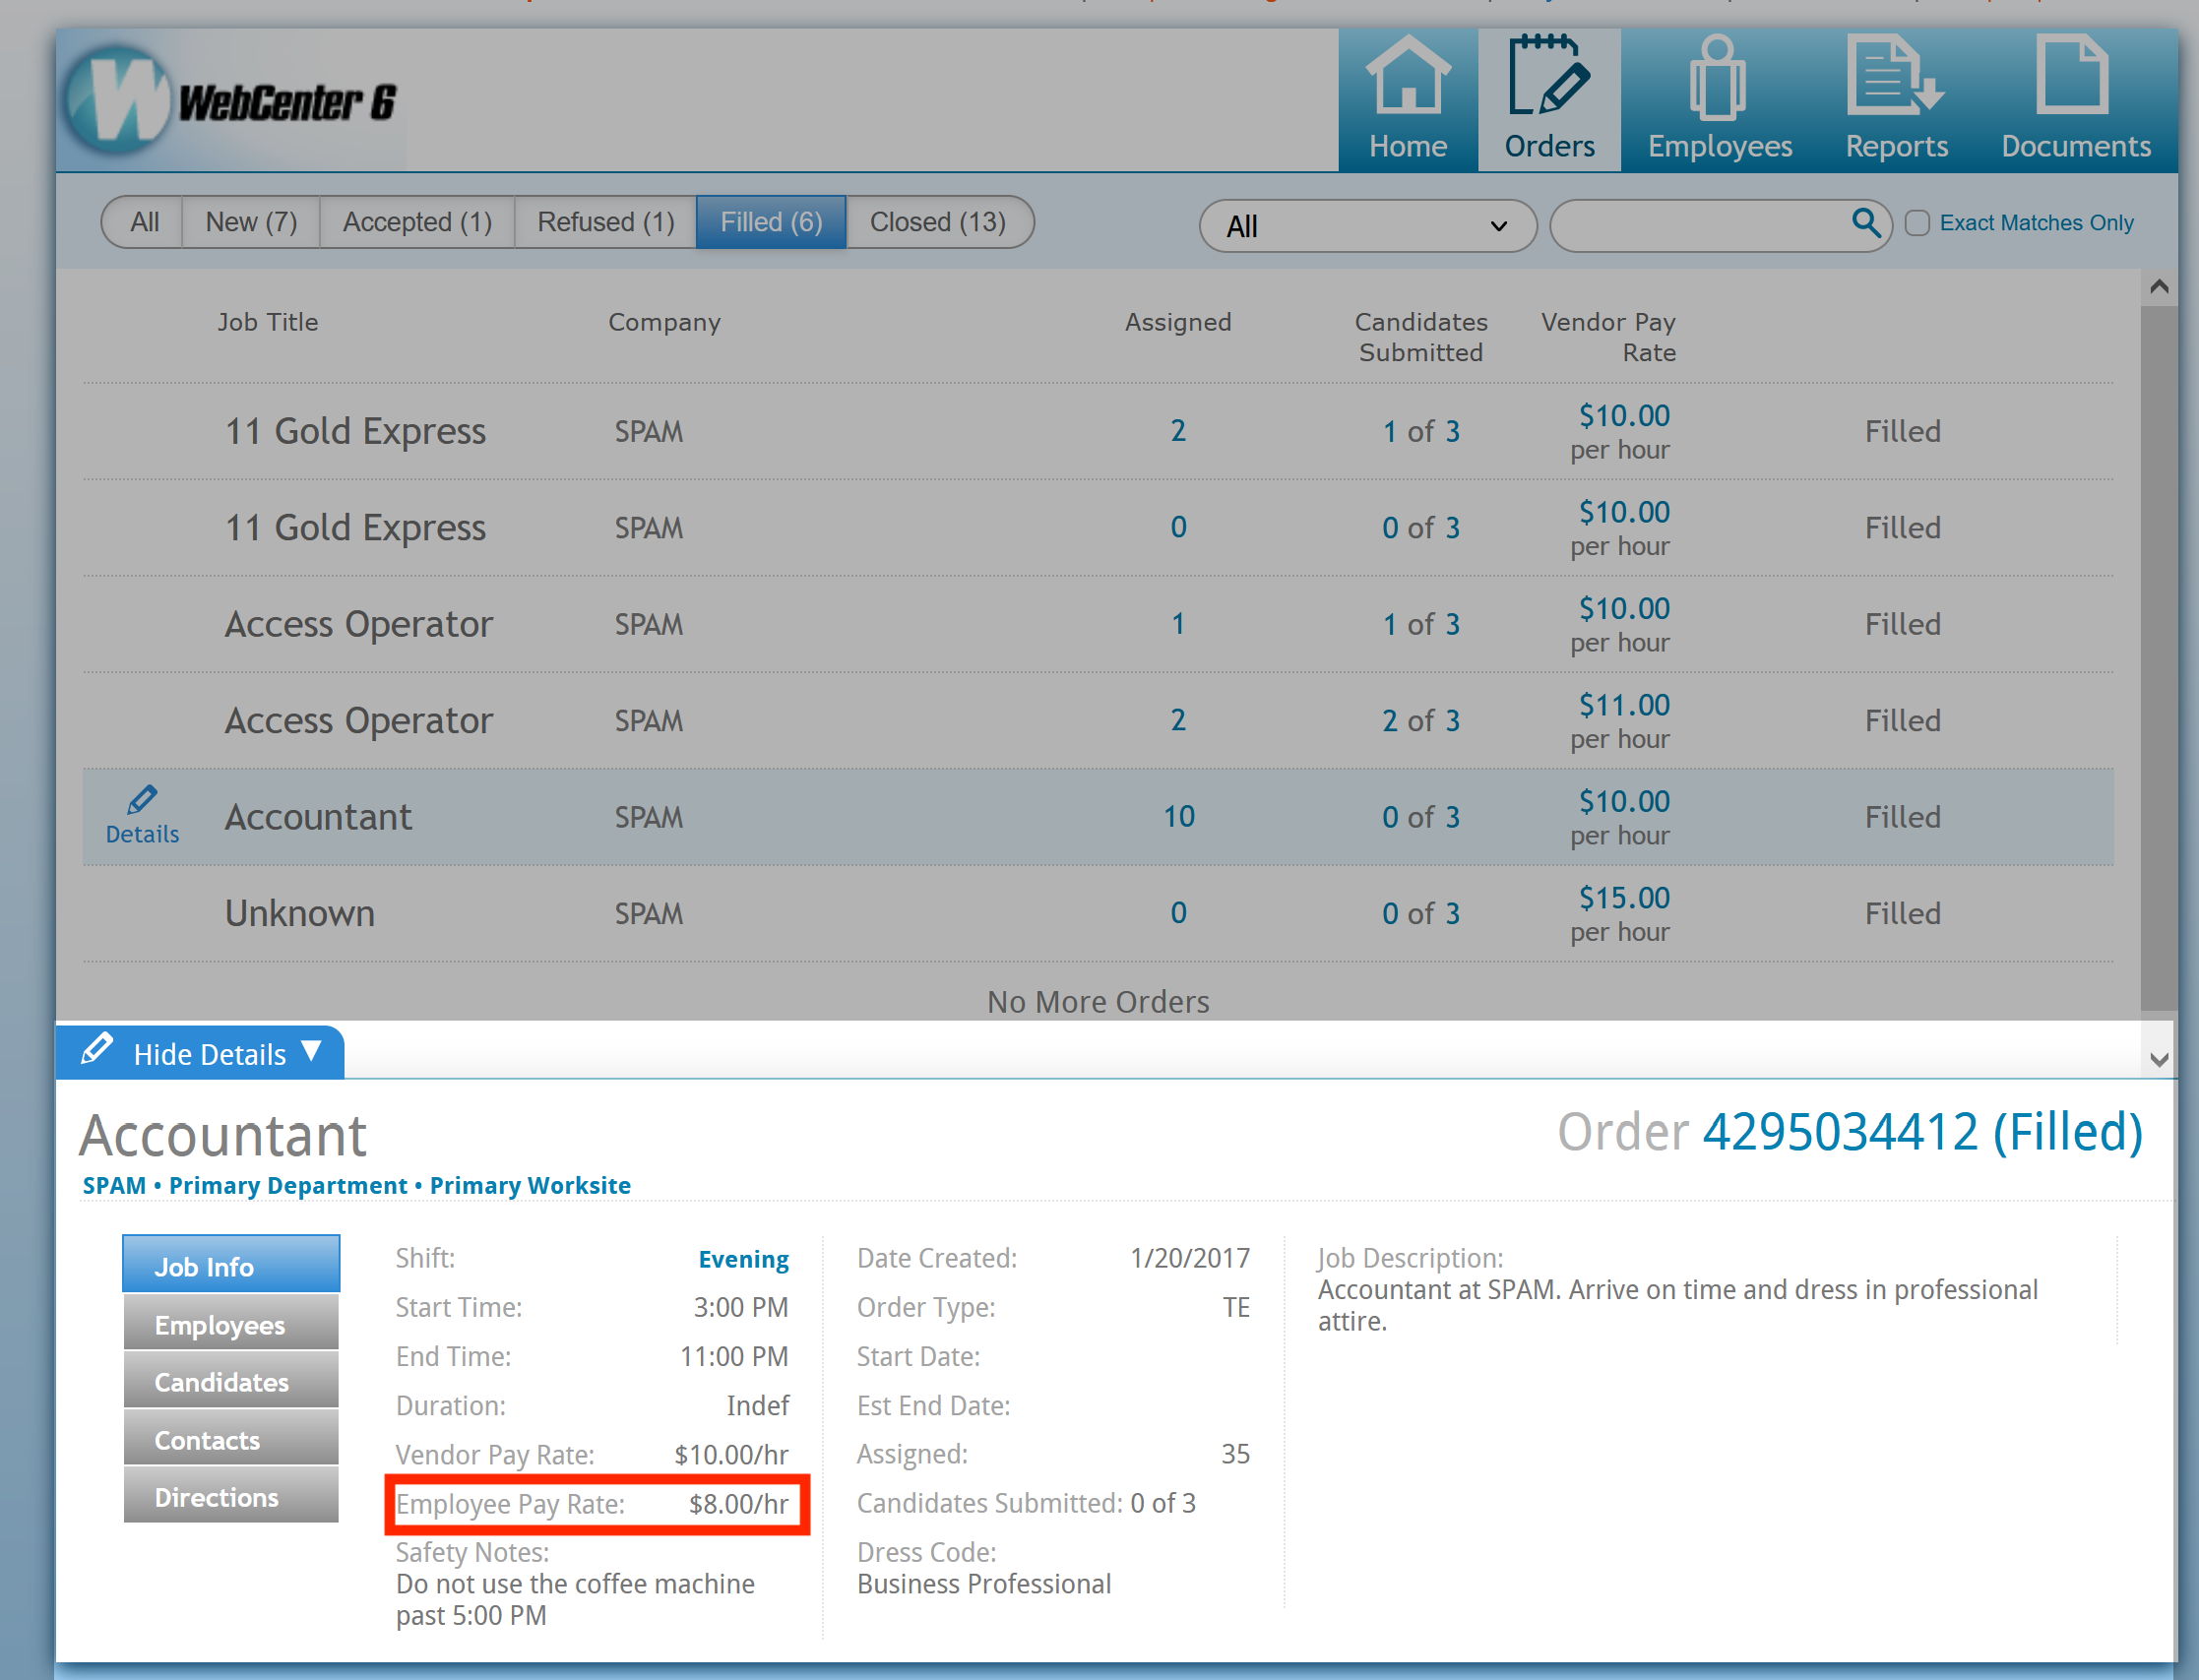
This configuration, located under the Employee tab, will allow you to choose the text that appears within the Vendor Order details for the "Employee Pay Rate":

Label for Vendor Pay Rate
This configuration, located under the Vendor tab, will allow you to choose the text that appears within the Vendor Order details for the "Vendor Pay Rate":

Employee Record Related Configurations
The following configurations are related to the Employees tab in the Vendor Portal.
To learn more about the Employee tab, check out Vendor: How to Add and Submit Employees.
The configs in this section include:
- Vendor Allow Employee Creation
- Allow Vendor To Delete Documents
- Vendor Allow Resume Uploads
- Resume Document Type
- Vendor SSN/SIN Edit Mode
Vendor Allow Employee Creation
This configuration, located under the Vendor tab, will allow you to choose whether you want vendors to be able to add new employees in the system themselves or not.

Setting this Config to True:
By default this configuration is set to true, which means the Vendors will be able to manually create employees, or add employee records from a resume. This can help cut down on your staffing specialists data entry for your vendors because the employee records need to exist for them to submit them as candidates on an order.
Setting this Config to False:
Maybe you have an agreement with a Vendor, or some Vendor contacts shouldn't be adding new people into the system. You can choose to set this rule to False which will stop them from being able to add new records.
Example Rule:
Consider setting this up per vendor or per contact (individual person from the vendor) 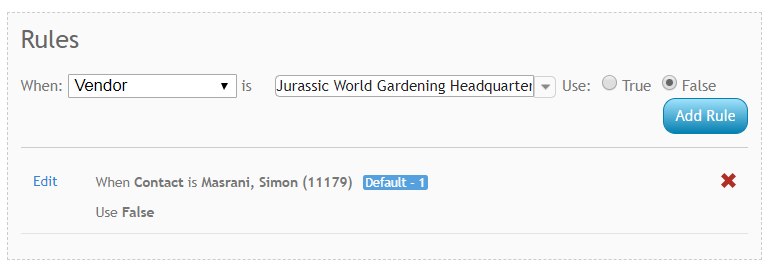
Allow Vendor To Delete Documents
This configuration, located under the Vendor category, allows you to choose whether you want vendors to be able to delete documents (ex. Resume) from their employee records. 
Setting this Config to True:
By default this configuration is set to True which means that vendors will be able to remove documents that may be outdated or mistakenly added to an employee record. This includes resumes, etc.
Setting this Config to False:
If you do not want your vendors to be able to remove documents from one of their employee's records, you can choose to set this configuration to false by creating a rule.
Example Rule:
Anyone from Vendor 123 Staffing should not be able to delete documents
Vendor Allow Resume Uploads
This config, located under the Vendor category, will allow you to choose which Vendors can or can not add an employee from a resume or upload a new resume to an employee record.

Setting this Config to True:
By default, this config is set to true which means that Vendors will be able to upload copies of resumes for employees and create employee records by uploading a new resume.
This can help add more details to the employee's record which is helpful when your team is screening candidates submitted by the Vendor.
Setting this Config to False:
If you do not want some vendors uploading resumes, you can add a rule to set this config to false
Example Rule:
I do not want any contacts for the Vendor ACME Staffing Inc to be able to upload a resume 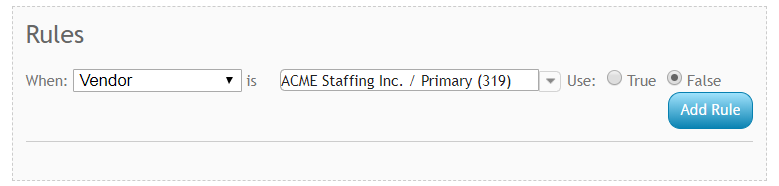
Resume Document Type
This config. located under the Miscellaneous category, allows you to change what document type is used for saving the resumes uploaded by Vendors.

By default this is set to something general like "Resume" but if you have a different document type you would like, you can create a rule to use a different option. Note that document types may differ in each system.
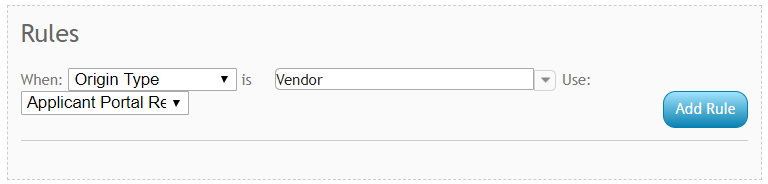
Example Rule:
For all Vendors that upload resumes, I want the resume to save with the document type "Applicant Portal Resume."
Vendor SSN/SIN Edit Mode
This configuration, located under the Vendor category, will allow you to choose whether Vendors can enter an SSN on the employee's record they are creating/editing. Optional
By default this config is set to optional, which means that Vendors will see the SSN field but will not be required to enter it to create or save the employee's record.
Required
You can create a rule if you want some or all of your Vendors to be required to enter a SSN for each employee they add into the system.
Example Rule: Vendor ACME staffing will be required to enter an SSN

Not Editable
If you don't want Vendors to edit or add a SSN on the employees record, you can create a rule to change that
Example Rule: All Vendors will not be able to edit an SSN

Candidacy Related Configurations
The following configs are related to the candidates section on an order for the Vendor: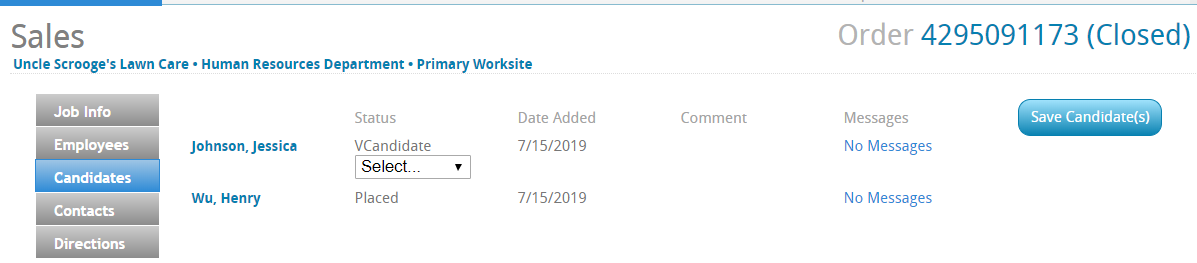
The configs in this section include:
- Vendor Allow Removing Candidates
- Vendor Orders Details Show Candidate Comments
- Vendor Show Employee Ratings
- Allow Vendor/Customer Messaging
Vendor Allow Removing Candidates
This config, located under the Vendor category, will allow you to choose whether a Vendor can remove a candidate from an order.

Setting this Config to True:
By default this config is set to true which will allow your vendors to remove any of their candidates from an order. This can be great if candidates turn down offers or stop working for the Vendor, etc.
Setting this Config to False:
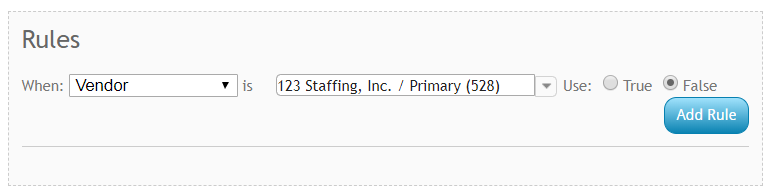
If you would rather have Vendors communicate a different way that a candidate should no longer be considered, you can create a rule to set this config to false which will stop the vendor from being able to remove a candidate.
Example Rule:
I do not want anyone from vendor 123 Staffing to be able to remove a candidate: 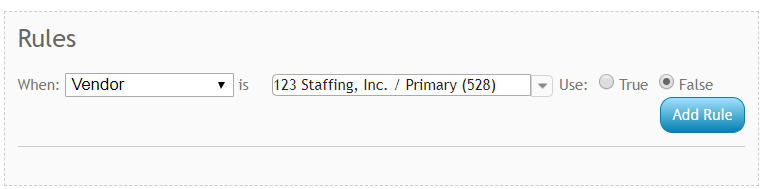
Vendor Orders Details Show Candidate Comments
This config, located under the Vendor category, will allow you to choose whether Vendors can see comments entered by your Staffing Specialists on the candidate worksheet  The comments field comes from the comments that can be entered on the candidate worksheet.
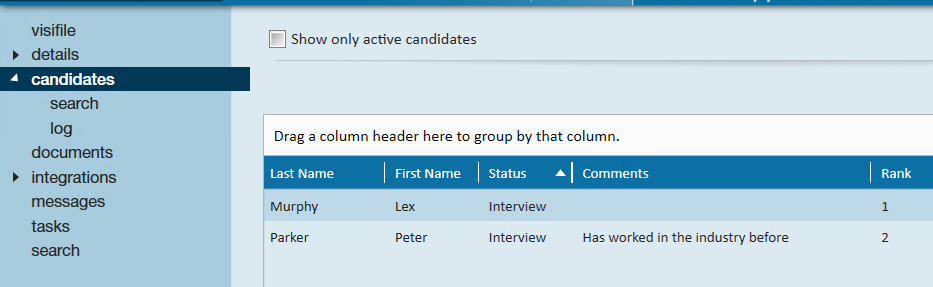 Candidate worksheet with comments column
Setting this Config to True:
If you would like Vendors to see the comments section from the candidate worksheet, you can create a rule to set this config to true
Example Rules:
Setting this Config to False:
By default this config is set to false which means that Vendors will not see any comments added to the candidate worksheet.
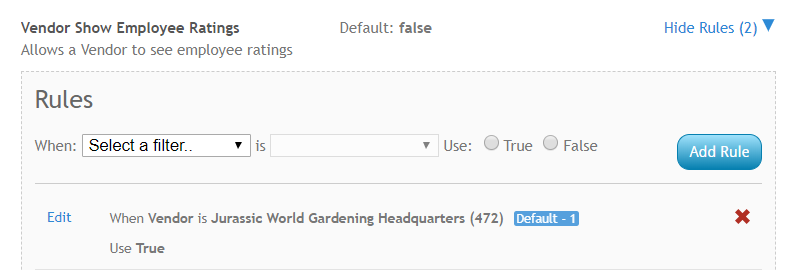
Vendor Show Employee Ratings
Similar to Comments, this config, located under the Vendor category, will allow you to choose whether your vendors see the ranking field from the candidate worksheet. 
Setting this Config to True:
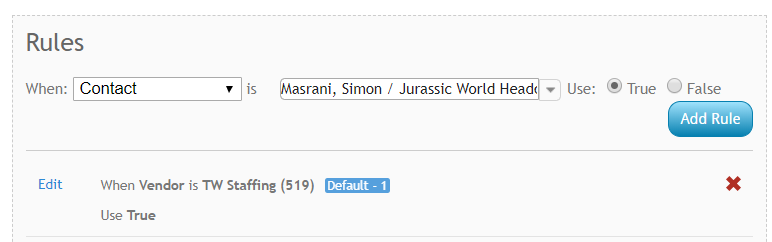
If you want a Vendor to see how their candidates are ranked, you can create a rule to set this config to true.
Example Rule: Simon, a vendor contact, should be able to see rankings

Setting this Config to False:
By default, this config is set to false which means Vendors will not see the ranking information for candidates.
Allow Vendor/Customer Messaging
This config, located under Miscellaneous, allows you to turn on a message feature which will allow your vendors and customer contacts to leave messages for each other about a candidate. 
When this feature is turned on, the Vendor and Customer Contact will be able to see a messages option next to the candidates 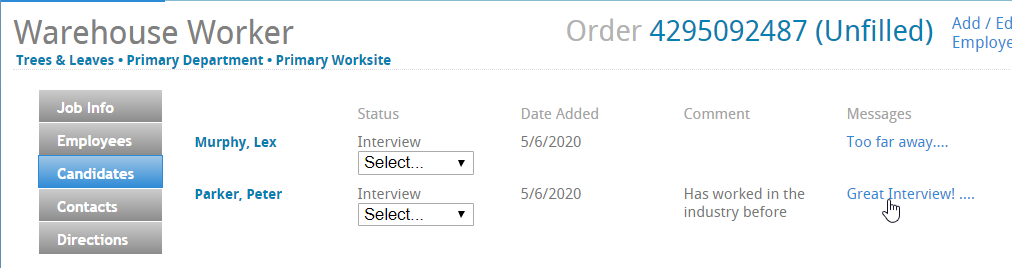
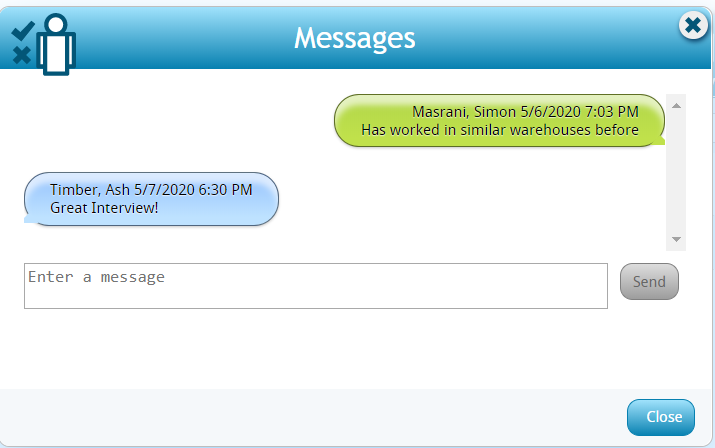
When they select a message, they will be able to see all messages from the Vendor or Customer Contact:
Setting this Config to True:
If you want to enable this feature, you will need to create a few rules to make sure this option is available to both the customer and the vendor.
Example Rules:
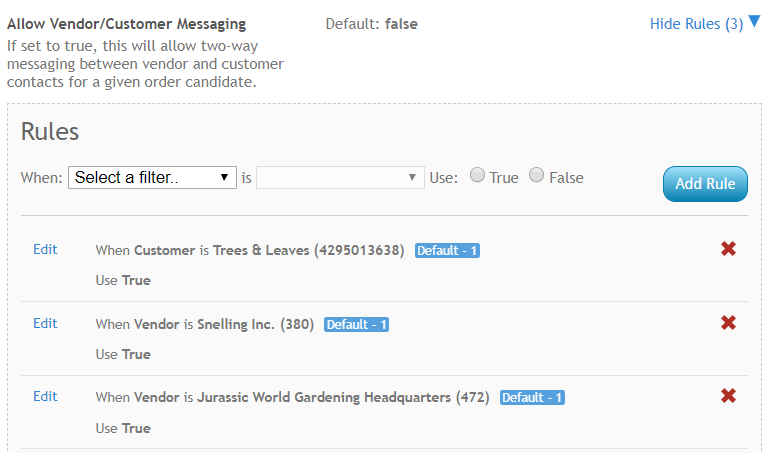
Customer and Vendor must both have this rule set to True in order to utilize this feature.
Setting this Config to False:
By default, this config is set to false which means the message option will not appear to Customers or Vendors who can see candidates.
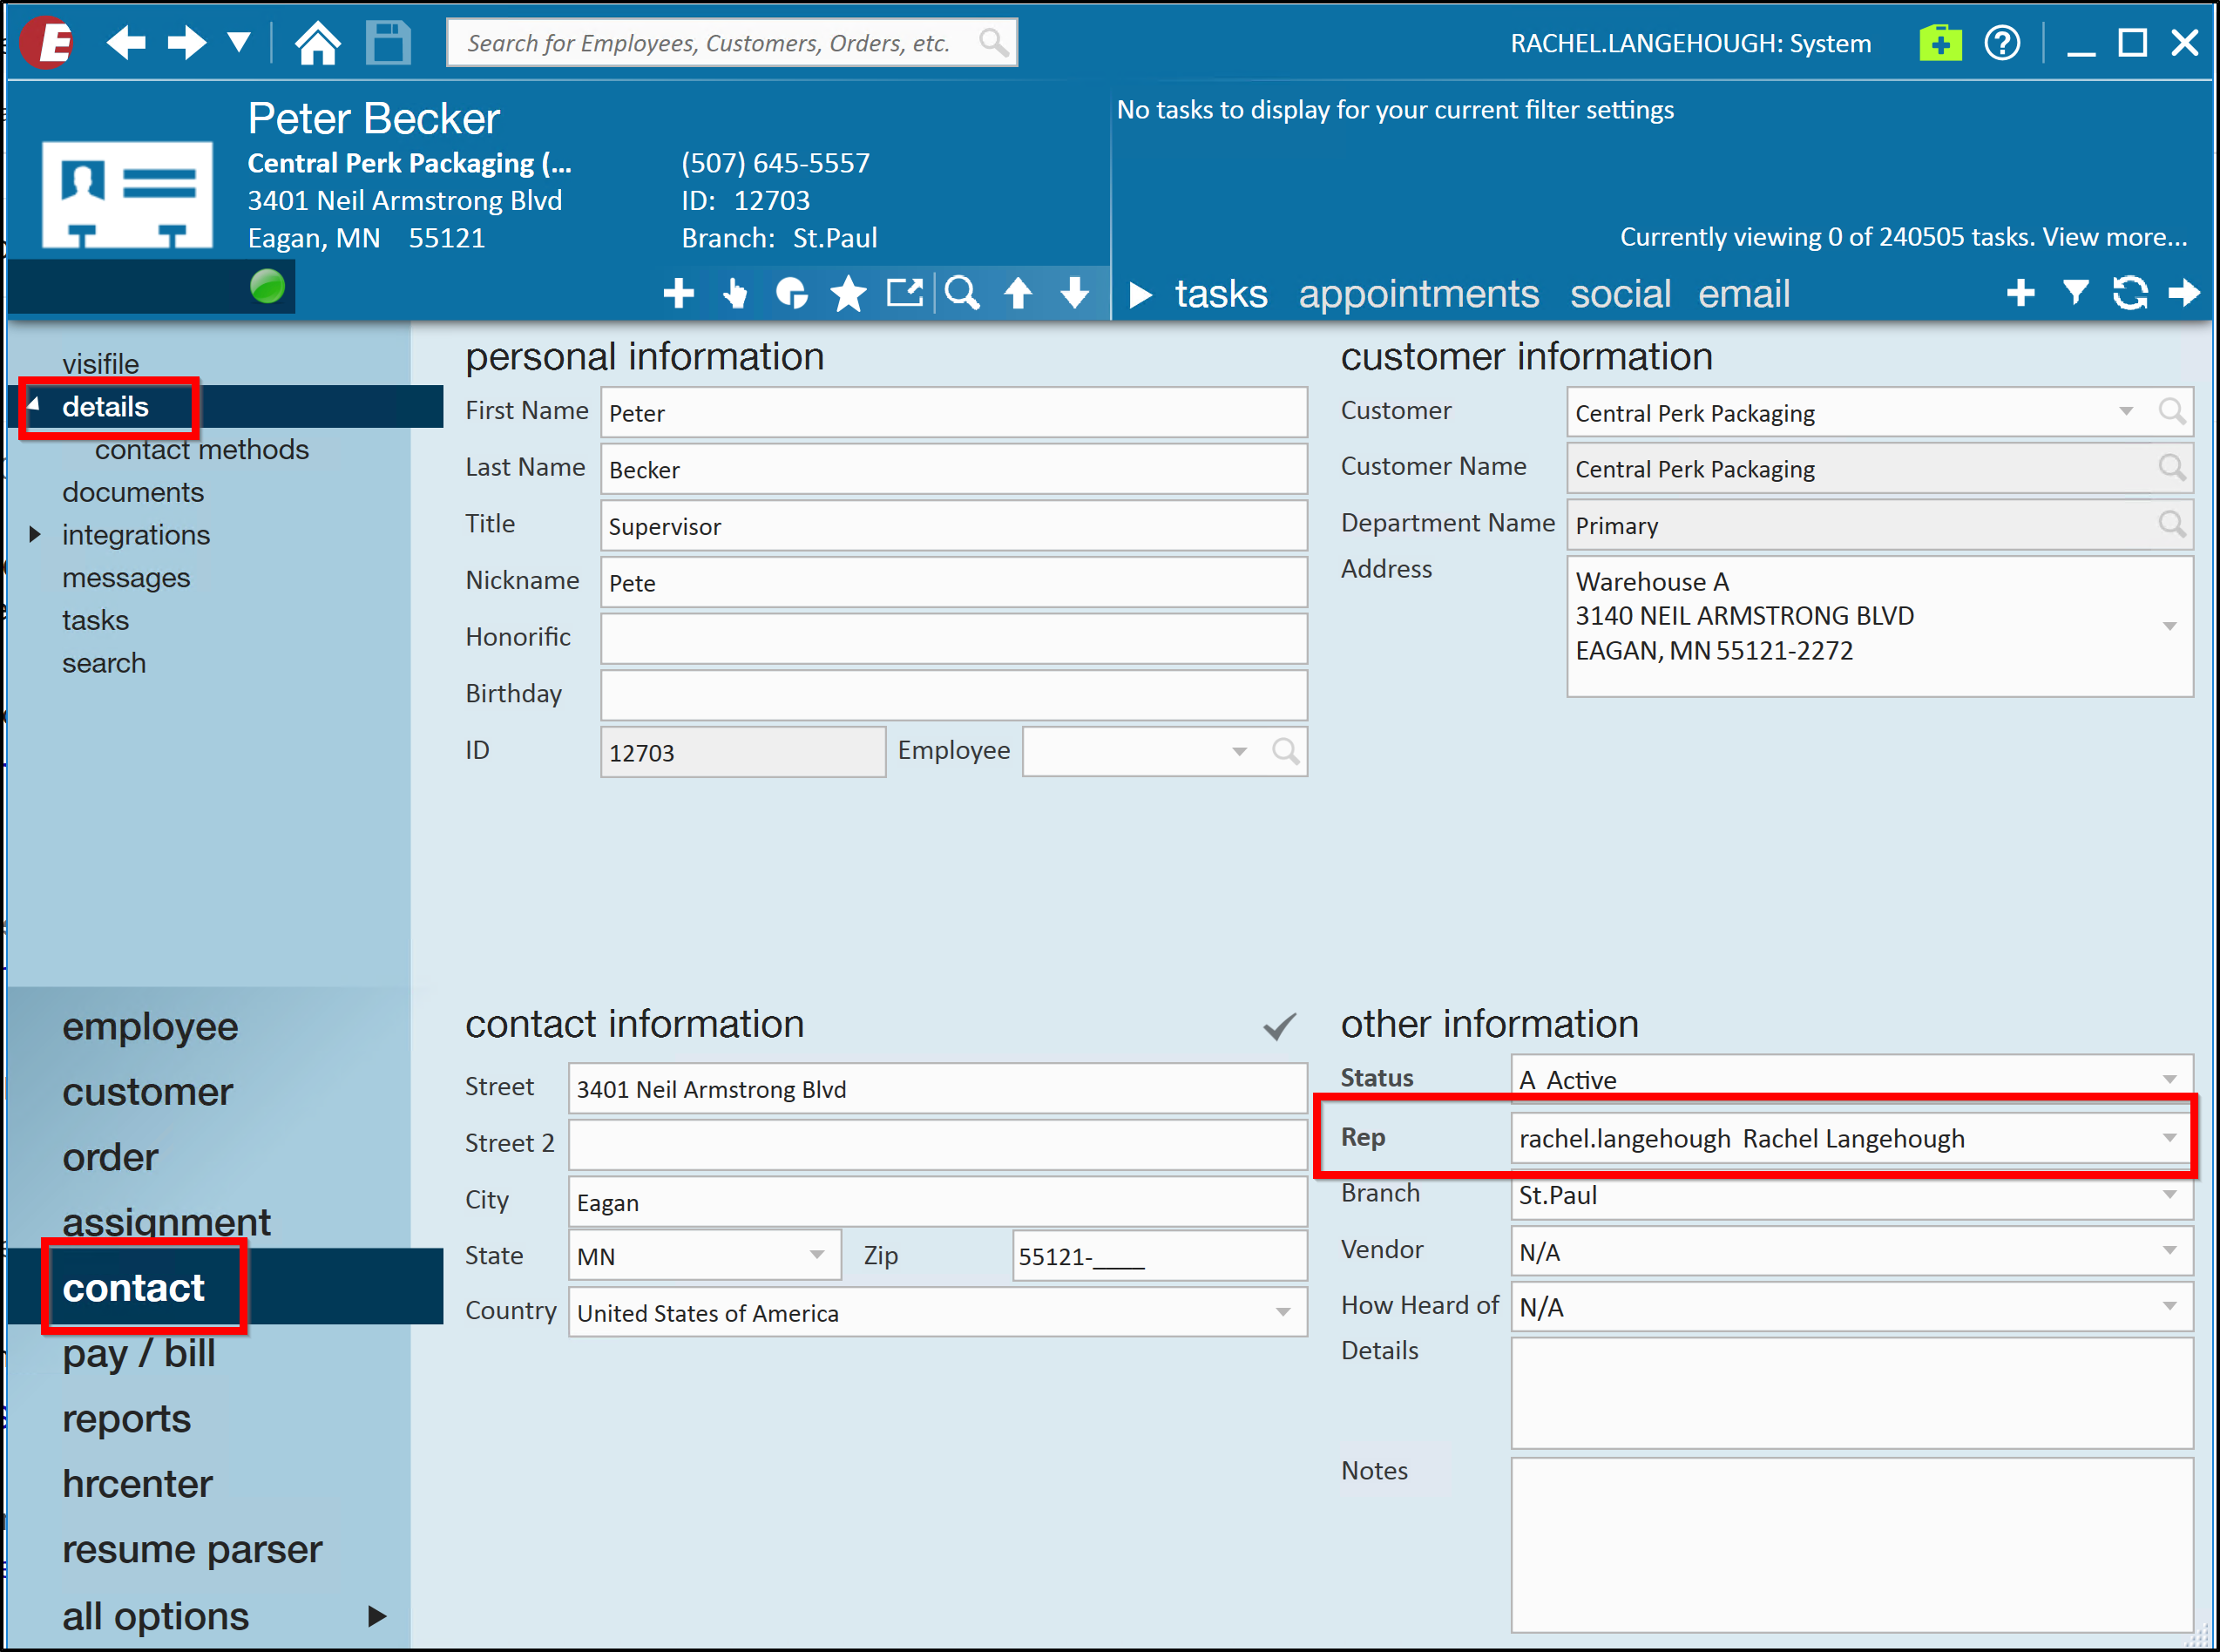
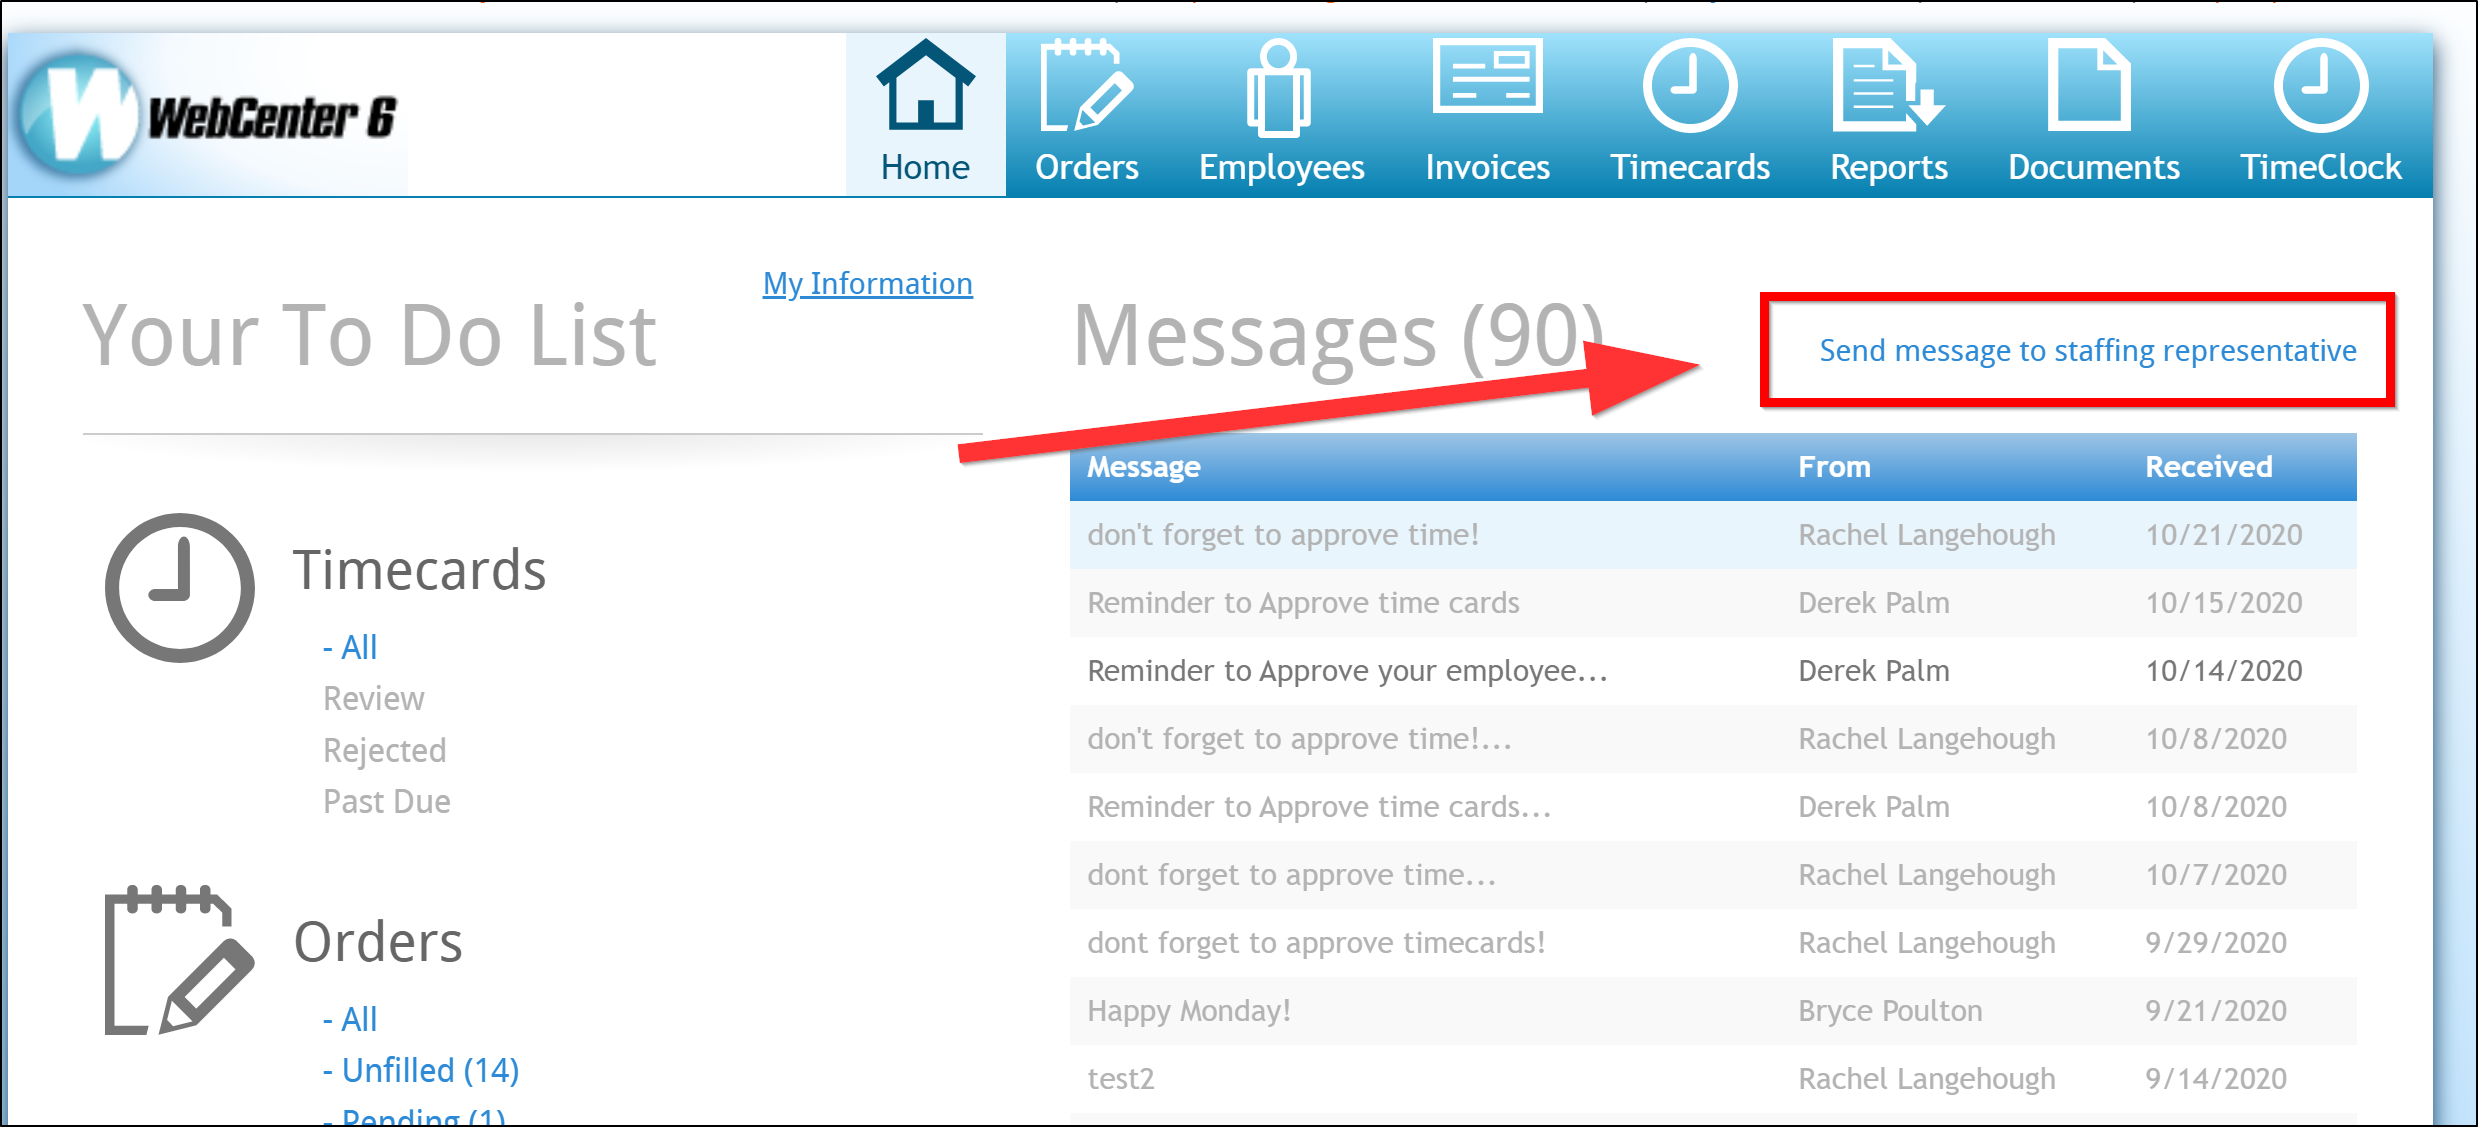
Allow Vendor Contact Messaging to a Service Rep
This config, located under Notifications, allows you to turn on a message feature which will allow your vendors (and/or customer) contacts to send their service rep a message (email).

By default, this config is set to false which means the message option will not appear to vendor contacts (and/or customer contacts).
Setting this Config to True:
If you want to enable this feature, you will need to create a new rule to make sure this option is available to your vendor (and/or customer) contacts. Once you set a new rule to true, the contact should see the following option seen below:
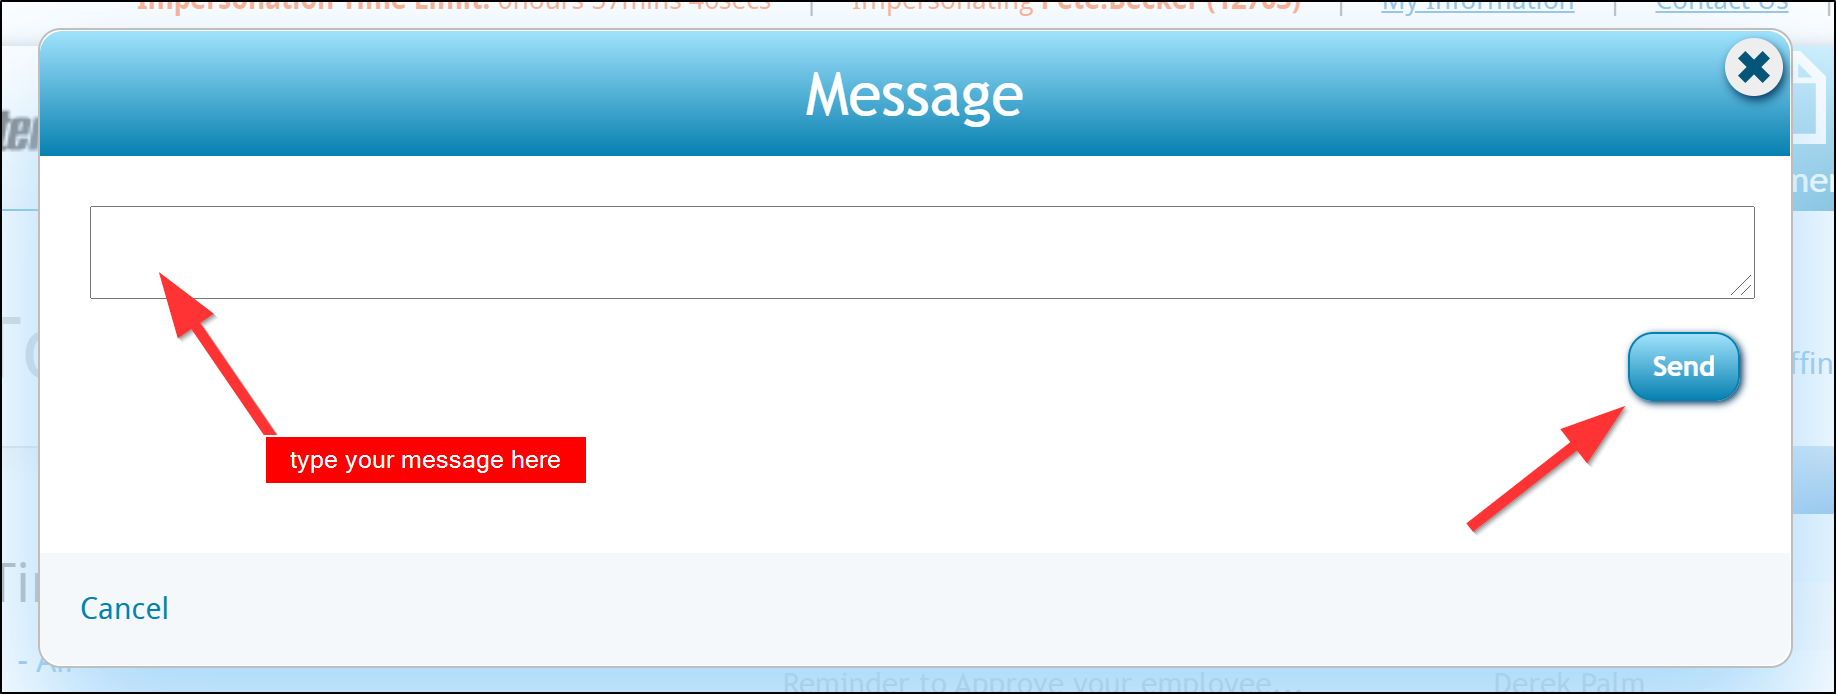
Upon selecting the "send message to staffing representative" they will be greeted with a message box (seen below). They can type in their message and hit send.
Where does this message go? This message will be sent to the email of the staffing representative listed on the vendor contact (or customer contacts) contact record.