What is a Subcontractor Vendor?
These are 3rd party staffing agencies or other providers that are sending their employees to fill some of your orders. Because these employee's do not belong to your staffing agency, the payroll for these people will be consolidated into a payment to the agency. The agency is then responsible for paying and preparing tax documents for their employees.
This article will walk through the process of distributing open orders for vendors to try and fill. If you have not created a Vendor record for your Subcontractor, you will want to complete this first. Check out Vendor - Subcontractors in Enterprise for more information.
*Note* This option is only available if you are utilizing the Vendor Module. Check out Vendor: Portal Quickstart and WebCenter Admin - Giving Vendors Access to the Web Portal for more information.
This article covers:
How to Distribute an Order to a Vendor
Utilize this option when you have an order that you want a vendor to submit candidates for. The order can be created the same way any other order is. Check out Enterprise - How to Create and Manage Temporary Orders for more information on creating orders.
- Navigate to the order record you want to distribute to a Vendor
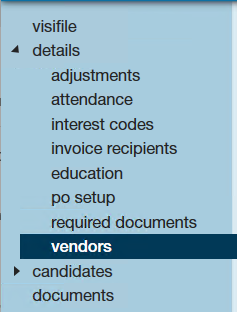
- Select Details > Vendors on the left
- Select the + in the upper right to add a Vendor to this order
- Enter the following information:
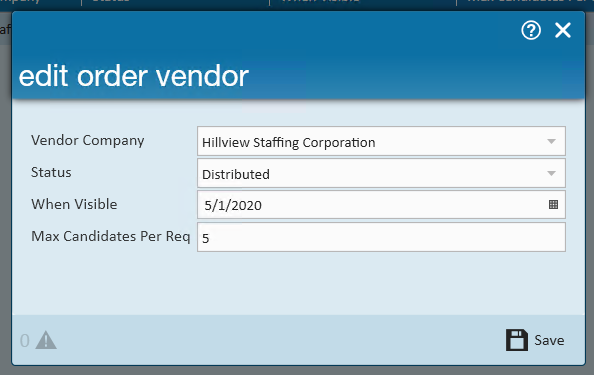
- Select the Vendor Company from the drop down
- Optionally, select a status: This would be a great option if you have already talked to the Subcontractor and know they have accepted it, you can switch the status to accepted. (see status options below)
- Set When Visibile Date: This will be the date that the Vendor will be able to see this order if it is still unfilled
- This is a great option when you want to give your own in house recruiters a chance to fill this order first before the vendors see it
- Enter the Max Candidates Per Req: Enter the maximum number of employees they can submit as candidates. This will depend on the number of positions open and number of vendors you have looking at the same order.


*Note* If you leave Max Candidates Per Req at "0" your vendor will not be able to submit employees as candidates.
5. Select Save 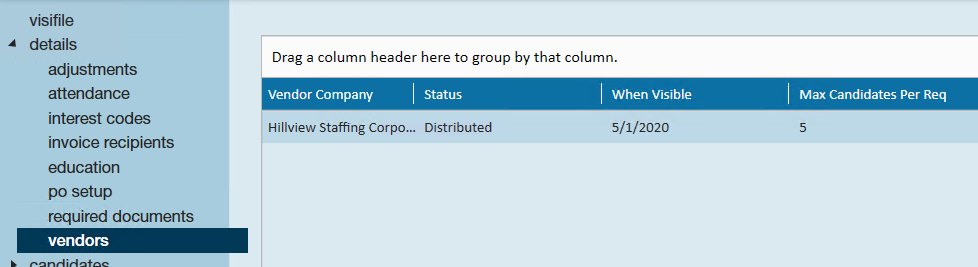
Vendor Statuses:
- Waiting For Distribution: If you are waiting a few days to distribute an order, you can still set it up to distribute on a specific date but use the waiting for distribution status to show that the vendor has not received this order yet.
- Distributed: This means the order has been distributed to the Vendor who can now review the details and choose accept or decline
- Accepted: Once a Vendor contact chooses Accept option on an order, the status of the vendor will change to accepted. They will now be able to review the order details and begin submitting possible candidates.
- Declined: If a vendor reviews an order and chooses not to submit any candidates they can decline the order. When they decline, they will be able to select a reason which will change the declined status. This is good for reporting.
How to Distribute All Future Orders From A Customer
Maybe your working with a government contract or with a major supplier where you will need help from your Subcontractor to fill lots of orders from the same customer. You have the option of setting up Subcontractor Vendors on the customer record to have them automatically distribute future orders.
- Navigate to the customer you want to add the vendor to
- Select Details > Vendor Management
- Select the + in the upper right to add a vendor to this customer
- Enter the following:
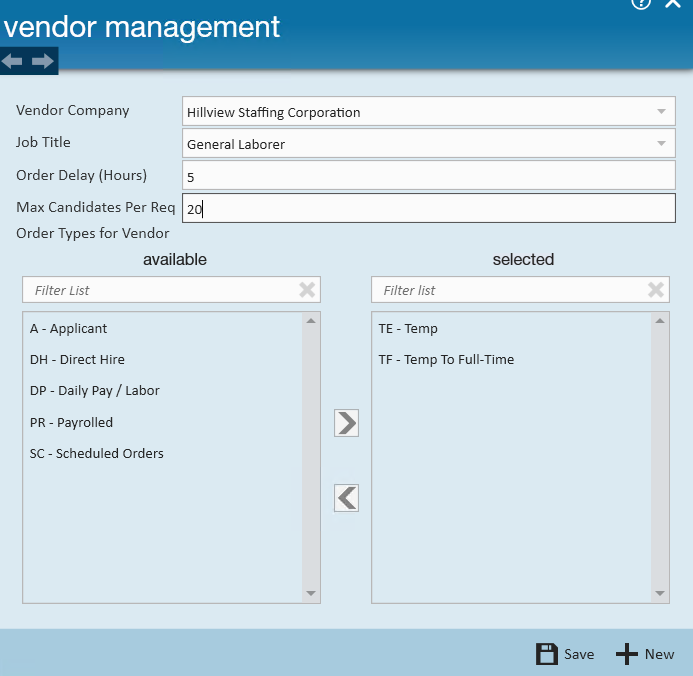
- Vendor Company: Select the vendor from the drop down
- Job Title: Optionally, select the specific job title that this vendor would fill
- This allows you to limit your vendor to only automatically being distributed on orders with a specific job title
- Order Delay: Enter the number of hours after the order is created that the vendor will be notified of the new order
- Max Candidates Per Req: Enter the maximum number of candidates that the vendor can submit to any order
- This option can be edited on each order if necessary later
- Order Types for Vendor: Select from the list of available order types which types of orders the vendor will automatically be distributed to
- For example, if you want the vendor to automatically have the option to work on Temp orders but direct hire orders you may not need help with, you can pick and choose the order types from the list.
- Select Save to finish or + New to add another vendor option


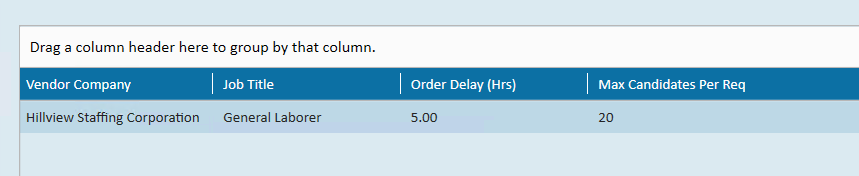
*Note* If you want your vendor to be distributed automatically to a few different job titles, etc. you can add the vendor under the vendor management section of the customer's record more than once.
Keep in mind once you add the vendor to the customer record, it will only automatically distribute on future orders. Orders that already exist will need to have the vendor manually added to each order.
*Note* If you leave Max Candidates Per Req at "0" you vendor will not be able to submit employees as candidates unless otherwise updated directly on the order record(s).
*Note* If you do not select any job order types the vendor will not be distributed to any (future) orders regardless of any other criteria added. Therefore, at least 1 order type must be selected from the available options. 
If your working with a few subcontracted vendors, you can add multiple vendors to a customer record and they will distribute orders based on the criteria saved. You can have multiple vendors working to fill one order for you.
What Information Shows to the Vendor?
Below, we will walk through the information that transfers from the Order Record to the Vendor Web Portal.
Order Statuses
Every order status has an equivalent in Enterprise to ensure your users can see the same information that the Vendor sees.
To See When a Vendor has Accepted or Declined an Order Request:
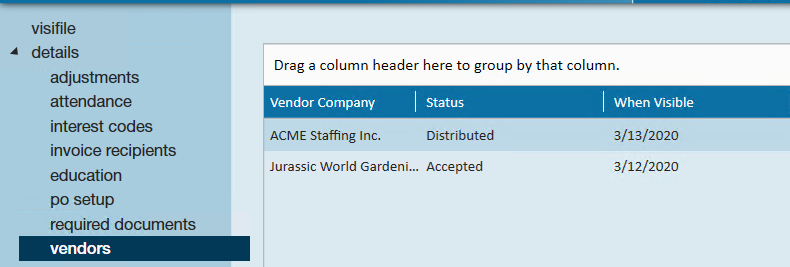
- On the order record, navigate to Details
- Select Vendors
- Current Status will be shown next to each Vendor
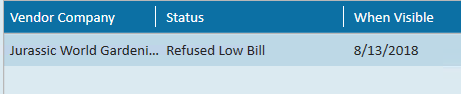
If they refused the order, the status will reflect the reason selected:
Filled & Closed Status:
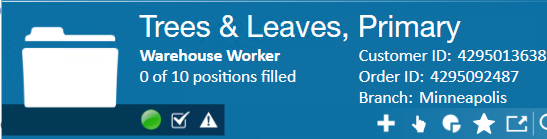
The filled status for an order is when the number of employees assigned is greater than or equal to the number required. The status will switch to filled and is found in the bottom right corner of the order:
This status can also switch to Closed to indicate that the order is finished.
Order Details
When a Vendor Contact views the details on an Order request. Those details come from the Order Record. Here we will review the sections of information and discuss configuration options.
Job Information
What the Vendor Sees: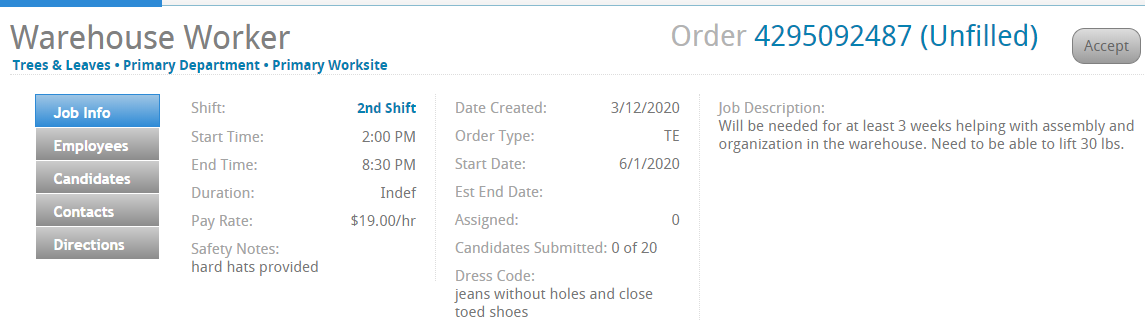
What information pulls from Order Details:
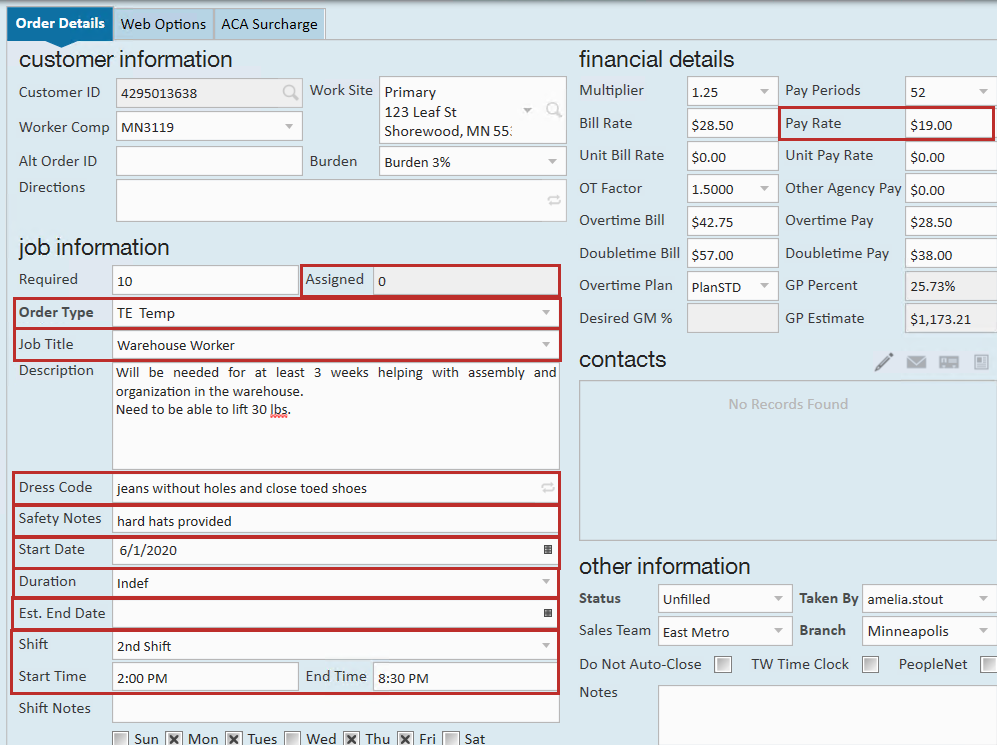
Includes: Number assigned, order type, job title, dress code, safety notes, start date, duration, est. end date, shift name, start time, endt time, and pay rate.
Fields to Clarify:
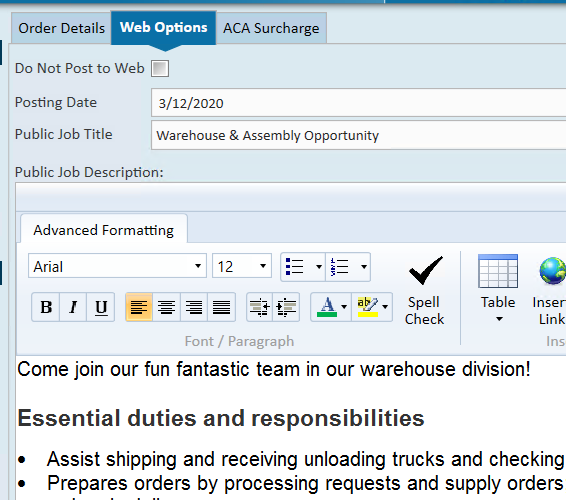
- Job Description: If there is a public job description, by default the public job description option will fill into the job description field in WebCenter. If there is no public job description then it will display the job description under details. (There are configurations to change this if you would prefer the regular job description)
- Candidates Submitted: Will only show the number of candidates submitted by that Vendor (not total candidates on the candidate worksheet). The total number of candidates they can submit comes from the vendors section of the order.

- Order Id: Located in the upper right of the WebCenter Portal is an order Id number. This is the same as the Order Id found in the Avatar of the order record and can be used to help clarify which order a vendor may be asking about.


Employees
What the Vendor Sees: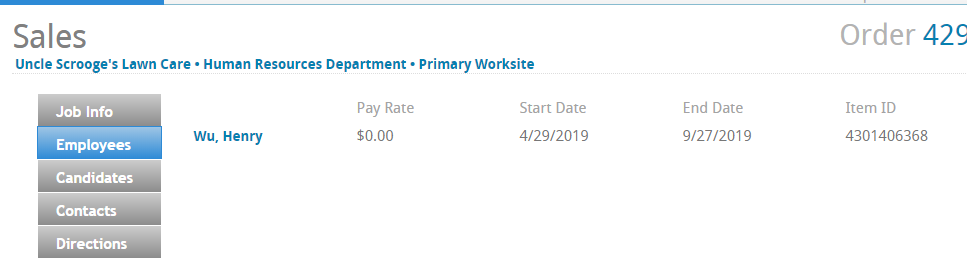
Employees listed here are employees that are owned by the Vendor and have been assigned by a staffing specialist to this order.
What information pulls from the assignment record: 
- Item Id for the Vendor is equal to the assignment Id in Enterprise
- The Company selected on the Assignment will be the Vendor that employs this person
- Pay Rate is from the pay rate on the assignment
- Start Date = Start Date
- End date in WebCenter is equal to Actual Date Ended on the Assignment Record
Candidates
What the Vendor Sees: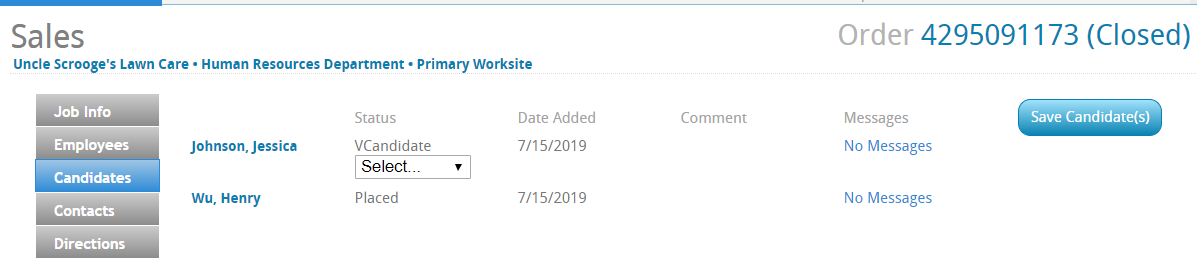
This section pulls information from the Candidate worksheet on the Order record. Candidates will only display here if they are employed by the Vendor.
Contacts
What the Vendor Sees: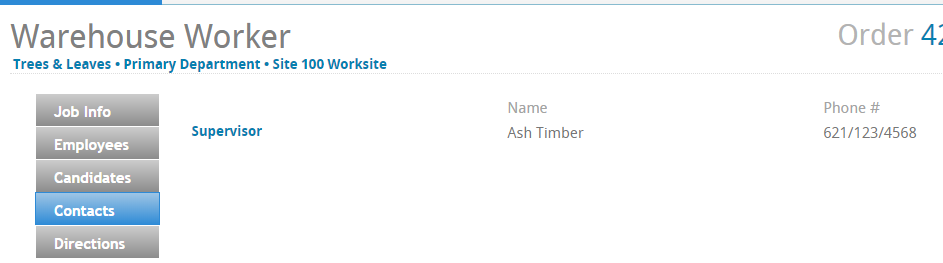
This section pulls in contact information from the Contact Roles Section on the Order Record. 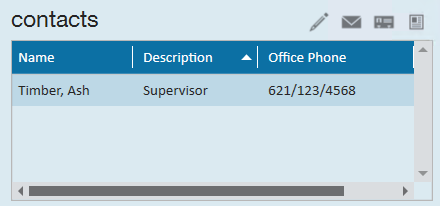
There is a configuration in WebCenter to change whether this displays to your Vendor.
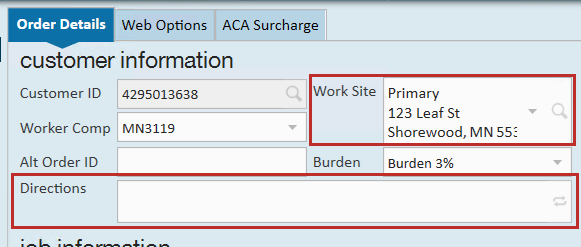
Directions
What the Vendor Sees: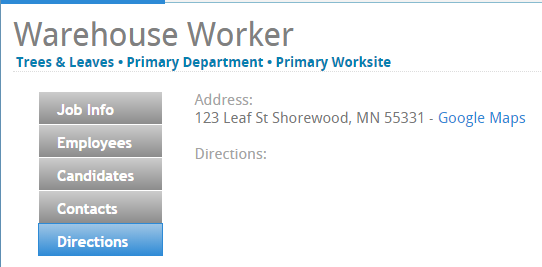
This information comes from the worksite and directions fields on the order details page: