Emailing In Beyond
Email options can currently be found by clicking on any email address in the system. Whether it's an employee, customer, or contact's email address you've saved on file, you can seamlessly email them using either the Beyond built in email or your device's default email program.
This article will discuss the options you have using Beyond's email platform.
*Note* In order to use Beyond's email platform, you must first set up your email in Beyond. Check out Beyond - Email Setup for more information.
Composing an Email
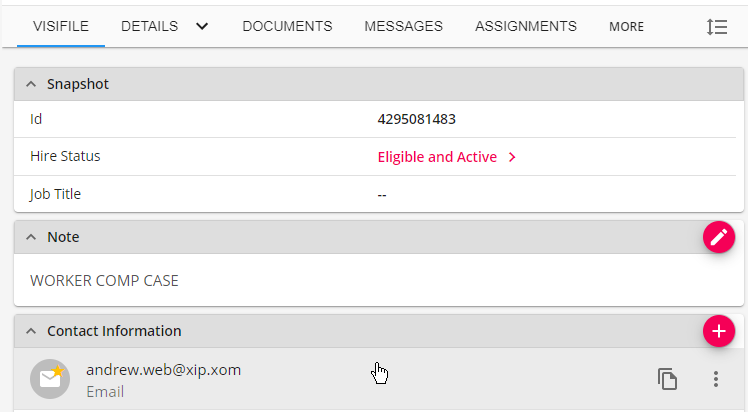
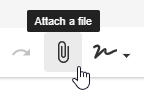
Click on any email address in the system to open email options:
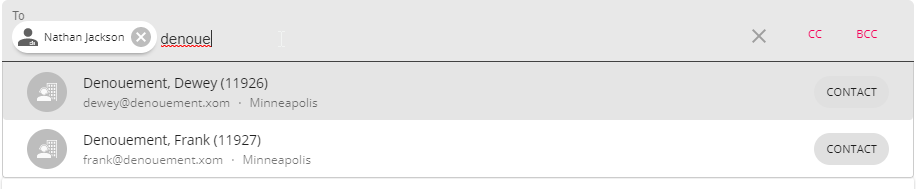
Or select multiple people from search results:

*Note* If an employee/customer/contact/prospect record does not have an email address entered on the record it will skip that person even if they are selected in the search results. In the above example, 20 employees are selected but only 11 have email addresses so the action says email 11 recipients instead of 20.
Depending on your email settings, you may be prompted to choose whether you want to use your device's default email application or Beyond's built in email:

If you choose, use Beyond, you will be brought to the Beyond built in email composer:

You have a lot of options when composing. Check out the options listed below for more details.
This Article Covers:
- Composing Basics
- Additional Formatting Options
- Attaching Documents & Inserting Signatures
- Additional Actions
- Sending Your Email
- Saving as a Draft
Composing Basics
You can add additional people into the To, CC, or BCC options by typing in an email or name (contact, employee, or customer).
If you have more than one email account set up in Beyond, you can click on the from email option to choose between email addresses.

Enter a subject for your email and compose your message:

Additional Formatting Options
There are additional options to format your email along the bottom of the composer.

Formatting Tips:
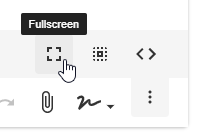
- Select the More Options in the lower right to view your email in full screen, select all text, or (if you are feeling tech saavy) use HTML to format your email:
- Selecting the text color button (
 ) allows you to pick from default color palette or use the Hex color code to add your own color to match your branding.
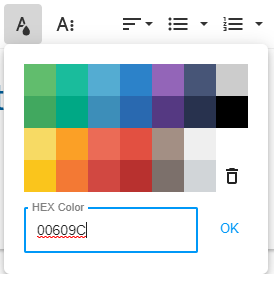
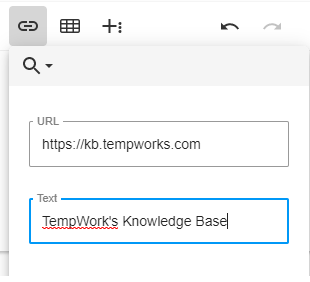
- Use the Insert a Link option to include a link to your website, HRCenter, or another site they might need:
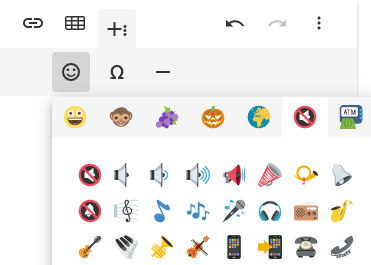
- Select the More Rich options to add emojis, symbols, or a horizontal line in your email:
- Use the
 button to get options for numbered lists, paragraph formatting, and paragraph styles
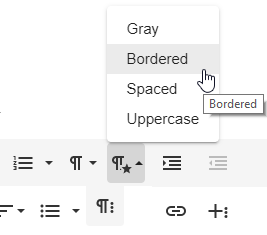
- Use the
 button to get options for highlighting, strikethrough or clear formatting:
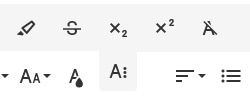

 ) allows you to pick from default color palette or use the Hex color code to add your own color to match your branding.


 button to get options for numbered lists, paragraph formatting, and paragraph styles
 button to get options for highlighting, strikethrough or clear formatting:

Attaching Documents & Inserting Signatures
You can attach documents and insert preset email signatures within your email.
Documents
Drag and drop or click on the paperclip to attach a document from your device.
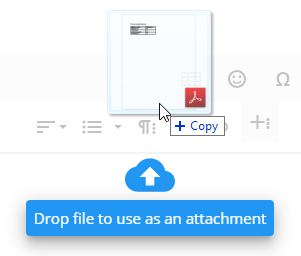
Attached documents will appear underneath the subject line:

Signatures
Signatures need to first be set up in beyond. See Beyond - Email Setup for more information.
To insert a signature, select the signature button in the lower right. 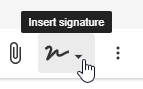
Additional Actions
Additional actions allow you to link different records and set up this email to be logged as a message on different records.
Tap on Additional Actions in the lower left to access these options
Link Records
This option allows you to link additional records related to this email. For example, if I am sending an email to a contact regarding an employee, I may also want this email logged on the employee's record. This is also great to link a related order, assignment, or customer that might be related to the message being sent.
To Link a Record:
- Select the + on the Link Record Card
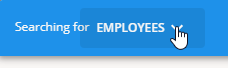
- Choose the record type(employee, customer, contact, order, or assignment) you are looking for at the top under searching for
- Search for the record by name, id, etc.
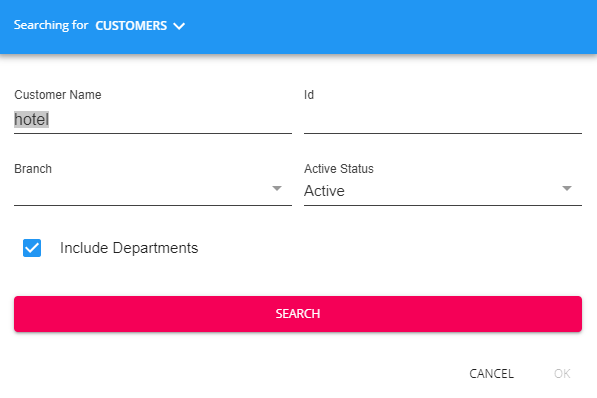
- Select the record or record(s)
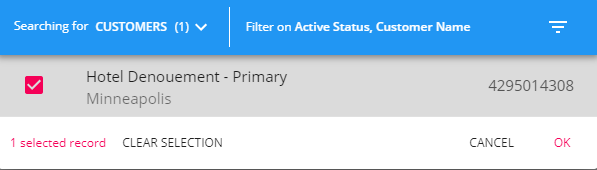
- You can run another search for more related records or select OK to finalize the linked records added
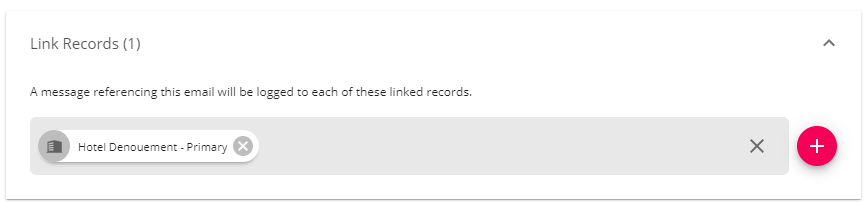


*Note* By default, messages are automatically logged on the record(s) of the people receiving the email so they do not need to be added to the linked records section.
Message
The message section under additional actions gives you settings options for logging the email as a message.
- By default the box is checked to log a message on all email recipients
- Select the message action code that best relates to the email being sent

*Note* Keep in mind that emojis, pictures, special text, etc. do not show up on the message logged.
Sending Your Email
Once you have entered all the necessary information and reviewed your email, you will be ready to send.
- Click the send button in the lower right to send your message
- The message will send in the background so you can continue to use Beyond while the email is processing
- Reply messages will come into your regular email inbox

*Note* If utilizing a Microsoft 365 email, Microsoft may require the re-authorization of the email account that has been added to Beyond. If this occurs, you will see a banner with an "Authorize" button when attempting to send an email within Beyond while utilizing the affected Microsoft 365 email address:

Selecting "Authorize" will open a new browser tab where you will need to log in with your Microsoft account credentials which will re-establish the link between Microsoft and Beyond.
Additionally, if attempting to utilize a Shared Microsoft 365 email account that needs to be re-authorized, you will see a banner within the "Compose Email" window:

The owner of the Shared Microsoft 365 email account will need to re-authorize the account before emails are able to be sent.
Once the owner has completed the re-authorization of the email account, you can select "Retry" to finish the sending of the email.
A message will appear at the bottom letting you know that the email was successfully queued for sending: 
The message will be logged on the appropriate related record(s): 
Saving as Draft
If you are not ready to send your email quite yet, you can choose to save it as a draft (located in the lower left)
The composed email will save under the activity panel > drafts section 
*Note* Keep in mind that this draft will only be saved until the window is closed.
Click on the draft to finish and send the email.
Related Articles
- None