Timecards & WebCenter
WebCenter offers users the capability to create, edit, submit, reject, and approve timecards. This document will walk users through the process of editing and submitting WebCenter timecards for approval.
*Note* Unsure of where submitted timecards go? Ask your staffing provider, as every client may be setup slightly differently.
This article includes:
Reviewing Timecards
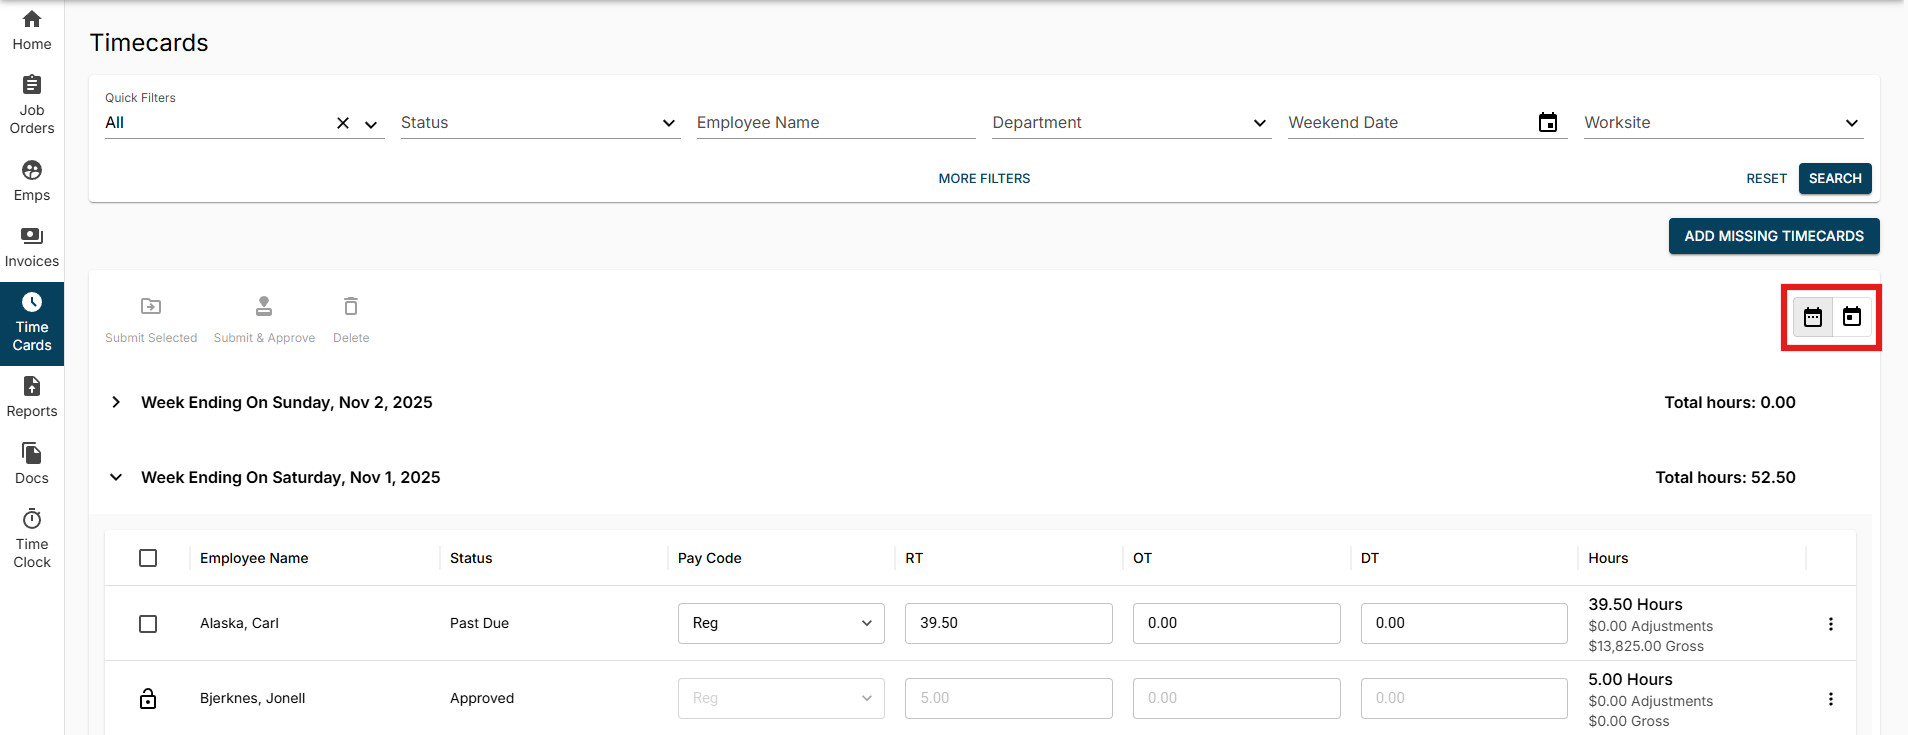
Log into WebCenter and navigate to the Timecards tab to see all timecards that have been created by your employees:
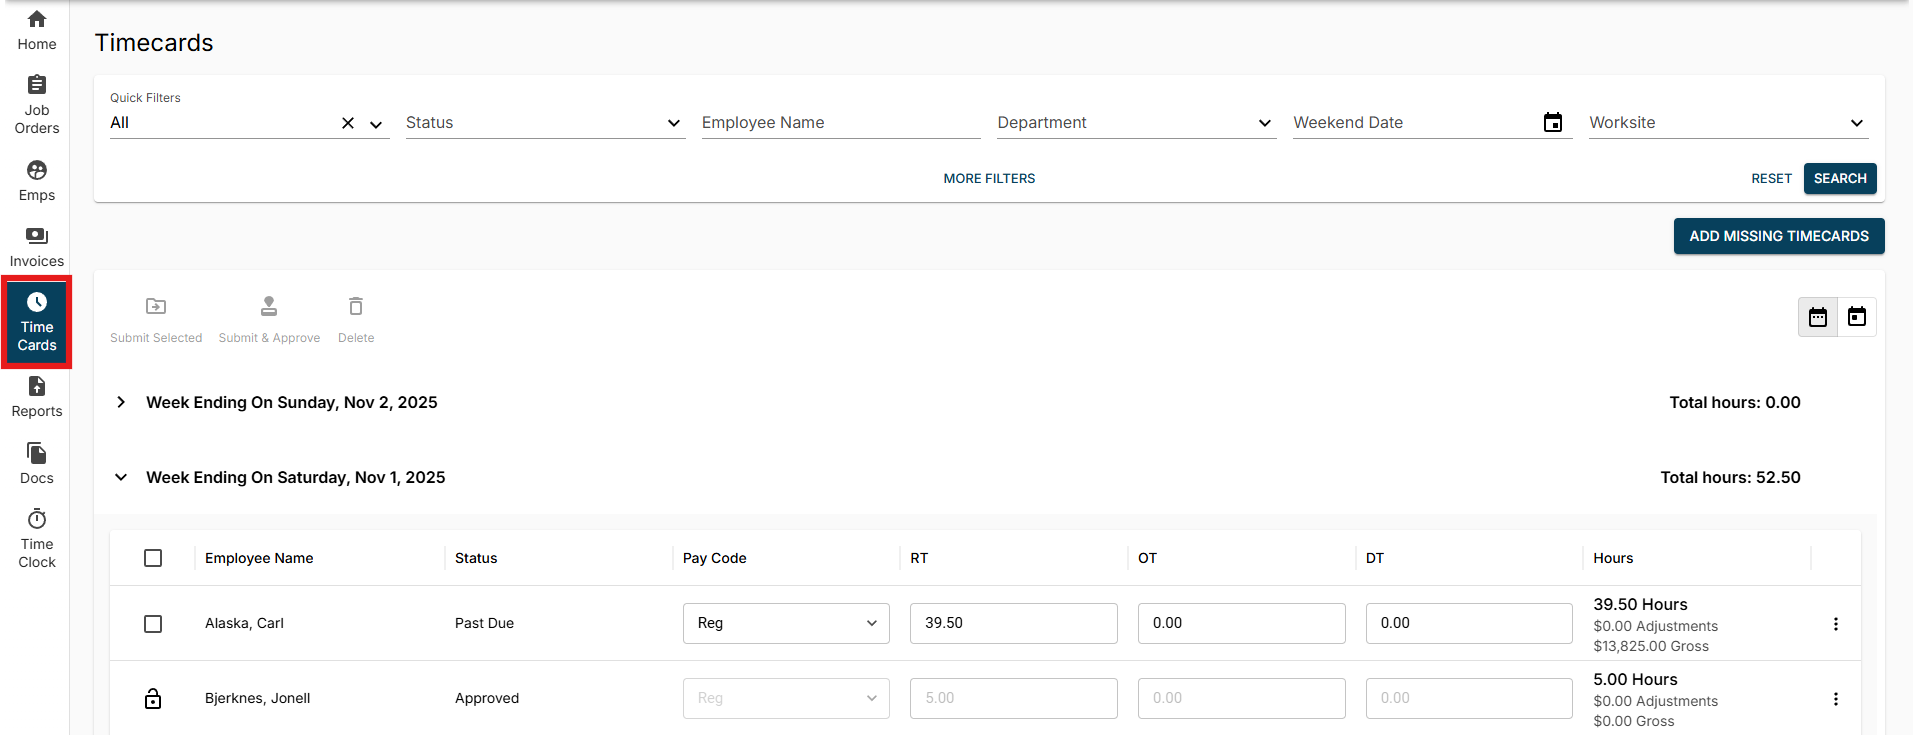
You can choose to see different sets of timecards via the Quick Filters at the top of the page:

*Note* Selecting the "All" option within the first filter will allow you to select the following types of timecards to view:

- All - Allows you to see all timecards in all statuses, this is also where you can edit timecards.
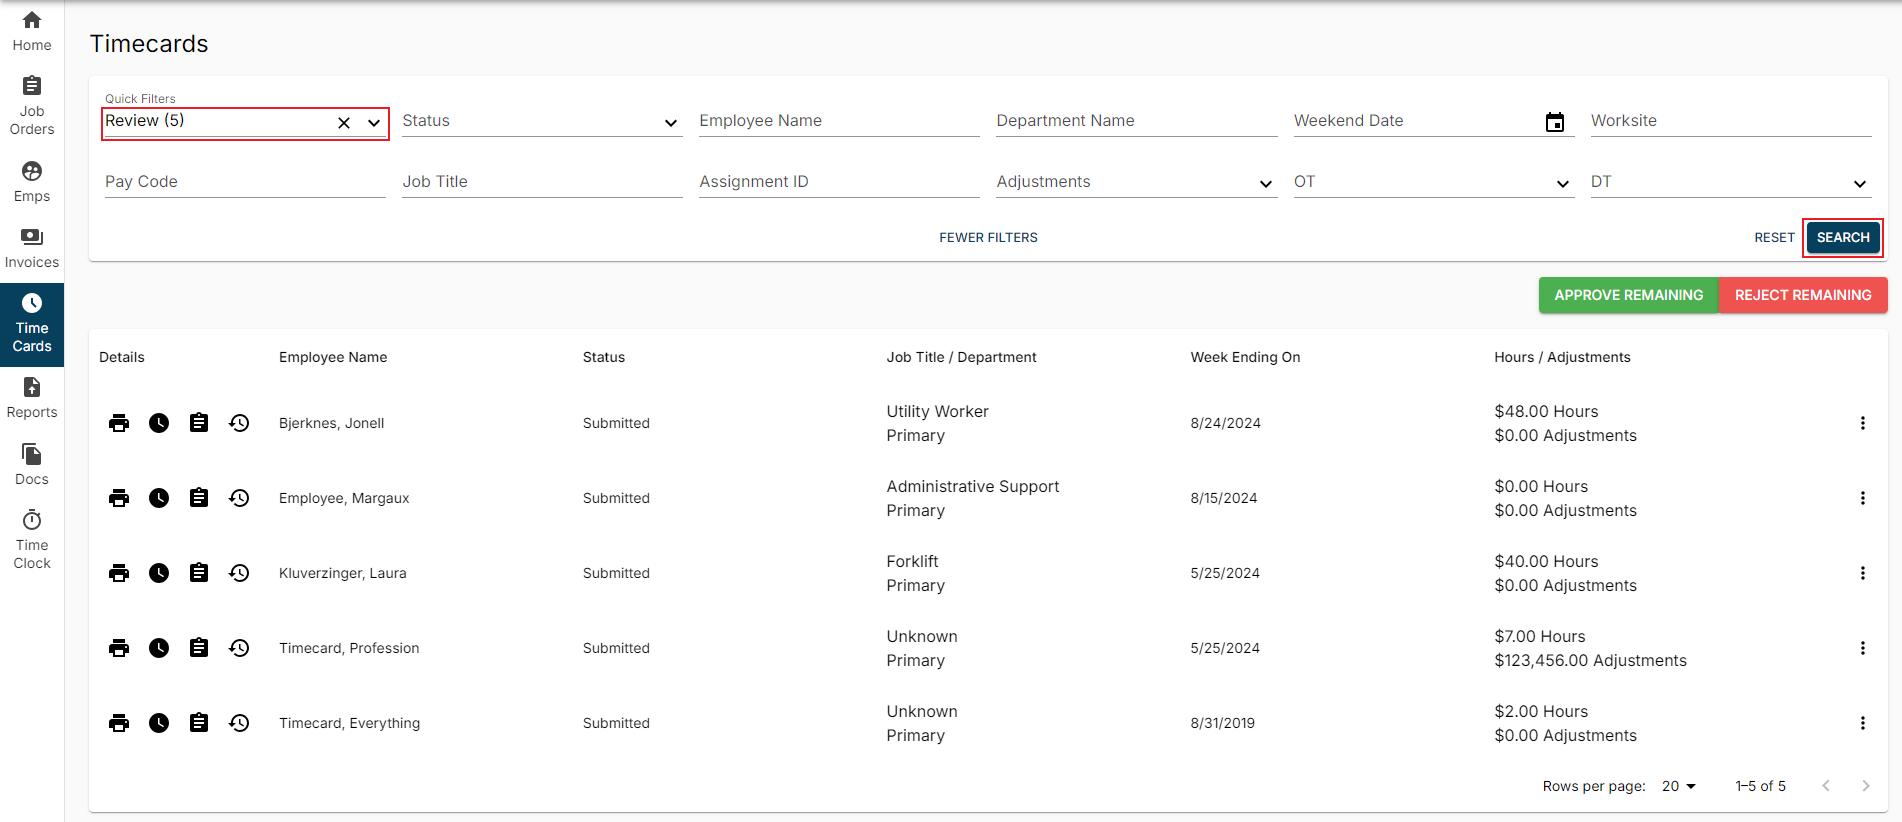
- Review - Allows you to see all submitted timecards looking for approval. Timecards can be approved or rejected from this view.
- Rejected - Shows all rejected timecards.
- Past Due - Shows all late timecards that have not been completed (paid) yet.
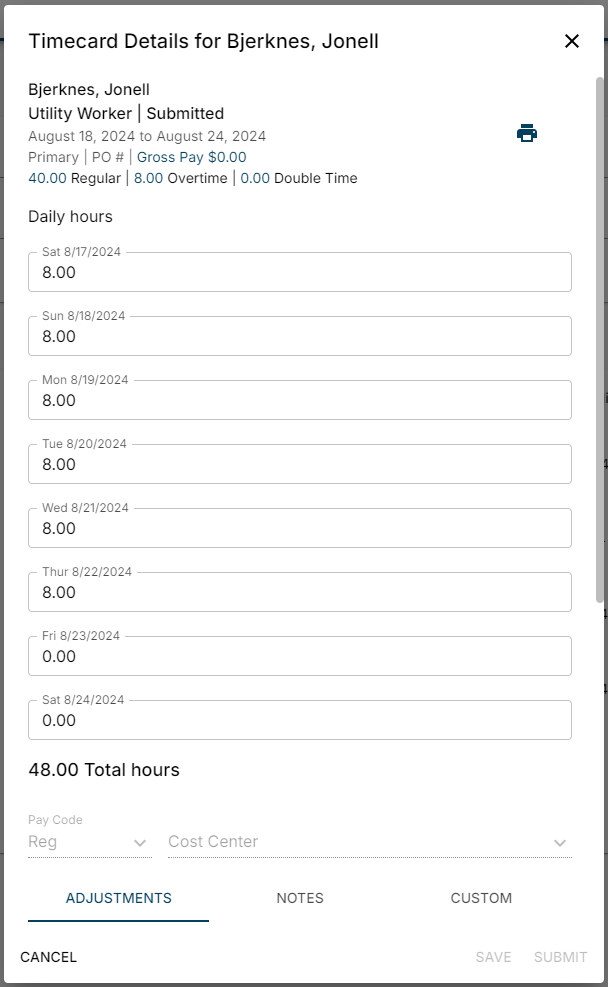
To see more details on the timecards, select the  icon to the right of the timecard and select "Details" to open the "Timecard Details" window:


*Note* Your timecards may look different than the picture above based on the timecard template set up for you by your staffing provider.
*Note* If you having difficulty finding timecards from employee submitting time via Mobile Time Punching in Buzz, these are classified as TimeClock Timecards in WebCenter. For more information, please see the article titled Customer Portal - Timeclock Punch Approval.
Creating Timecards for Employees
Have employees that forgot to create a timecard this week? Want to enter their hours for them? You can create timecards for your direct reports.
- Navigate to the Timecards tab in WebCenter
- Select the "Add Missing Timecards" button at the top right:

- Select "All missing timecards for this week" to add any missing timecards for the current week:
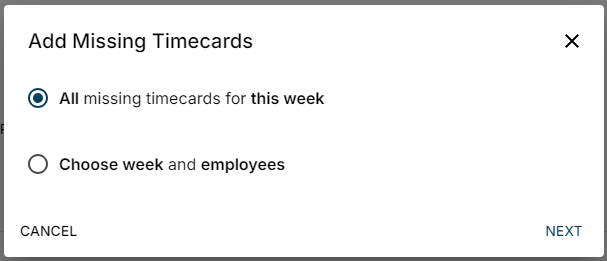
- Alternatively, select "Choose week and employees" to pick and choose the employees you want to add time for or to add a late timecard:
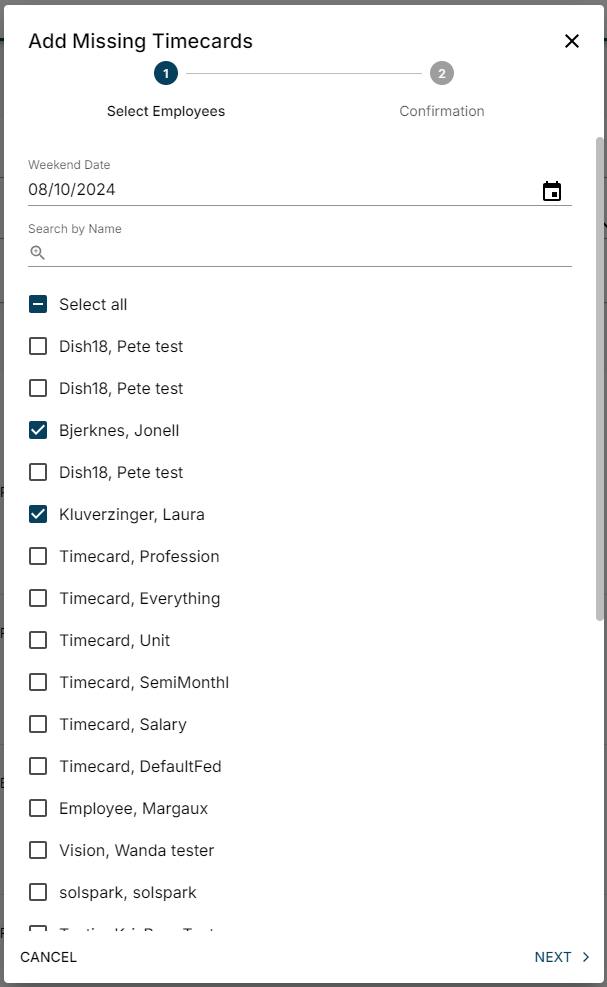
- Select the appropriate Weekend Date and employees from the list and select "Next" once complete:
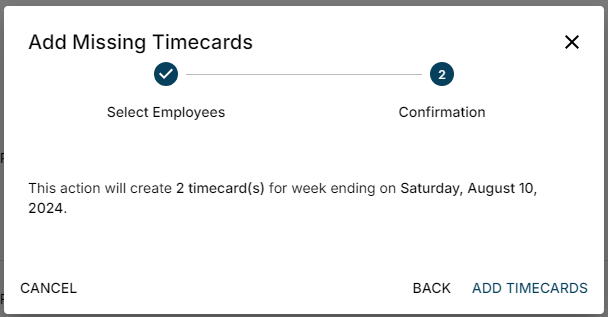
- Within the confirmation window, select "Add Timecards":
- Select the appropriate Weekend Date and employees from the list and select "Next" once complete:


Editing Timecards
If you find any timecards that are incorrect or that you want to enter time for the employee on, then you will need to edit the timecard.
*Note* Submitted timecards may need to be unlocked first by selecting the  icon to the left of the timecard:

Timecards with the  icon are restricted and you will not be able to make any changes:


Any unlocked timecard will be editable.
To entire/edit time within the timecard, simply select the appropriate field within the row (Pay Code, RT, OT, DT) and add the intended values for each timecard:

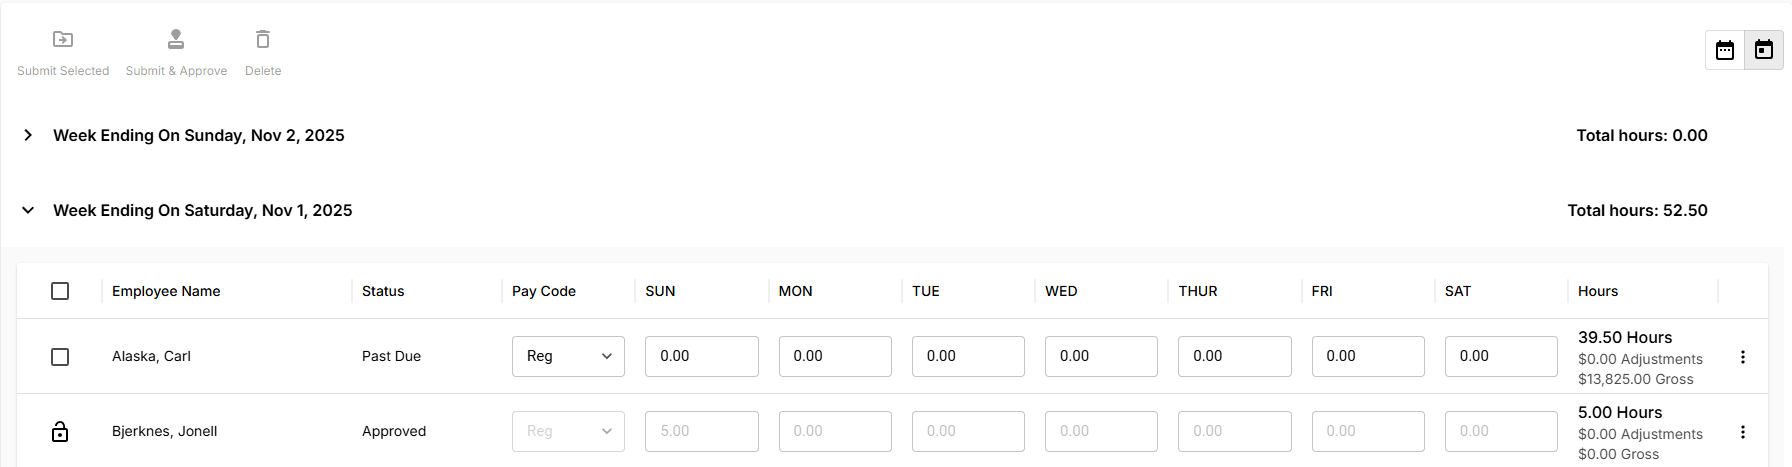
*Note* By default, the Timecards page is set to the "Weekly" view. This can be changed to "Daily" view by selecting the intended option on the right:
Example of "Daily" view:
Alternatively, to see more details on the timecards, select the icon to the right of the timecard and select "Details" to open the "Timecard Details" window:

Within the "Timecard Details" window, you can add/edit the hours for the days of the week, upload files, add notes, and add/edit adjustments.

Once all changes needed have been made, select "Submit" to submit the timecard for approval.

To Submit a Timecard
Select the checkbox next to the edited/unsubmitted timecard(s) and choose the "Submit Selected" option at the top left:

To Delete a Timecard
Select the checkbox next to the edited/unsubmitted timecard(s) and choose the "Delete" option at the top left:

Approving or Rejecting Timecards
Timecards submitted by your employees need to be reviewed and approved or rejected.
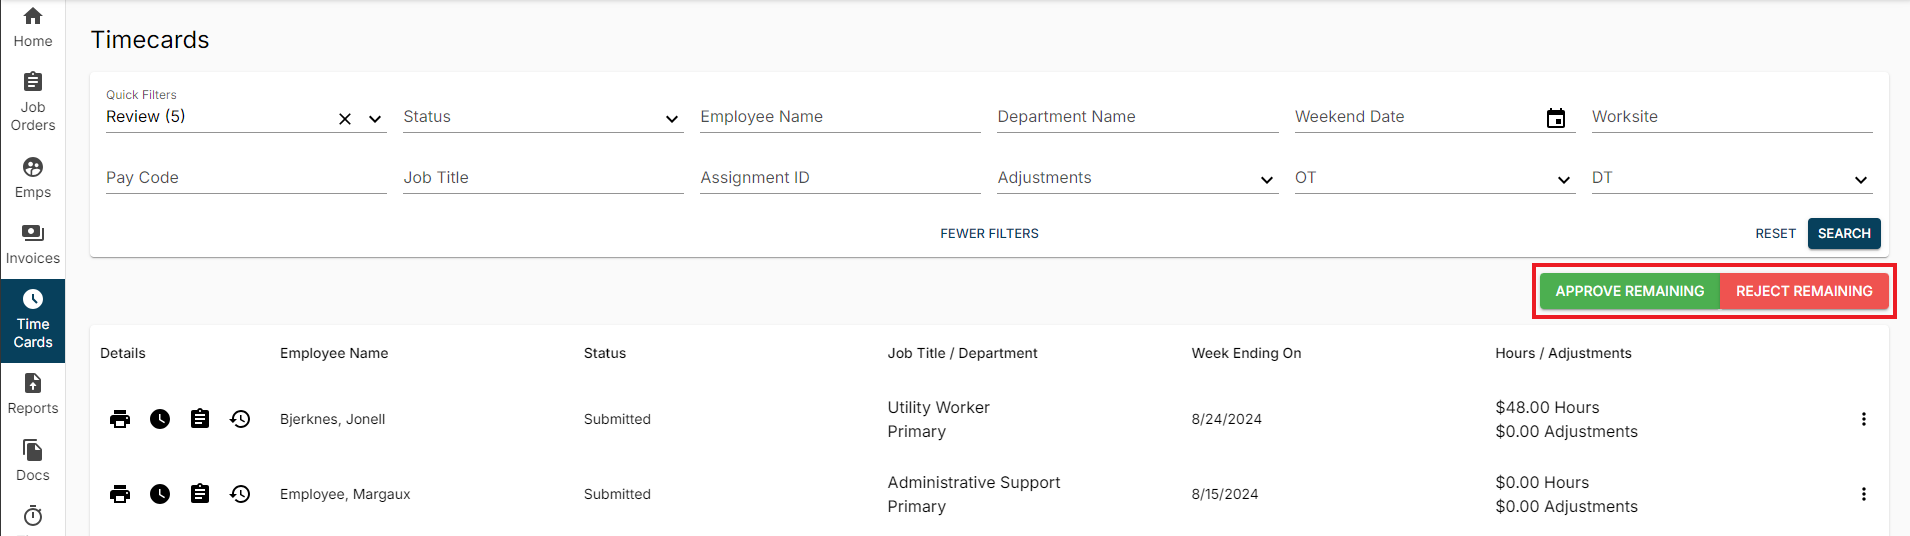
- Navigate to the Timecards tab, select "Review" within the "All" filter, and select "Search" to find all timecards that need to be reviewed:
- Review the timecard information by double-clicking on the timecard within the list to open the "Timecard Details" window:
- Timecard information can be viewed at a glance by hovering your mouse cursor over the
 icons to the left of the timecard:
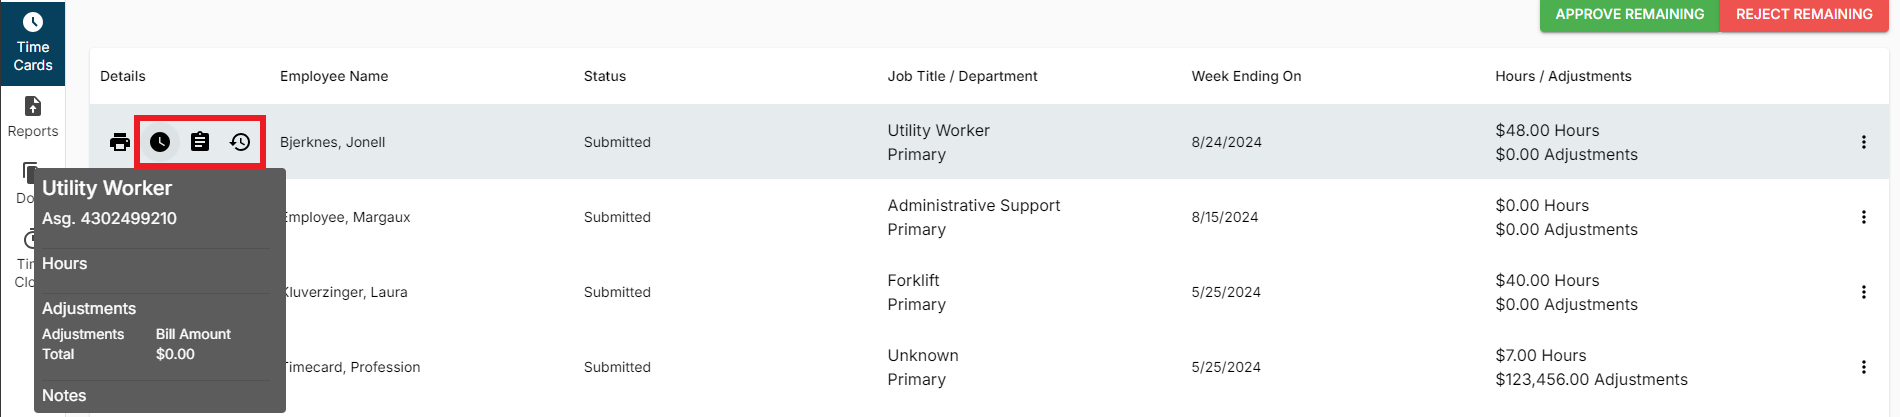
- Timecard information can be viewed at a glance by hovering your mouse cursor over the
- Approve or reject the timcard(s)
- Individually approve or reject by selecting the
 button to the right of the timecard and selecting either "Approve timecard" or "Reject timecard":
- Mass approve or reject by selecting either the "Approve Remaining" or "Reject Remaining" option at the top right:
- Individually approve or reject by selecting the


 icons to the left of the timecard:
 button to the right of the timecard and selecting either "Approve timecard" or "Reject timecard":

Rejected timecards will require you to enter a reason for rejection:

*Note* Rejected timecards are sent back to the employee to update and resubmit. If configured, they will receive an email alert letting them know that their timecard was rejected.
Timecards that are not approved will not be paid. If you would rather fix the timecard instead of having them resubmit their timecard for approval, you may edit the timecard by double-clicking on the timecard within the list to open the "Timecard Details" window:
Once the information has been edited, select "Submit". The timecard can now be approved following the process outlined above.
When approving timecards, you will get a confirmation screen before finalizing:
Once a timecard is approved, your staffing provider will be able to complete the payroll process.
*Note* The updated WebCenter Customer Portal contains all the functionality as Legacy WebCenter, but in the event you need to navigate back to Legacy, you can select the "Back to Legacy WebCenter" option to the top right of the WebCenter window:

For more information on navigating to the Legacy WebCenter, along with the feedback survey, please see the article titled Customer Portal - Navigating to Legacy & Feedback Survey.