Overview
With access to HRCenter Admin, you can modify the branding of your instance of HRCenter, create forms, pages, email templates, and more.
Before being able to access HRCenter Admin, the service rep will need to have their web user account created within Enterprise.
Service Rep Web User Accounts
Service reps can be given web user credentials, this will allow them to log into both HRCenterTM and WebCenterTM, depending on the setup. Service reps with credentials are able to interact with both modules in different ways.
- HRCenter- A service rep with a web user account can process recruiter only and recruiter first workflows. These workflows/pages can be interacted within HRCenter. Depending on permissions, users can also access HRCenter Admin.
- WebCenter- A service rep with a web user account can access the WebCenter admin portal. Depending on the user role given to your service rep, they will be able to interact with the admin portal in a number of ways. Some examples may include impersonating other web users, setting configs, creating email templates, and creating WebCenter timecard templates.
*Note* If you are using Enterprise to pay your internal employees and using WebCenter to manage them, your service reps will need two sets of credentials. One will reflect their employee record on the staff side of your company; the other set would be their service rep credentials.
Creating Credentials
To grant a service rep access to HRCenter Admin, navigate to Enterprise > All Options > Administration
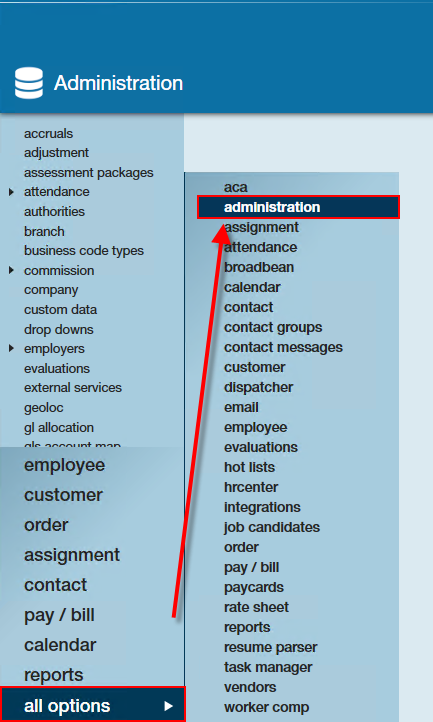
Select "service rep" from the options on the left. This form will display all service reps within your system.
Select the service rep from the list you wish to make credentials for:

Once a user has been selected, select the "WebUser Management" tab at the top. Here, you will be able to manually create credentials for this service rep:
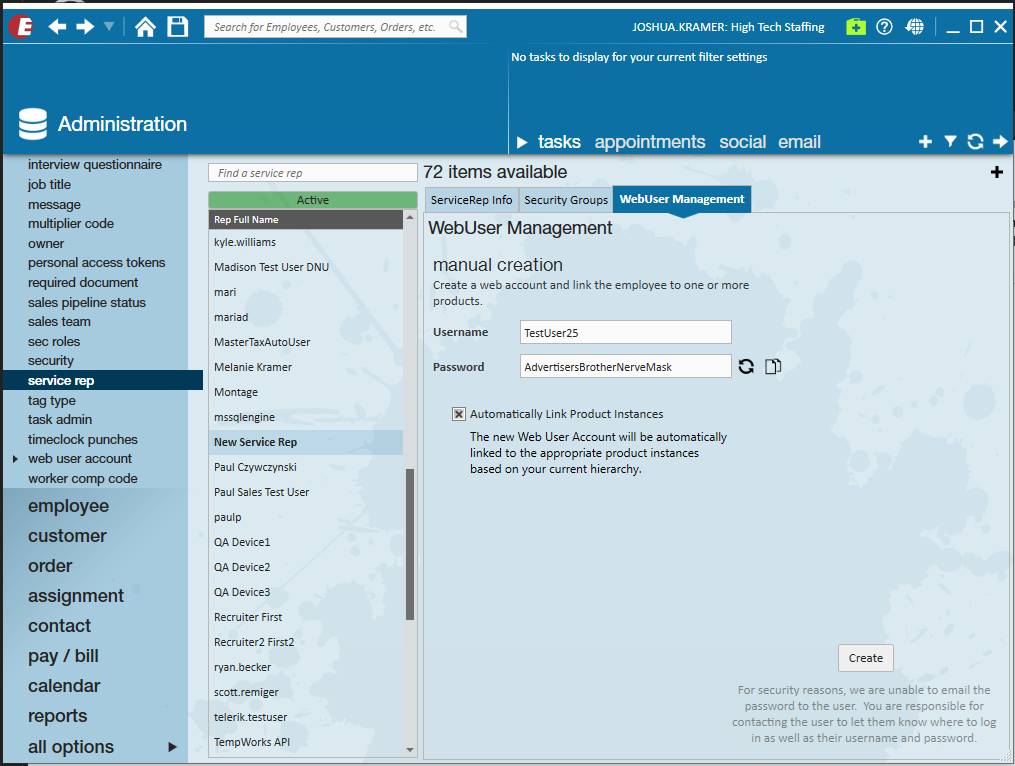
Credentials must include:
- Username: The username must be unique.
- Password: The password must contain 8 characters. A unique password can be generated by selecting the
 button.
 - Product Instance: You will be presented with two options
- Automatically Link Product Instances: This tells the software to automatically provide appropriate WebCenter and HRCenter product instances to the Web User that is being created.
- Manually Add Product Instances: This is where you will be able to choose the specific product instance along with the intended role for WebCenter and tenant for HRCenter.
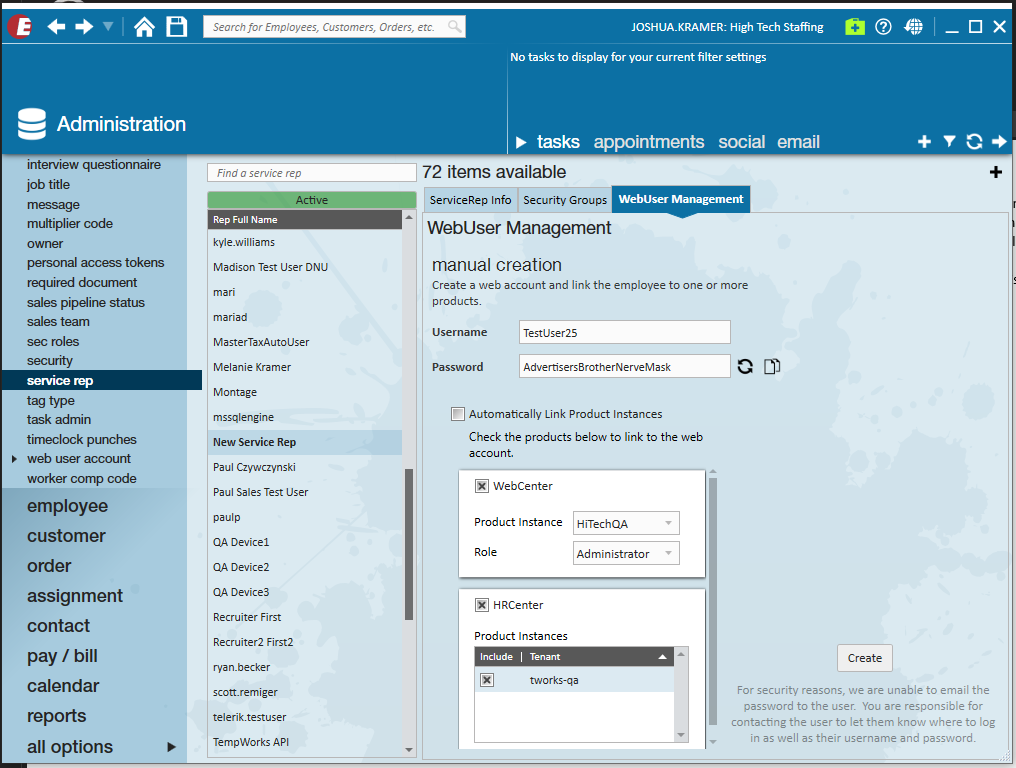
- Role: This will be used if you chose to manually link product instances. This defines what the service rep will have access to in WebCenter. It is recommended that typical service reps be given an "AdminLight" role, while reserving "Admin" for users that would be involved in configuring WebCenter.
- Tenant: This will be used if you chose to manually link product instances. This is the web tenant the service rep will have access to. It is most common the user has only access to a single tenant however, provided your system has multiple instances of web modules, you might give the service rep access to any or all of those tenants.
 button.
For HRCenter Admin access, select the product instance for "HRCenter".
Once you have provided all the information for the web user account, select "Create".
You are now responsible for relaying the service rep's credentials to them.
*Note* For more information on Web User Management, please see the article titled Enterprise - Managing Service Rep Web User Accounts.
Granting Access to HRCenter Admin
Once the credentials have been created for the service rep, an additional Security Role will need to be applied.
Navigate to Enterprise > All Options > Administration > Sec Roles:

Navigate to the service rep that requires access to HRCenter Admin and select the pencil icon to edit the service reps sec roles:

Within the "Manage Sec Roles" window, find the "HRCenter" sec role and select the "+" to add it to the service rep:

Select "Save" once complete.
*Note* The final step to grant access to HRCenter Admin for the service rep is to contact TempWorks Support to apply a final administrative permission to the service rep on the back-end.
Logging into HRCenter Admin
Once the permissions have been applied to the service rep, they will be able to log into HRCenter Admin using the credentials previously setup while accessing the HRCenter Admin URL that is specific to your company (https://hrcenter-admin.ontempworks.com/CompanyName).
Related Articles
- None