Overview
In order for you to enter in the hours your employees have worked, you'll need to create timecards in WebCenter.
*Note* Please contact your Staffing Provider in the event you require access to the Timecards tab.
Creating the Timecard
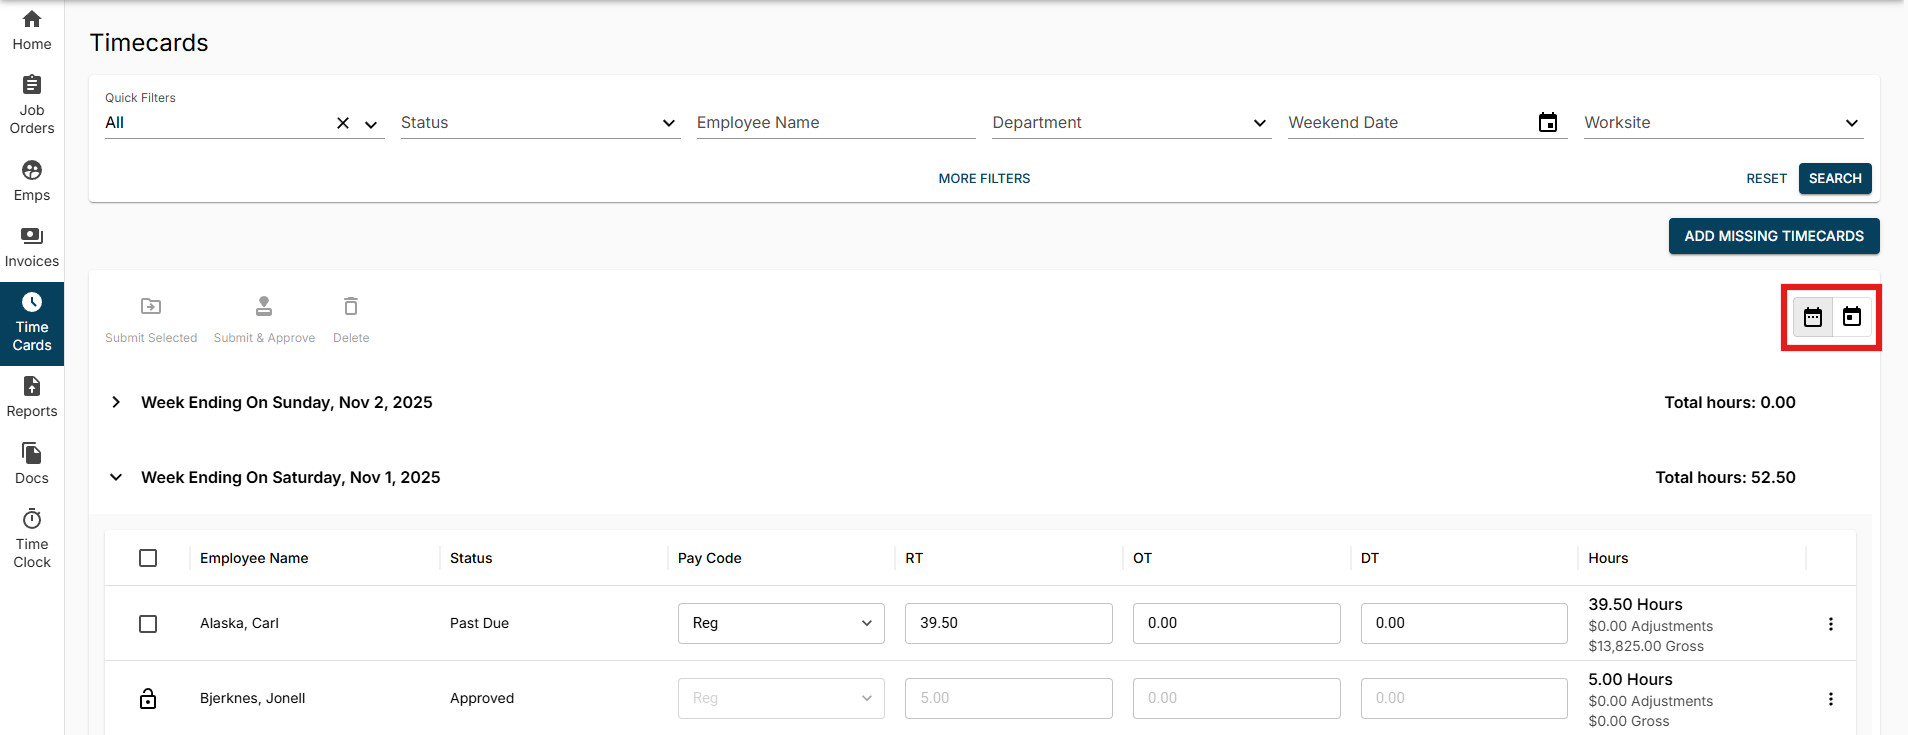
- Navigate to the Timecards tab in WebCenter
- Select the "Add Missing Timecards" button at the top right:

- Select "All missing timecards for this week" to add any missing timecards for the current week:
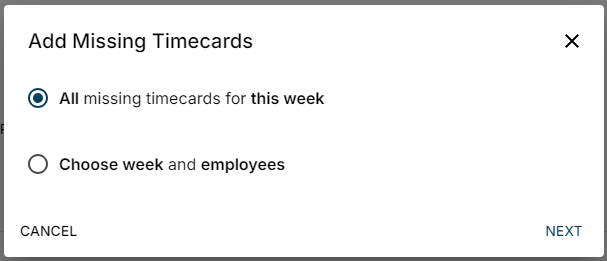
- Alternatively, select "Choose week and employees" to pick and choose the employees you want to add time for or to add a late timecard:
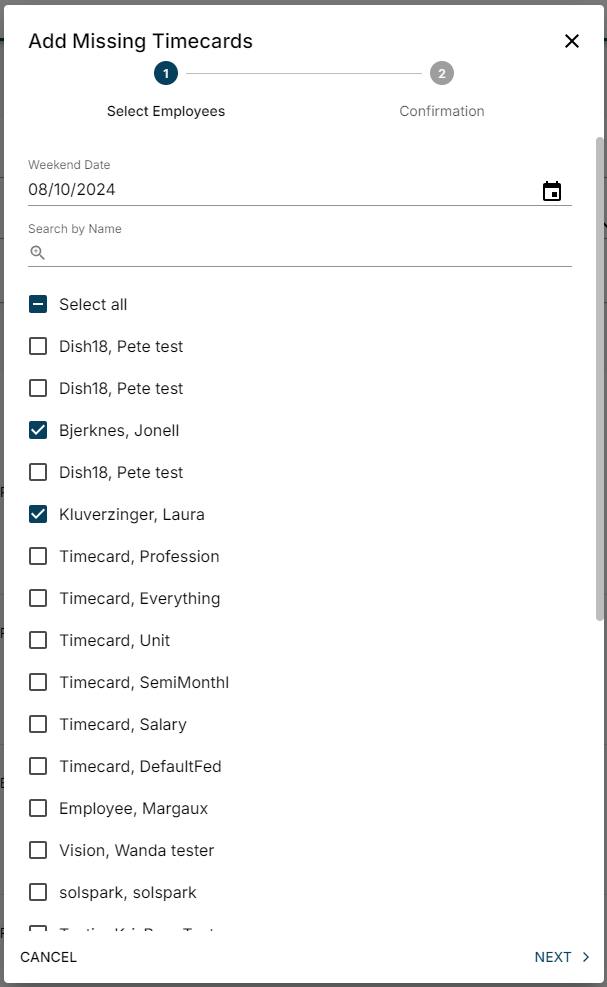
- Select the appropriate Weekend Date and employees from the list and select "Next" once complete:
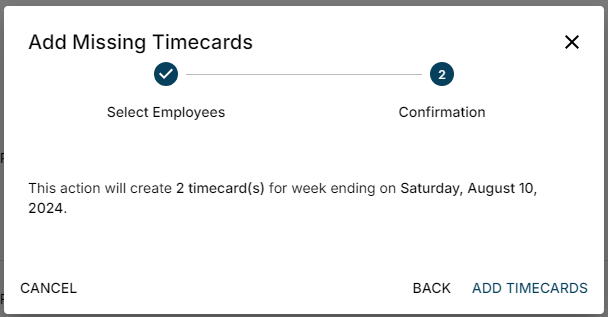
- Within the confirmation window, select "Add Timecards":
- Select the appropriate Weekend Date and employees from the list and select "Next" once complete:


Once the timecard has been created, it's time to enter in the hours the employee(s) worked.
Entering Time
Time can be entered for the employee via either the Timecards or Emps (Employees) Tab.
Timecards Tab
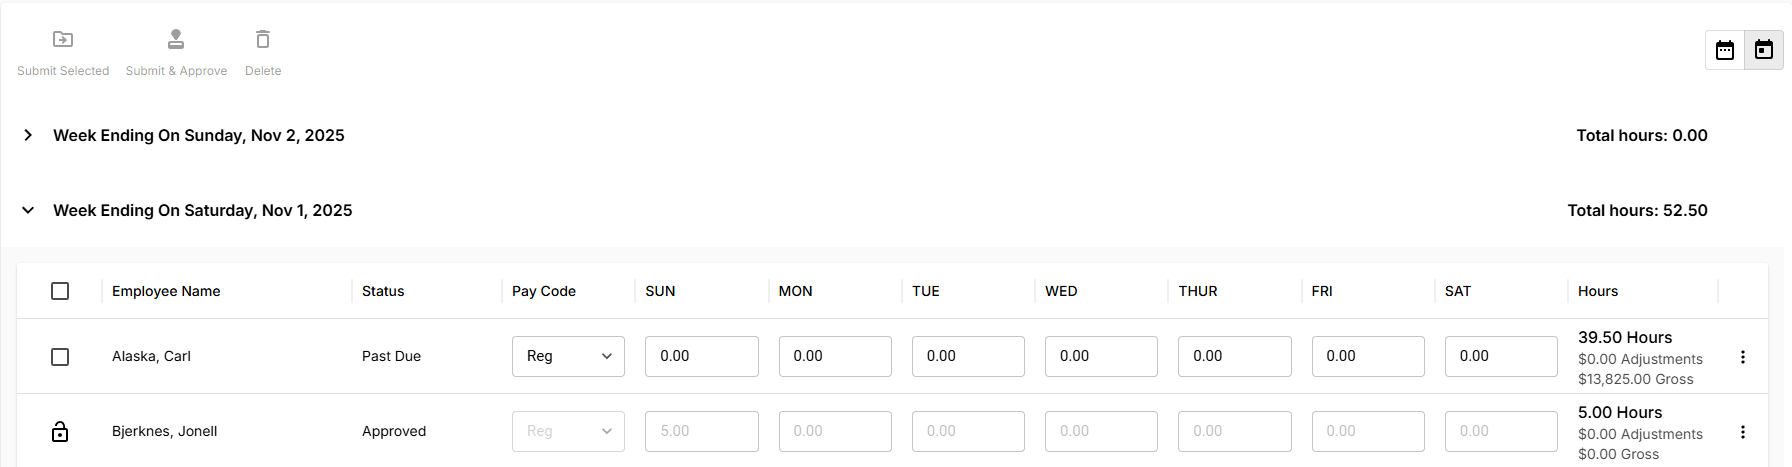
To enter/edit time within the timecard, simply select the appropriate field within the row (Pay Code, RT, OT, DT) and add the intended values for each timecard:

*Note* By default, the Timecards page is set to the "Weekly" view. This can be changed to "Daily" view by selecting the intended option on the right:
Example of "Daily" view:
Alternatively, to see more details on the timecards, select the  icon to the right of the timecard and select "Details" to open the "Timecard Details" window:

Within the "Timecard Details" window, you can add/edit the hours for the days of the week, upload files, add notes, and add/edit adjustments.

Once all changes needed have been made, select "Submit" to submit the timecard for approval.

Emps (Employees) Tab
Within the Emps tab, while viewing an employee that is currently assigned, either double-click on the record or select the  icon and select "Details":

Within the employees details, select "Enter Time" to open the Time Entry window:

Within the Time Entry window, ensure the correct Weekend Date is selected, select the appropriate assignment you are creating the timecard for and select "Next":

Now you will be able to add hours, adjustments, notes, upload files, etc to the timecard. Once all of the information has been entered, select "Next":

Within the Confirmation window, you will see the action that is about to be completed. Select "Confirm" to create the timecard for the employee:

The timecard can now be reviewed and submitted for approval within the Timecards tab.
Submitting Timecards
Select the checkbox next to the edited/unsubmitted timecard(s) and choose the "Submit Selected" option at the top left:

Optionally, you can select the "Submit & Approve" option if you are listed as an eligible timecard approver and the timecard is ready to be sent to payroll:

*Note* The updated WebCenter Customer Portal contains all the functionality as Legacy WebCenter, but in the event you need to navigate back to Legacy, you can select the "Back to Legacy WebCenter" option to the top right of the WebCenter window:

For more information on navigating to the Legacy WebCenter, along with the feedback survey, please see the article titled Customer Portal - Navigating to Legacy & Feedback Survey.