What is Form Builder?
HRCenter Form Builder allows you to take any paper forms you have your employees fill out and make them digital so they can be included in any application or onboarding process through HRCenter. Forms filled out via HRCenter can be automatically saved onto the employee's record.
As an HRCenter Admin, you'll need to gather your forms and either scan or create an electronic version to get started.
*Note* You will need access to HRCenter Admin in order to use form builder. Talk to your manager or Bridge Admin if you need assistance getting access.
In this article:
- When to Use Form Builder
- How to Plan out Your Forms
- Form Creation Basics
When to Use Form Builder
Form Builder does have some limitations and may not be the best solution for every form you have. If you are looking to have information pre-filled from the employee's record or save information entered on the form to specific fields on the employee's record, we have limited options in our default form builder. 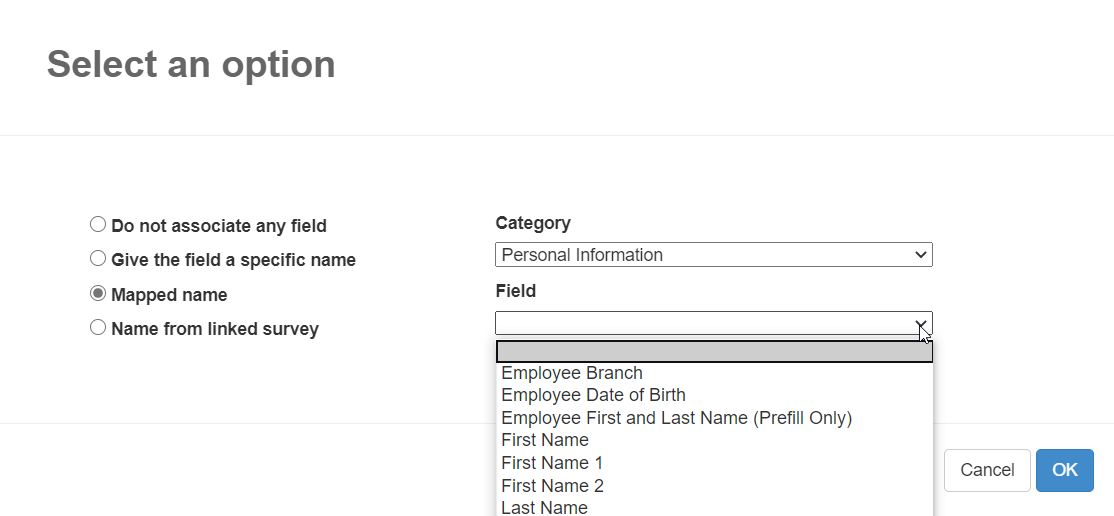
Forms in Form Builder can be no longer than 5 pages. If you have longer forms, consider consolidating the information.
Check out When and When Not to Use the HRCenter Form Builder for more information.
We also have limited dependencies which allow you to require or open fields based on other field answers. To learn more about dependencies, check out Dependencies in the HRCenter Form Builder.
If you have forms in your paper application that ask the employee to fill out basic information including name, address, and contact information, consider customizing a information page that is already available and mobile friendly: How to Create Information Pages.
Common Form Examples:
- Communication Agreements
- Acknowledgement Forms
- Customer Specific Forms
- Direct Deposit Forms
Planning Out Your Forms
Some things are easier if you plan them out first, and building forms is one of those things.
You'll need to have an electronic copy of each form you want to include in HRCenter. This can be a scanned copy of the form but be careful as scanning documents back onto a computer can sometimes lower the quality of the image. If you have a word document or PDF copy that can be edited, that is ideal for building high-quality forms.
Organize Your Forms
To make it easier, we recommend gathering all your forms and saving them in one place. Consider which ones you are going to include for all employees and which ones are customer or job specific. Do some of your forms require signatures from the recruiter and the employee? Take this opportunity to review your forms and see if any should be updated, consolidated, etc. 
Note that shorter applications and onboarding workflows will lead to higher completion rates which means that if you keep the minimum amount of paperwork, your applicants, employees, and recruiters will be happier.
If you have a lot of forms, consider your deadlines and whether you want one person or a whole team of people creating the forms.
Clean Up Your Formatting
Adding your forms to HRCenter can be a great opportunity for you to consider reorganizing or cleaning up how your forms are formatted. Not all formats on paper work great on computers or mobile devices.
Consider Removing:
- Lines to write out a response or sign - keep the instruction or field label but ditch the underline as it can be hard to have it match up perfectly with the fields you'll be creating

- Checkboxes - you can have multiple choice answers - in fact we encourage it - but it can be difficult to match the checkboxes or radio dials perfectly to existing checkboxes on your form. Sometimes the boxes just aren't the same size
- Formatted date boxes - If you are having an employee enter a date don't have separate spaces for month, date, and year - just leave one space for the full date and when we build the form we'll make sure the field is formatted.

- Any instructions that don't make sense on a computer - including "circle the best option" or "turn this form into your recruiter" etc.


Creating a Form (Basics)
Please see the following instructions to create your first form!
*Note* Make sure you have a saved copy of your form before you get started here. It's best if you can have an image file (.png or .jpg) but you can also upload a .doc, .docx, or .pdf document.
In the event you upload a .doc, .docx, or .pdf document, please be aware that the document is automatically converted to an image, and it may affect the sizing of the form if returned to the employee documents section.
Therefore, it is recommended to upload a .PNG or .JPG image.
Setting Up the Form in Form Builder
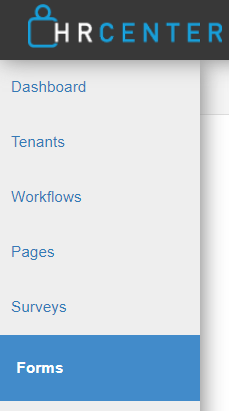
- In HRCenter Admin, navigate to the forms option on the left
- Select the + in the upper right to create a new form
- Enter the form details:
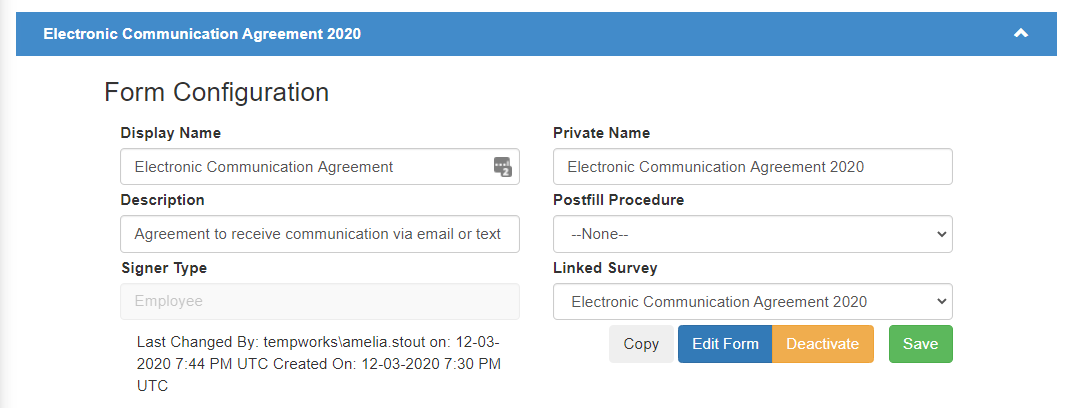
- Display Name: Name of form as you want it to appear to the applicant
- Private Name: Internal name ex. "Example Health Form 2020"
- Description (Optional)
- Postfill Procedure: Only use this drop down if you are creating a direct deposit form
- Signer Type: Set to Employee if the employee is filling it out or ServiceRep if the staffing rep is filling it out
- Linked Survey: Only use this drop down if you are creating a mobile friendly form
- Select the green save button to save your changes
- Select Edit Form button
- Drag and drop or click "Choose File" to upload a copy of your form


Setting Up Form Fields
Next step is going to be utilizing the Toolbox to drag and drop what you want your employees to enter text, check boxes, sign, etc. Each form is unique so here we will cover a few of the different options you might utilize.
Text Box
When you want your employees to type in their name, profession, or any short answer, you can utilize the textbox option.
*Note* If you need them to write more than a couple words, we recommend using the TextArea option which will provide a larger space for them to write.
Utilize some of the more specific toolbox options such as number which will only allow employees to type a number or email to ensure they type out an email address.
- Grab the text option in the toolbox on the left
- Drag it to where you want the applicant to enter text on your form
- Resize as needed
- Don't forget to hit save
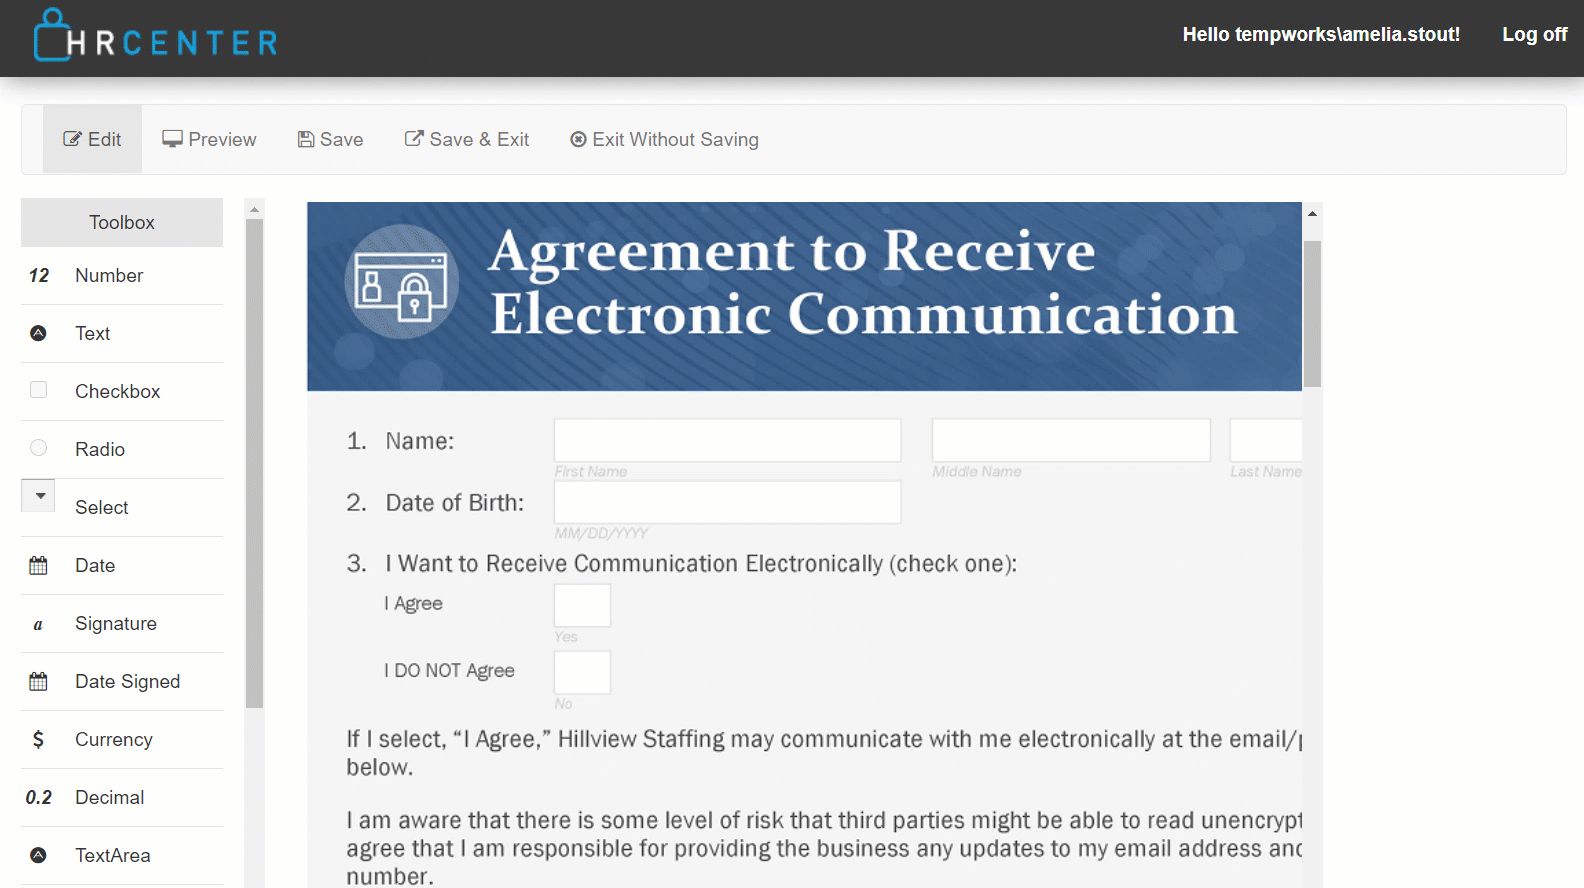
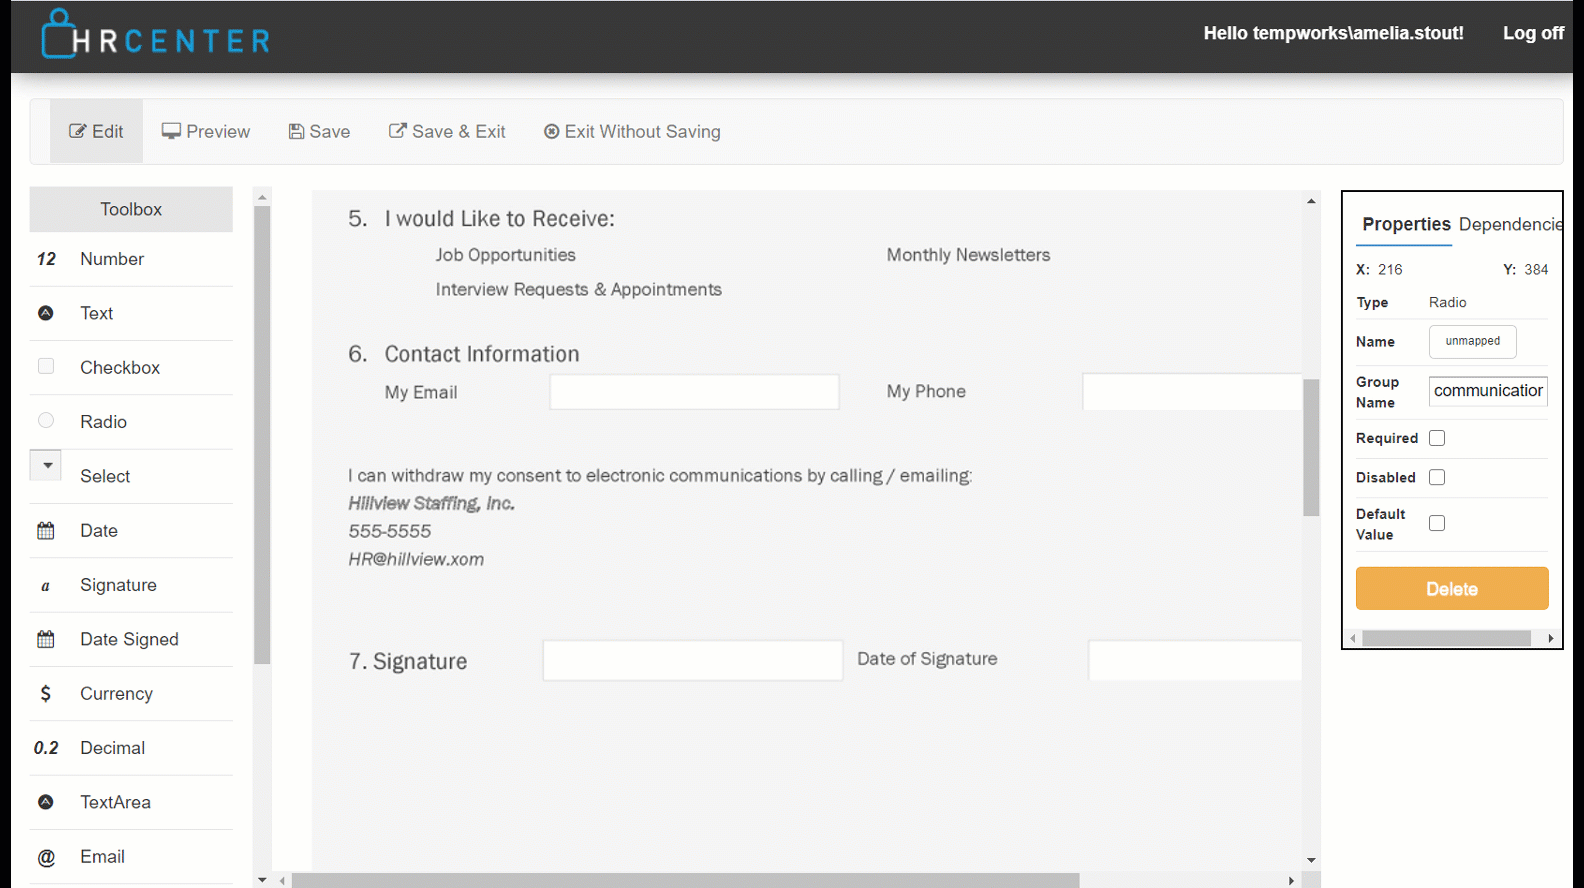
Radio Dials
Radio dials are a great tool when you need an applicant to choose one of the options available. With radio dials applicants will only be able to select one radio per group.
- Grab the Radio option in the Toolbox and drag it to where you want your first option
- Under properties on the right enter a name under group name
- Grab another Radio option and give it the same group name
- Repeat for all options needed

Optionally, if this is a required answer, select the Required box under properties to require one of the dials be checked to submit this form
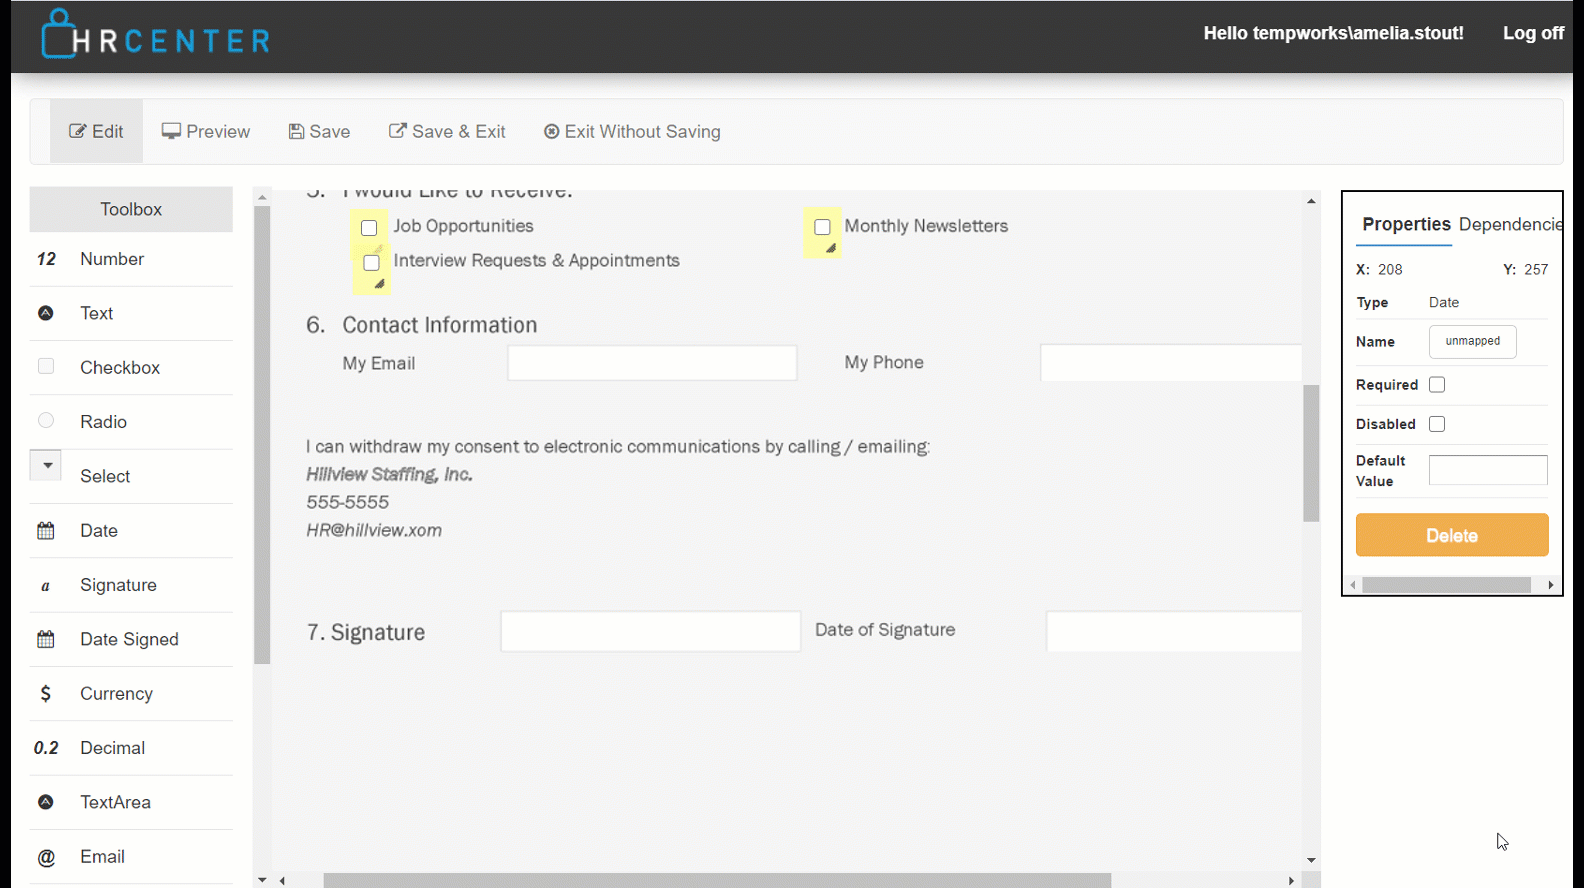
Checkboxes
Utilize Checkboxes when you have multiple options and you want your applicants to be able to select as many as they want.
- Grab the Checkbox option from the Toolbox on the left and drag it to where you want the first checkbox to be
- Repeat for all checkboxes
- If at least one checkbox must be checked, under properties:
- Give all the checkboxes the same group name
- Select the required checkbox
- Don't forget to save
Date
There are a few date options available.
- The regular Date option works like a textbox but will require the applicant to enter a full date MM/DD/YYYY to submit the form.
- The Date Signed option will automatically populate the form with the date the applicant signs once they sign and submit their form.
For either option, drag and drop it to where you want the date to appear on your form.
Signature
If you want this form signed by your applicant, you'll need to add a signature option from the Toolbox. Keep in mind electronic signatures look different than regular signatures.
- Grab signature option from the Toolbox
- Drag it to where you want the sign here button to appear
Consider checking the required box to ensure the applicant signs and adding the date signed option as well.
To learn more about electronic signatures, check out Electronic Signatures and E-Sign Legality.
Preview
Once you've added all the fields you need, click the preview option to try filling out the form. Note that signatures won't appear in Form Builder Preview but you'll have another chance to preview the form when you make the page. 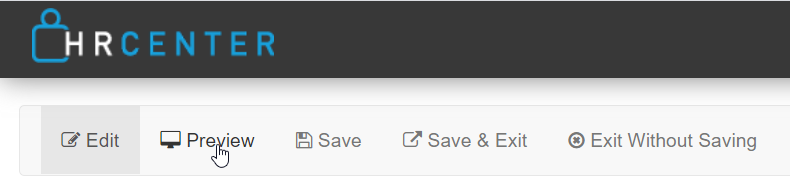
*Note* Once you have finalized your form, you will need to turn the form into a page in order to add it to a workflow or assign it to an employee. Check out How to Create Form Pages for more information.
Next Steps
- Ready for Recruiters to Assign this page? Check out How to Create Form Pages to turn this form into a page that can be added to workflows or assigned individually
- Need to have a staffing specialist sign this form? Check out
- Want your form to be available in Spanish? Check out Creating Translated Forms
Related Articles
- None