Overview
In an effort to improve maintainability, performance, and security when accessing documents across Beyond, Enterprise, and WebCenter; TempWorks is implementing a new document storage solution that utilizes the power and efficiency of the cloud.
As a result, there are new security requirements when setting up users with Document Type permissions.
*Note* Self-Hosted clients do not need to take any further action.
Managing Document Type Security
With the implementation of the new document storage solution, documents within TempWorks products will only be accessible via Security Groups.
*Note* Please keep in mind the following:
- If you are only utilizing Beyond, you do not need to take any further action.
- If you are only utilizing Enterprise, you will need to convert your existing Document Type Security Roles into Security Groups.
- If you are utilizing both Beyond and Enterprise, you will need to validate Document Type permissions and make edits to Security Groups as necessary.
- New and existing users will need to be a member of the appropriate Document Type Security Group in order to access documents within TempWorks products.
Once the document migration is complete, if users are not a member of a Document Type Security Group with the appropriate permissions, they will be unable to access documents within TempWorks products.
Utilizing the Document Type Security Report
*Note* TempWorks has created a report that includes a breakdown of the current Document Type permissions relationship between Beyond and Enterprise. This report, as outlined below, can be utilized to assist in determining which Service Reps require modified Document Type permissions.
To access the report, navigate to Enterprise > Reports > All > "Enterprise - Beyond Document Permissions":
*Note* When accessing the report, it is recommended you be at your highest allowed hierarchy.

*Note* To access the report in Beyond, navigate to the B Menu > Reports > All Reports > "Enterprise - Beyond Document Permissions".
Understanding the Report Filters
When running the report, please keep in mind the following information related to the filters:
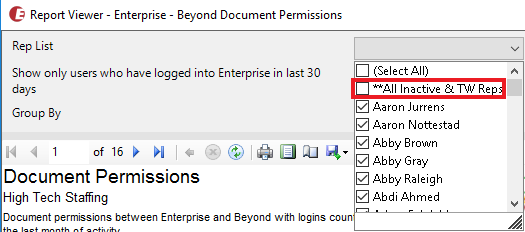
- Rep List: Contains all Service Reps within your company.
- If you are planning for the report to contain all Service Reps. choose the "(Select All)" option.
- To remove inactive Service Reps from the report, make sure the "All Inactive" option is not selected.
- Show only users who have logged into Enterprise in last 30 days: Shows Service Reps whether they have logged into Enterprise within the last 30 days.
- If you want Service Reps that have logged into Enterprise within the last 30 days, select "True".
- If you want all Service Reps to be included within the report, regardless of their last login into Enterprise, select "False".
- Group By: Determines how the report is grouped.
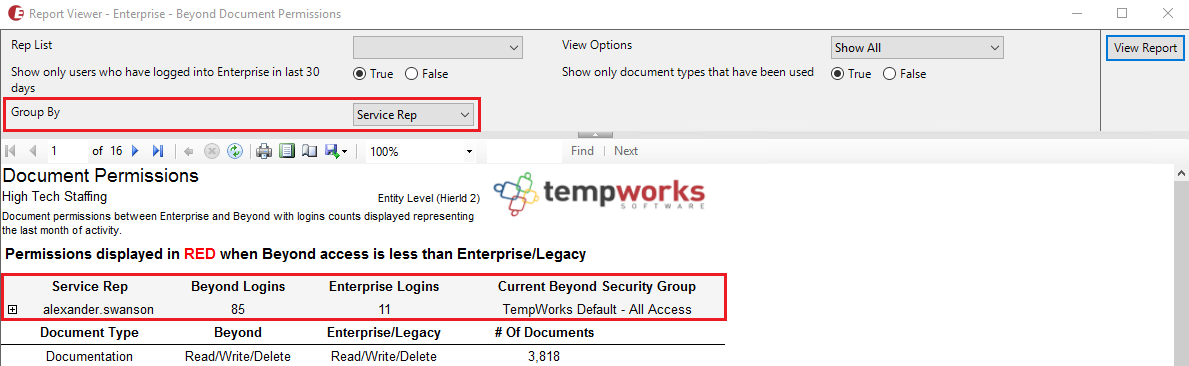
- Select "Service Rep" to group all Document Types and related Permissions by the individual Service Rep:
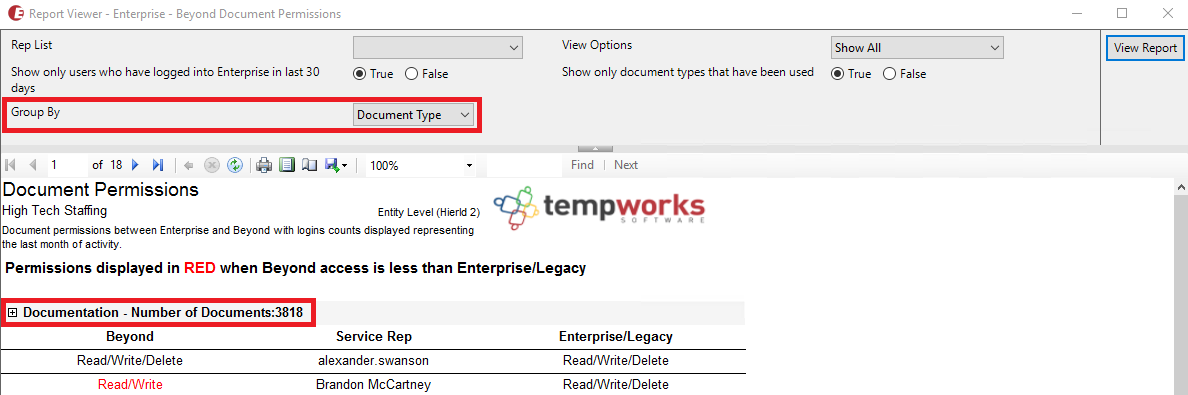
- Select "Document Type" to group all Service Reps by the individual Document Type and related Permissions:
- Select "Service Rep" to group all Document Types and related Permissions by the individual Service Rep:
- View Options: Shows the Document Type permission relationship between Beyond and Enterprise based on the option selected.
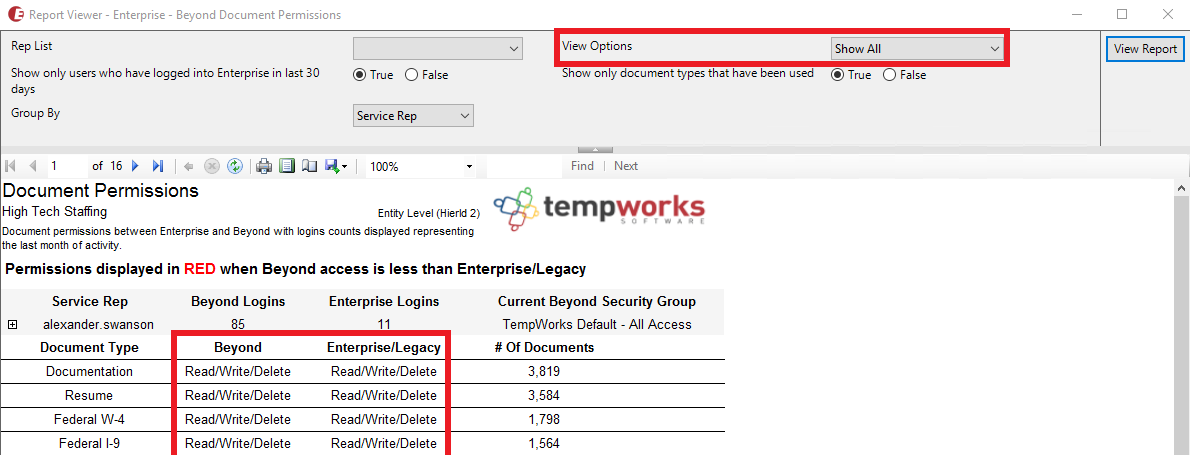
- Show All - Shows all Document Type permissions and their corresponding relationship between Beyond and Enterprise:
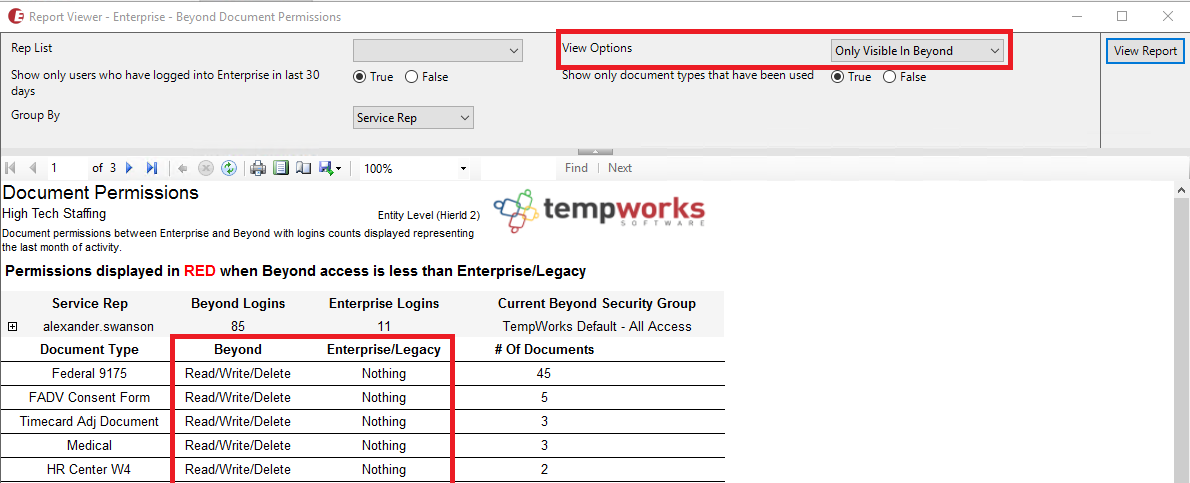
- Only Visible in Beyond - Shows the Document Types that are only visible to the corresponding Service Rep within Beyond:
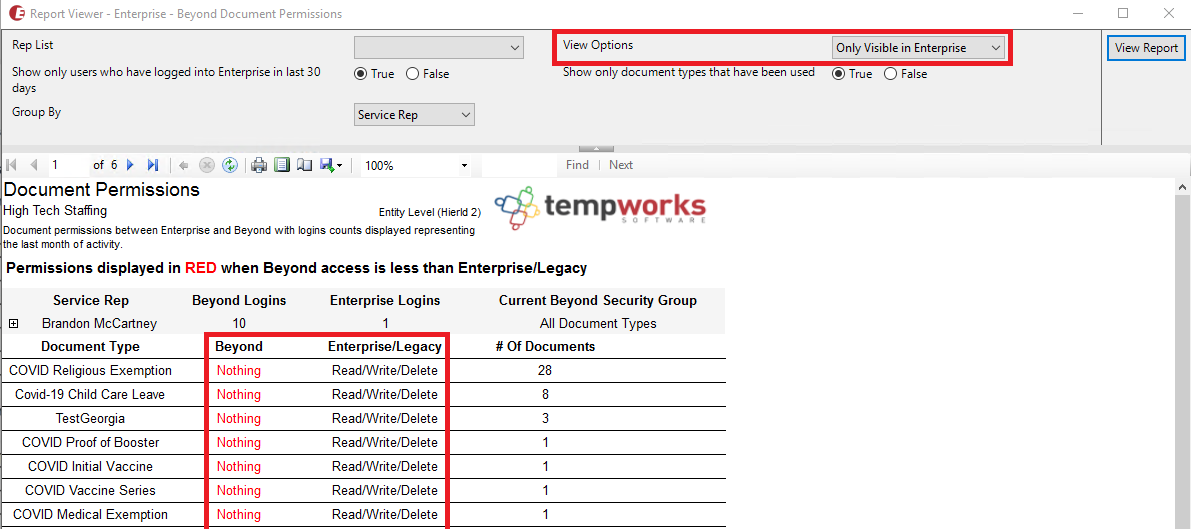
- Only Visible in Enterprise - Shows the Document Types that are only visible to the corresponding Service Rep within Enterprise:
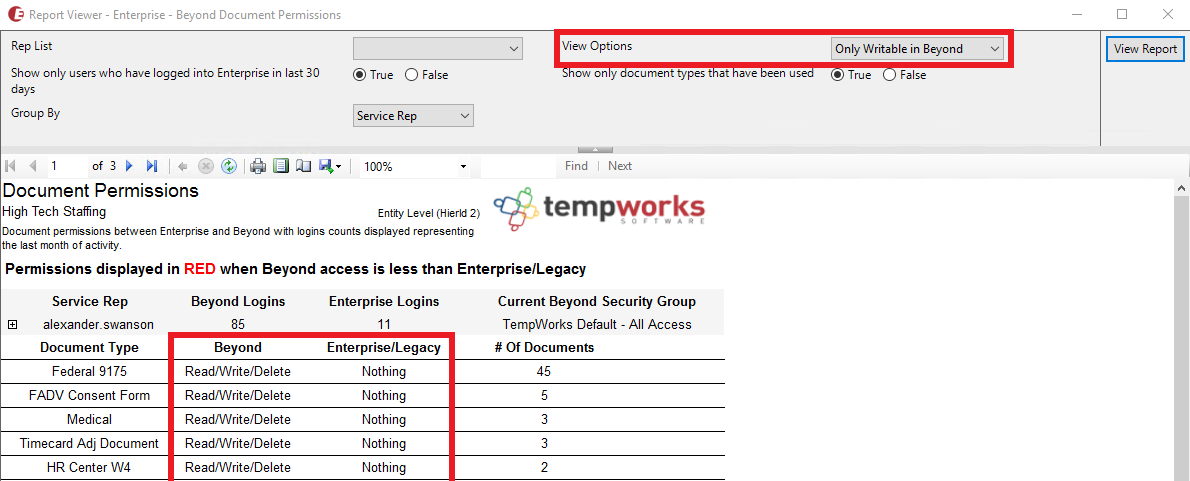
- Only Writable in Beyond - Shows the Document Types that are only able to be viewed and edited by the corresponding Service Rep within Beyond:
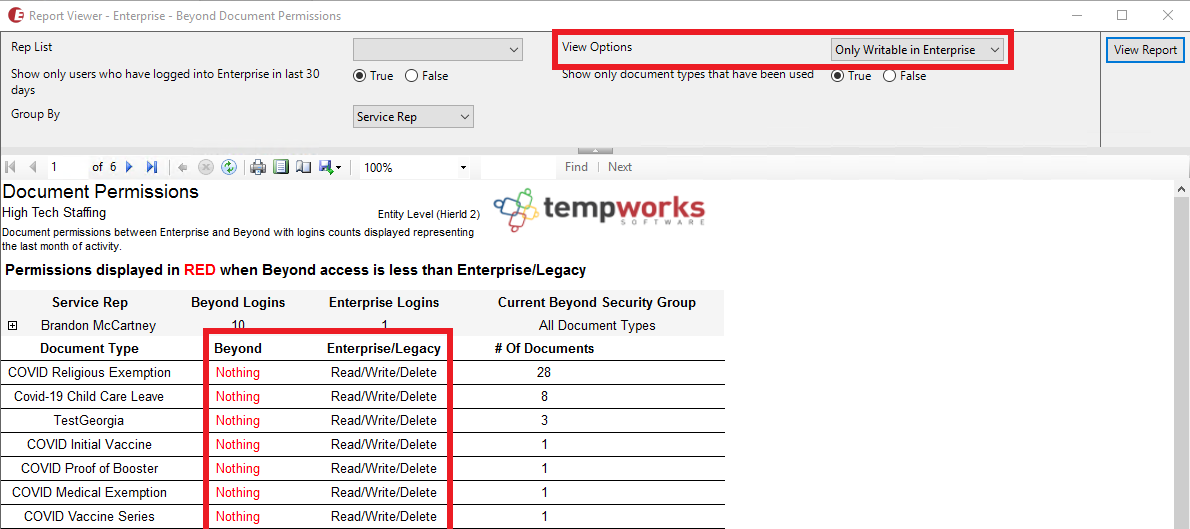
- Only Writable in Enterprise - Shows the Document Types that are only able to be viewed and edited by the corresponding Service Rep within Enterprise:
- Only Deletable in Beyond - Shows the Document Types that are only able to be removed from records by the corresponding Service Rep within Beyond:
- Only Deletable in Enterprise - Shows the Document Types that are only able to be removed from records by the corresponding Service Rep within Enterprise:
- Show All - Shows all Document Type permissions and their corresponding relationship between Beyond and Enterprise:
- Show only document types that have been used:
- (Recommended) Select "True" to only show document types that have been used within your system.
- Select "False" to show all document types.


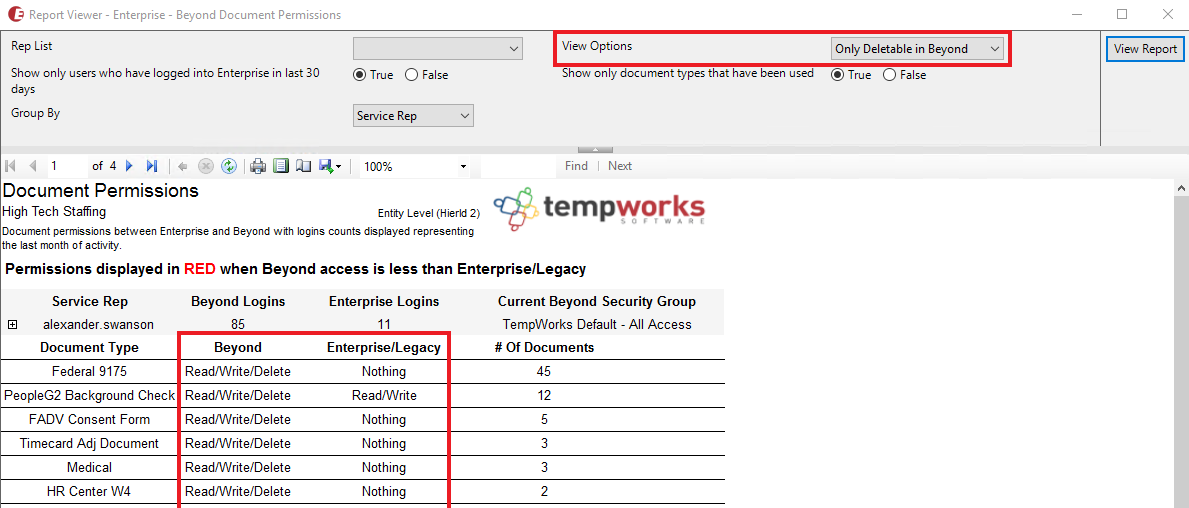
*Note* Located at the top of the report is a banner that states "Permissions displayed in RED when Beyond access is less than Enterprise/Legacy":
This means that when permissions under the "Beyond" column are red, the service rep has less access to documents with that Document Type in Beyond vs Enterprise:

With Document Type security now requiring the setup of Security Groups, the end goal is to have your Document Type permissions match between Beyond and Enterprise.
Example Scenarios for Running the Report
The following examples are based on your current utilization of Beyond and/or Enterprise.
Enterprise Only
With this scenario, we only utilize Enterprise and therefore do not have any Security Groups configured within our system.
The below example contains the following filter options:
- Rep List: All selected, with the "All Inactive" option not selected.
- Show only users who have logged into Enterprise in last 30 days: "True"
- Group By: Document Type
- View Options: "Only Writable in Enterprise" or "Only Deletable in Enterprise"
- Either of these options should be chosen due to the point that Document Types that are able to be edited/deleted can also be viewed.
- Show only document types that have been used: "True"
Once the report is run based on the above parameters, keep in mind the following information related to the columns within the report:
- Document Type: When uploading a document to a record, these are the values presented within the dropdowns.
- Beyond: The Service Rep's current Document Type permissions within Beyond.
- Enterprise/Legacy: The Service Rep's current Document Type permissions within Enterprise.
- # Of Documents: The number of documents within your system that are under that specific Document Type.
With the above filter options selected, we are able to see the Document Types that are accessible by individual Service Reps within Enterprise, but not within Beyond:

With this information, we can make an informed decision as to whether Service Reps can be added to an existing Default Security Group or if a new Document Type Security Group will need to be created with the appropriate permissions (instructions below).
Beyond & Enterprise
With this scenario, we utilize both Beyond and Enterprise and therefore have Document Type permissions that might not match between the two.
The below example contains the following filter options:
- Rep List: All selected, with the "All Inactive" option not selected.
- Show only users who have logged into Enterprise in last 30 days: "True"
- Group By: Document Type
- View Options: Show All
- Show only document types that have been used: "True"
Once the report is run based on the above parameters, keep in mind the following information related to the columns within the report:
- Document Type: When uploading a document to a record, these are the values presented within the dropdowns.
- Beyond: The Service Rep's current Document Type permissions within Beyond.
- Enterprise/Legacy: The Service Rep's current Document Type permissions within Enterprise.
- # Of Documents: The number of documents within your system that are under that specific Document Type.

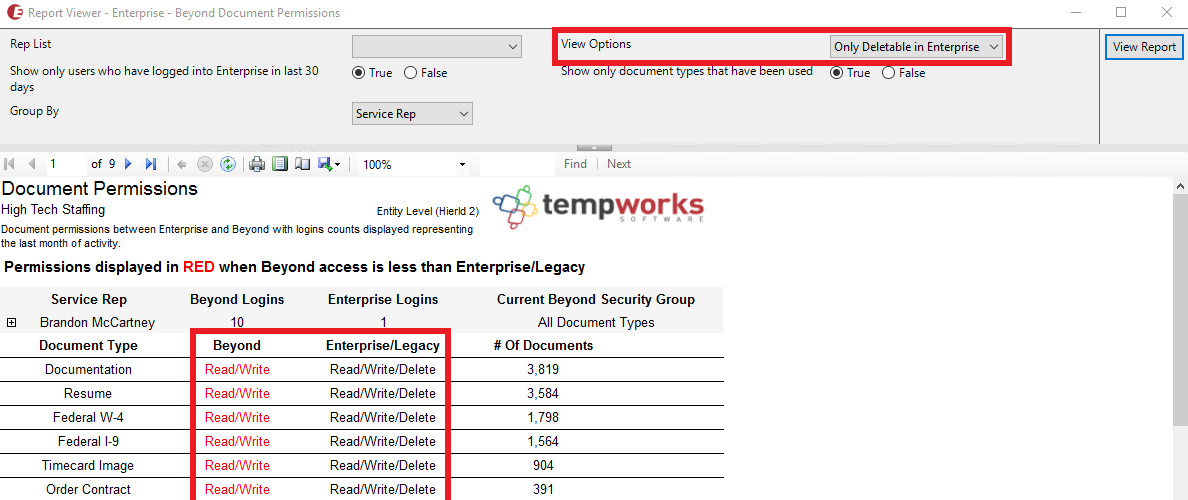
Based on the above example, we see that Brandon has access to Read/Write/Delete for many Document Types in Enterprise but only has access to Read/Write, and in some cases has no permissions, for those same Document Types within Beyond.
Therefore, if the Service Rep requires additional Document Type permissions, it is recommended you do the following:
- Navigate through the report, making note of the Document Types the Service Rep does not have access to within Beyond.
- Determine if there is an existing Security Group that contains the related Document Type permissions that the Service Rep can be added to.
- If not, create a new Document Type Security Group with the intended permissions (instructions below).
Creating Document Type Security Groups
This section details how to create and add users to Document Type Security Groups within both Enterprise and Beyond.
*Note* When managing Security Groups, you will always see the following default Document Type Security Groups:
- TempWorks Default - All Access: Can Read/Write all Document Types.
- TempWorks Default - No Access: No Access to Document Types.
- TempWorks Default - Read Only - All: Can View all Document Types.
The above defaults are always available to utilize. If you want more manual control over what documents are accessible, you can create your own Document Type Security Groups (as outlined below).
Enterprise
Navigate to All Options > Administration > Security > Select "Document Type Security Groups" from the dropdown:

Select the "+" at the top right corner to create your own Document Type Security Group:

Within the "Create New Security Group" window, enter/select the following:
- Hierarchy: The hierarchy level where the Document Type Security Group will be accessible
- Name: The name of the Document Type Security Group
- Description: The description of the Document Type Security Group
- Permissions: Select the "Can Read", "Can Write", and/or "Can Delete" permissions for each document type you'd like to include.
Once complete, select "Save" to create the Document Types Security Group:

Once saved, navigate to the newly created Document Type Security Group and select the "+" within the "Members" section:

Within the "Add Member to Security Group", select the appropriate user from the dropdown, and select "Save" to add the user:

*Note* In the event you attempt to add a user who is a member of a different Document Type Security Group, you will receive the following message:

*Note* Within Enterprise, users are added to Security Groups one by one. Repeat the above step for any additional users that need to be added to the Security Group.
For more information on creating Security Groups within Enterprise, please see the following article titled Enterprise - Security Group Administration.
Beyond
Navigate to B Menu > System Settings > Security > Document Types:

Select the "+" at the top right corner to create your own Document Type Security Group:

Within the "Document Types Security Group" window, enter/select the following:
- Name: The name of the Document Type Security Group
- Hierarchy Level: The hierarchy level where the Document Type Security Group will be accessible
- Description: The description of the Document Type Security Group
- Permissions: Select the "Can Read", "Can Write", and/or "Can Delete" permissions for each document type you'd like to include.
- Members: Select the appropriate users to be added to this Document Type Security Group.
Once complete, select "Submit" to create the Document Types Security Group:

*Note* For more information on creating Security Groups within Beyond, please see the following article titled Beyond - Managing Security Groups.
Troubleshooting
In the event users are not a member of a Document Type Security Group, they may encounter the following issues when attempting to view documents within TempWorks products:
Beyond/Enterprise
- Issue: Unable to view documents within the "Documents" tab.
- Error: "An established connection was aborted by the software in your host machine."
- Error: "You do not have permission to create or modify documents with a Document Type ID of ###."
- Error: "Documents could not be retrieved. Enterprise cannot communicate with the TempWorks Open API. The API configuration information is missing."
- Warning: Your security groups do not allow access to any document types. Please contact your administrator:
- This warning can be received when attempting to upload a document within Enterprise/Beyond.
- To fix, ensure the Document Type has been added to an intended Document Type Security Group as outlined within the steps of this article.